Table of Contents >> Show >> Hide
- Why Paint and Vinyl Make a Great Cabinet Makeover Combo
- Before You Start: Know What Kind of Cabinet You Have
- Supplies You’ll Need
- Step-by-Step: How to Turn a Plain Cabinet Into a Beauty
- Step 1: Remove Doors, Drawers, and Hardware (and Label Everything)
- Step 2: Clean Like You Mean It
- Step 3: Repair Dents and Old Hardware Holes
- Step 4: Sand for Adhesion (Not for a Shoulder Workout)
- Step 5: Prime the Cabinets
- Step 6: Wait for Primer to Dry, Then Sand Again
- Step 7: Paint the Cabinets (Thin Coats Win)
- Step 8: Let the Paint Cure Before Adding Vinyl
- Step 9: Add Vinyl for Texture, Pattern, or Detail
- Beautiful Paint-and-Vinyl Cabinet Design Ideas
- Common Mistakes to Avoid
- Cost and Timeline: What to Expect
- How to Keep Your Finished Cabinets Looking Great
- Experience Section: What DIYers Commonly Learn After Doing a Paint-and-Vinyl Cabinet Makeover (Extended 500+ Words)
- Final Thoughts
Some cabinets are not ugly. They are just… aggressively uninteresting. They stand there in your kitchen, bathroom, laundry room, or hallway like they were designed by a committee whose only goal was “beige, but quieter.” The good news? You do not need a full remodel to fix that. With the right prep, a durable cabinet paint, and smart use of vinyl (either decorative decals, peel-and-stick film, or architectural finish material), you can turn a plain cabinet into something that looks custom, stylish, and genuinely expensive.
This guide walks you through a practical, real-world cabinet makeover process using paint and vinyl together. We’ll cover what works, what peels, what bubbles, what dries slowly when the weather is rude, and how to get a finish that looks intentional instead of “I panic-painted this at 11:30 p.m.” You’ll also get design ideas, a cost/timeline breakdown, and a longer experience section at the end with common lessons DIYers learn the hard way.
Why Paint and Vinyl Make a Great Cabinet Makeover Combo
Paint gives you the foundational transformation: color, coverage, and a clean, cohesive finish. Vinyl adds personality without forcing you into advanced carpentry. Think of paint as the outfit and vinyl as the accessories. Together, they let you create contrast, pattern, texture, and detail while staying budget-friendly.
Here’s why this combo works so well:
- Paint handles the heavy lifting: It refreshes the whole cabinet body, doors, and frames.
- Vinyl adds precision style: You can apply it to door panels, drawer fronts, labels, or accent sections.
- It’s flexible: Love the paint color but hate your pattern choice later? Replace the vinyl and keep the painted base.
- It’s affordable: You get a custom look without custom millwork pricing.
Vinyl options can range from simple cut decals (like geometric shapes or name labels) to peel-and-stick films that mimic wood, marble, linen, or matte finishes. There are also professional-grade architectural films used on cabinets and doors when you want a higher-end wrap look.
Before You Start: Know What Kind of Cabinet You Have
Not every cabinet is equally makeover-friendly. Solid wood and wood veneer are usually the easiest to paint. Laminate can absolutely be painted too, but it needs the right prep and a bonding primer. Metal cabinets need a different paint choice, and ultra-damaged cabinets may not be worth the effort.
A quick honesty check helps:
- If the cabinet doors are structurally sound, paint and vinyl can work beautifully.
- If the veneer is peeling badly, shelves are sagging, or particleboard is crumbling, replacement may be smarter than refinishing.
- If your home is older (especially pre-1978), test for lead paint before sanding or stripping anything.
That last point matters a lot. Sanding old finishes can release hazardous dust, so do not skip safety steps. Pretty cabinets are great; breathing safely is even better.
Supplies You’ll Need
Paint Prep and Painting Supplies
- Screwdriver or drill (for doors and hardware)
- Painter’s tape
- Drop cloths or plastic sheeting
- Degreaser or TSP cleaner (for greasy cabinets)
- Wood filler and putty knife (optional, for old hardware holes or dents)
- Sandpaper (medium grit and fine grit; 220-grit is common for smoothing)
- Tack cloth or shop vacuum
- Bonding primer (especially for glossy or laminate surfaces)
- Cabinet enamel, acrylic enamel, or hybrid alkyd cabinet paint
- Angled brush + small roller (microfiber or foam, depending on finish preference)
- Respirator and gloves
- Fans for ventilation
Vinyl Supplies
- Vinyl film/contact paper/architectural finish film, or cut vinyl decals
- Measuring tape or ruler
- Utility knife or craft knife
- Straightedge or square
- Squeegee/scraper tool (a credit card can work in a pinch)
- Transfer tape (if using cut vinyl decals)
- Rubbing alcohol + microfiber cloth (for final wipe-down before vinyl)
Step-by-Step: How to Turn a Plain Cabinet Into a Beauty
Step 1: Remove Doors, Drawers, and Hardware (and Label Everything)
Remove all doors, drawer fronts, hinges, knobs, and pulls. This is not the moment to “just work around it.” Painting around hardware usually leaves ridges and messy edges, and reassembly becomes a puzzle no one enjoys.
Label every door and opening with painter’s tape and a number system. Even cabinets that look identical may be slightly different in size, and that tiny difference becomes very obvious when a door suddenly refuses to align.
Pro tip: Put hinge screws in labeled zipper bags. Future You will be grateful and slightly emotional.
Step 2: Clean Like You Mean It
Cabinets collect grease, oils, food splatter, and mystery residue that no one remembers creating. Paint hates grease. Vinyl hates it too. If you skip cleaning, your finish may chip early and your vinyl may lift at the edges.
Start with a degreaser. For tougher grime, many pros and paint manufacturers recommend a TSP-based cleaner (used with good ventilation). Pay extra attention near stoves, coffee stations, and sink cabinets.
Let everything dry fully before moving on.
Step 3: Repair Dents and Old Hardware Holes
If you’re reusing the same hardware, leave the holes alone. If you’re switching hardware and the new holes won’t align, fill the old ones with wood filler. Smooth it, let it dry, and sand flush.
This is also the time to patch chips, dents, or worn corners. Paint and vinyl can improve a cabinet dramatically, but they do not perform miracles on gouges the size of a small canyon.
Step 4: Sand for Adhesion (Not for a Shoulder Workout)
Sanding is less about stripping everything to bare wood and more about creating a surface the primer can grip. Most cabinet finishes are too smooth or glossy for direct paint. A light but thorough sanding is usually enough.
- Use medium-grit sandpaper first for general scuffing.
- Use flexible sanding pads or folded paper for profiles and corners.
- Sand with the grain on wood surfaces when possible.
- For laminate, be gentlelightly scuff, don’t sand through the laminate layer.
After sanding, vacuum everything and wipe it down with a tack cloth. Dust left behind is the fastest way to get a gritty finish.
Step 5: Prime the Cabinets
Primer is not a “maybe.” It is the reason your paint sticks, levels better, and lasts longer. It’s especially important for glossy finishes, laminate, stain-blocking situations, and darker color changes.
Use a high-quality bonding primer. Some systems recommend testing primer adhesion on an inconspicuous area first, which is a smart move if your cabinets have an unknown finish. If you’re painting a bold or much darker color, consider tinted primer to improve coverage.
Apply primer in this order for cleaner results:
- Cabinet box edges and details
- Flat surfaces on the cabinet boxes
- Door backs (let dry, then flip)
- Door fronts and drawer fronts
Work in light coats. Heavy primer causes drips, and drips become little hardened mountains you’ll have to sand later.
Step 6: Wait for Primer to Dry, Then Sand Again
This is where patience becomes part of the design. Dry time varies by product, humidity, temperature, and ventilation. Some primers feel dry quickly, but manufacturers often recommend longer wait times for best performance. Follow the label first, always.
Once the primer is fully dry, lightly sand with a fine grit (220-grit is a common choice) to smooth out brush marks, dust nibs, and pooled edges. Wipe dust away again.
That second sanding step is one of the secrets to a more professional-looking finish. It is boring, yes. It is worth it, also yes.
Step 7: Paint the Cabinets (Thin Coats Win)
Choose a durable cabinet paint: cabinet enamel, acrylic enamel, or a hybrid alkyd is usually the sweet spot for most DIYers. These finishes are designed to hold up better than standard wall paint and are easier to clean.
For sheen, most people do best with:
- Satin: soft, forgiving, modern look
- Semi-gloss: durable and easy to wipe down
- Gloss: durable, but it highlights flaws and brush marks
Application method:
- Use an angled brush for detailed/recessed areas.
- Follow with a small roller on flat areas to minimize brush marks.
- Keep coats light and even.
- Let each coat dry fully before the next.
Most cabinets need at least two coats for a durable, even finish. Between coats, do a very light sanding with fine paper and wipe off the dust. This step makes your second coat look dramatically better.
Step 8: Let the Paint Cure Before Adding Vinyl
Dry is not the same as cured. Cabinets may feel dry enough to touch or rehang before the finish has reached full hardness. Adhesive vinyl applied too soon can pull, dent, or imprint soft paint.
A safe rule: let the paint fully dry and give it extra curing time before applying vinyl, especially on high-contact areas like drawer fronts. If the manufacturer gives a service/cure recommendation, follow that. When in doubt, wait longer. A weekend delay is better than peeling off your fresh paint with your “cute checkerboard accent.”
Step 9: Add Vinyl for Texture, Pattern, or Detail
This is where the fun starts. There are three common ways to use vinyl on cabinets:
Option A: Cut Vinyl Decals (Best for Details)
Use permanent or removable self-adhesive vinyl to create shapes, labels, faux inlays, monograms, or small panel accents. Apply transfer tape, burnish the design, and place it on a clean, dry cabinet surface. This is ideal for:
- Pantry labels
- Geometric corner accents
- Scallop or arch details on plain slab doors
- Subtle stripe borders on drawer fronts
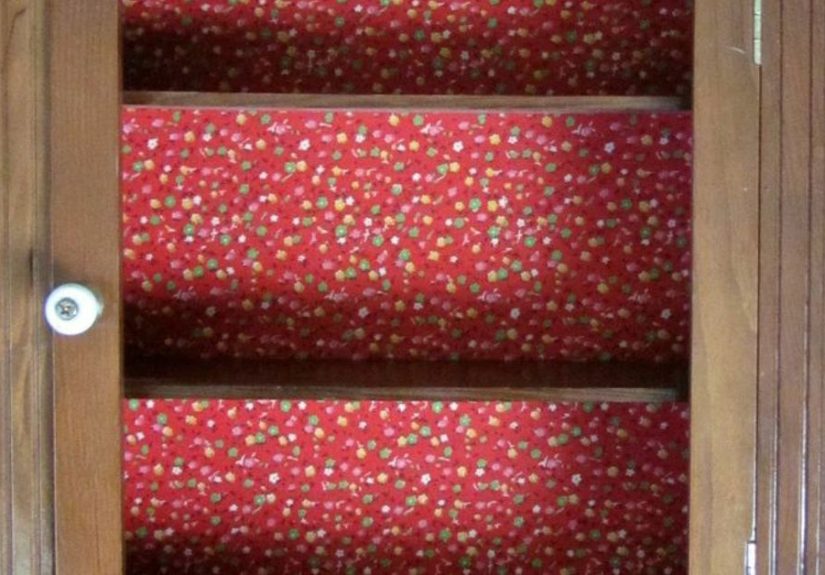
Option B: Peel-and-Stick Vinyl/Contact Paper (Best for Bigger Impact)
This works well on flat door panels, drawer faces, or cabinet interiors. Measure carefully, cut with a little extra material, and smooth the vinyl as you apply it to prevent bubbles. Work from one edge outward, using a scraper or smoothing tool.
For tricky shapes or curved drawers, many DIYers get cleaner results by applying a larger rectangle first and trimming precisely with a craft knife afterward.
Option C: Architectural Finish Film (Best for a Luxe, Built-In Look)
If you want a high-end woodgrain, textile, matte, or specialty finish, architectural films are a serious upgrade. These are often used commercially because they’re durable, cleanable, and designed for resurfacing cabinets, doors, and other interior surfaces.
Translation: if you want your plain cabinet to look like it came from a custom showroom, this is the “fancy but still practical” route.
Beautiful Paint-and-Vinyl Cabinet Design Ideas
1) Painted Frame + Vinyl Center Panel
Paint the whole door a solid color (soft white, sage, charcoal, navy), then add a vinyl pattern only inside the center panel. This gives a custom inset look without replacing doors.
2) Matte Paint + Faux Wood Vinyl
Use a matte or satin paint on the cabinet frame and apply a warm wood-look vinyl to the door fronts. This creates a modern mixed-material stylegreat for laundry rooms, offices, or lower cabinets in a mudroom.
3) Color-Blocked Drawers
Paint the cabinet body one color, then use a contrasting vinyl band or geometric strip across each drawer front. It feels custom and designer-y, but your budget remains calm.
4) Utility Cabinets with Cork or Chalkboard Panels
This is especially good for family kitchens or craft rooms. Paint the cabinet, then add self-adhesive cork or a chalkboard-style insert to one panel for notes, lists, or reminders. Functional and cute is a powerful combination.
5) Subtle Tone-on-Tone Vinyl
If you hate loud patterns, use a low-contrast vinyl in the same color family as your paint (for example, greige paint with a soft linen-look vinyl insert). Up close it looks rich; from across the room it looks clean and custom.
Common Mistakes to Avoid
- Skipping degreasing: Grease ruins adhesion for both paint and vinyl.
- Painting over glossy finishes without prep: You need sanding and/or bonding primer.
- Rushing dry times: This causes smudging, peeling, fingerprints, and regret.
- Using wall paint: Cabinets need tougher paint.
- Applying vinyl on uncured paint: The adhesive can mark or lift fresh paint.
- Not labeling doors: Reassembly becomes a puzzle game you did not ask to play.
- Trying to “eyeball” vinyl cuts: Measure first. Then measure again. Then be smug later.
Cost and Timeline: What to Expect
DIY Cost Range
A simple paint-and-vinyl cabinet makeover can be very affordable compared with replacement. Your total depends on cabinet size, paint quality, primer, and how fancy your vinyl choice is.
- Budget setup: paint + primer + basic vinyl accents
- Mid-range: premium cabinet enamel + better tools + durable peel-and-stick vinyl film
- Higher-end DIY: professional-grade paint system + architectural finish film + new hardware
In many cases, you can complete a strong-looking makeover for a fraction of replacement cost. If you’re doing a full kitchen, supplies can still add up, but it’s usually far less painful than a cabinet replacement quote.
Timeline
For most DIY projects, expect this to take multiple days, not one afternoon. Prep, dry time, and cure time are the real schedule drivers. A realistic plan for a small-to-medium cabinet set is:
- Day 1: Remove hardware, clean, repair, sand
- Day 2: Prime
- Day 3: Sand primer, first coat paint
- Day 4: Light sand, second coat paint
- Days 5–7+: Dry/cure time (varies by paint and conditions)
- Final step: Apply vinyl and reassemble
If you rush this, the cabinet will tell on you. Usually with a fingerprint.
How to Keep Your Finished Cabinets Looking Great
Once your cabinet looks amazing, treat it like the star it is:
- Wait until the paint has fully hardened before heavy cleaning.
- Use gentle cleaners firstespecially on painted and vinyl-covered areas.
- Avoid abrasive scrubbers that can dull sheen or damage edges.
- Wipe spills quickly, especially around sink base cabinets and coffee stations.
- Check vinyl corners occasionally and press down any early lifting before dirt gets under them.
If you used removable vinyl, the best part is future flexibility. You can keep the paint and switch the look later without starting from scratch.
Experience Section: What DIYers Commonly Learn After Doing a Paint-and-Vinyl Cabinet Makeover (Extended 500+ Words)
The most common experience people report with a paint-and-vinyl cabinet makeover is surpriseusually in two directions. First, surprise at how dramatic the transformation looks. Second, surprise at how much of the project is actually prep and waiting, not painting. On social media, cabinet makeovers look like a quick “before and after,” but in real life, the difference between a polished result and a messy one usually comes down to the quiet, unglamorous steps: labeling, degreasing, sanding, dust removal, and patience.
A lot of people start out thinking the paint color is the biggest decision, then realize surface prep matters more. Cabinets near a stove or microwave can feel clean but still have a thin grease film that causes paint to fisheye or separate. Once DIYers clean properly, the paint goes on smoother and the final sheen looks more even. This is one of those lessons nobody loves, but everybody remembers.
Another frequent experience is learning how much drying and curing times affect the outcome. Many people apply a first coat, touch the surface a few hours later, and think, “Perfect, let’s move on.” Then the next coat drags, fingerprints appear, or the finish dents while reinstalling hardware. That is when they discover the difference between “dry to the touch” and “fully cured.” The same issue shows up with vinyl: applying adhesive film too soon can leave marks in fresh paint or pull the finish at the edge when repositioning. The people who get the best results are usually the ones who wait longer than they want to.
Vinyl application itself is another big learning curve. Beginners often try to cut every piece perfectly before applying it. In practice, many find it easier to lay down a slightly oversized piece, smooth it carefully, and trim it in place with a sharp knife. This works especially well for drawer fronts and inset panels. People also learn very quickly that bubbles are easier to prevent than fix. Smoothing as you gorather than sticking the whole sheet down and hoping for the bestmakes a huge difference.
Curves, corners, and decorative profiles are where “simple” projects become educational. Flat shaker-style doors are usually the easiest. Raised panels and ornate trim require slower trimming, more patience, and sometimes a change of plan. A lot of DIYers start with a bold idea for every door, then scale back and use vinyl only on select accent cabinets. That is not failure; that is design intelligence.
Many people also mention how much hardware changes the final look. Even a well-painted cabinet can still feel dated with old knobs or pulls. Swapping hardware after painting and adding a vinyl detail often creates the “wow” moment. It is the combination that makes the cabinet look intentional, not just repainted.
One more common experience: confidence grows fast after the first cabinet door. The first one usually takes the longest because you are figuring out your process. By the third or fourth, your sanding pressure is better, your brush loading is cleaner, your roller marks are lighter, and your vinyl alignment gets more precise. That is why many people recommend testing your full process on a laundry room cabinet, bathroom vanity, or garage cabinet before doing a full kitchen. You build skill on a lower-pressure project and bring that experience into the bigger makeover.
In the end, the biggest lesson is that beautiful cabinets are rarely about fancy materials alone. They are usually the result of a repeatable system: clean, prep, prime, paint, cure, apply vinyl carefully, then reassemble without rushing. Once you experience that process and see the finished result, plain cabinets stop looking like a problem and start looking like opportunity.
Final Thoughts
Turning a plain cabinet into something beautiful using paint and vinyl is one of the smartest style upgrades you can make without a full renovation. Paint gives you the strong foundation. Vinyl gives you texture, pattern, and personality. Together, they let you create a custom look that feels expensive, practical, and uniquely yours.
If you remember only three things, make them these: prep thoroughly, respect dry/cure times, and apply vinyl only to a clean, fully cured surface. Do that, and your “plain cabinet” can become the kind of project people compliment immediatelyand then ask, “Wait… you did that yourself?”