Table of Contents >> Show >> Hide
- Why Zoom lighting is weird (and why your eyes are lying to you)
- The “good lighting” recipe (simple, repeatable, flattering)
- Five-minute fixes: look better before your next meeting starts
- Build a simple home Zoom lighting setup (budget to “wow”)
- Zoom settings that help (and the ones that can betray you)
- Room-by-room lighting solutions
- Common Zoom lighting mistakes (and how to fix them fast)
- Lighting for Zoom recordings and “video mode” moments
- Conclusion: the simplest “look good on Zoom” formula
- Experience Add-On: what actually happens when you try these tips (500-ish words of real-life chaos)
- SEO Tags
If you’ve ever joined a Zoom and discovered you look like a witness in a true-crime documentary (“The suspect appeared as a shadowy blob…”), congratulations: you’ve met Bad Lighting. The good news is you don’t need a Hollywood crew or a ring light the size of a UFO to look clear, professional, and alive in 2D. You just need to give your camera what it wants: soft, front-facing light, consistent color, and a scene that doesn’t confuse your webcam into turning you into a silhouette.
This guide breaks down what actually worksfast fixes, budget setups, and a few “creator-level” upgrades plus Zoom settings that can help when your room lighting refuses to cooperate.
Why Zoom lighting is weird (and why your eyes are lying to you)
Your eyes are amazing at adjusting. Your webcam? Not so much. Cameras have to choose an exposure and a white balance, and when the scene has strong backlight (like a bright window behind you), the camera often exposes for the background. Result: the window looks gorgeous, and you look like a mysterious silhouette who definitely didn’t mute fast enough.
The goal is to make your face the brightest, most evenly lit subject in the framewithout blasting it with harsh light that creates shiny hotspots, deep under-eye shadows, or “I’m being interrogated” vibes.
The “good lighting” recipe (simple, repeatable, flattering)
1) Put a soft light in front of you
The easiest win is a large, soft light source near the camerathink a window with sheer curtains, a lamp with a shade, or a dedicated LED light aimed through diffusion. Soft light wraps around your face and reduces harsh shadows.
2) Avoid bright light behind you (aka backlighting)
A window behind your head can make the camera darken everything else to avoid overexposing the background. If the window must be in frame, angle your setup so the window is off to the side and your face is still front-lit.
3) Keep the color of light consistent
Mixing warm yellow lamps with cool daylight can make your skin tone look odd and can confuse automatic white balance. If possible, use one “family” of light (mostly daylight or mostly warm indoor) and match bulbs if you’re using lamps.
4) Add a little depth (optional, but makes you look expensive)
A subtle background light (like a small lamp behind you, off to the side) can separate you from the background. This is the difference between “flat webcam look” and “surprisingly polished human.”
Five-minute fixes: look better before your next meeting starts
Turn yourself toward the biggest light source
If you have a window, face it. If the light is too intense, diffuse it with sheer curtains or blinds. No window? Place a lamp slightly behind your webcam and aim it toward your face (through a shade if possible).
Raise your camera and bring it to eye level
Lighting works better when the camera is at or slightly above eye level because it reduces unflattering shadows. Stack a few books under your laptop or use a stand. Your neck will also thank you.
Brighten your screen (yes, your monitor counts as a light)
In a pinch, your screen can act like a weak fill light. Increase brightness slightly, and open a mostly white window (a blank document works). It won’t replace a real light, but it can rescue you from “cave mode.”
Kill overhead lighting (or tame it)
A bright ceiling light can create raccoon-eye shadows and shiny foreheads. If you can’t turn it off, balance it by adding a front light so the overhead doesn’t dominate your face.
Do a 10-second camera check
Open Zoom’s video preview and look for: harsh nose shadows, bright glare on glasses, blown-out background, and mismatched colors. Fix one thing at a timemove the light, adjust curtains, or shift your chair six inches. Six inches is a magical distance in lighting.
Build a simple home Zoom lighting setup (budget to “wow”)
Level 1: Window + diffusion (the free classic)
- Best for: daytime calls, minimal gear, natural look
- Setup: sit facing the window; use curtains/blinds to soften
- Pro tip: avoid sitting too close to the windowstep back so the light spreads more evenly
Level 2: One lamp as a key light (the “I own furniture” solution)
- Best for: nighttime calls, windowless rooms
- Setup: place a lamp behind/near the webcam, slightly above eye level, angled down gently
- Make it softer: use a lampshade, bounce it off a white wall, or add diffusion
Level 3: Ring light or LED panel (the creator upgrade)
Ring lights are popular because they create even, front-facing light and reduce shadows. LED panels (often called “key lights”) can look even more natural when placed slightly off-center at about a 30–45° angle from the camera, mimicking window light.
- Placement: near the camera and slightly above eye level
- Intensity: bright enough to lift your face, not so bright you look washed out
- Color temperature: pick one that matches your room (daylight-ish for daytime, warmer for cozy evening)
Level 4: Two-light “mini studio” (key + fill)
If one side of your face looks great and the other side looks like it’s filing taxes in the dark, add a fill light. The fill should be dimmer than the key. A cheap desk lamp can work if it’s softened (shade, diffusion, or bounced light).
Level 5: Three-point lighting (key + fill + backlight)
This is the classic video setup: a key light in front, a softer fill to reduce shadows, and a small backlight behind you to separate you from the background. You don’t need equal power for eachsubtlety looks more natural on Zoom.
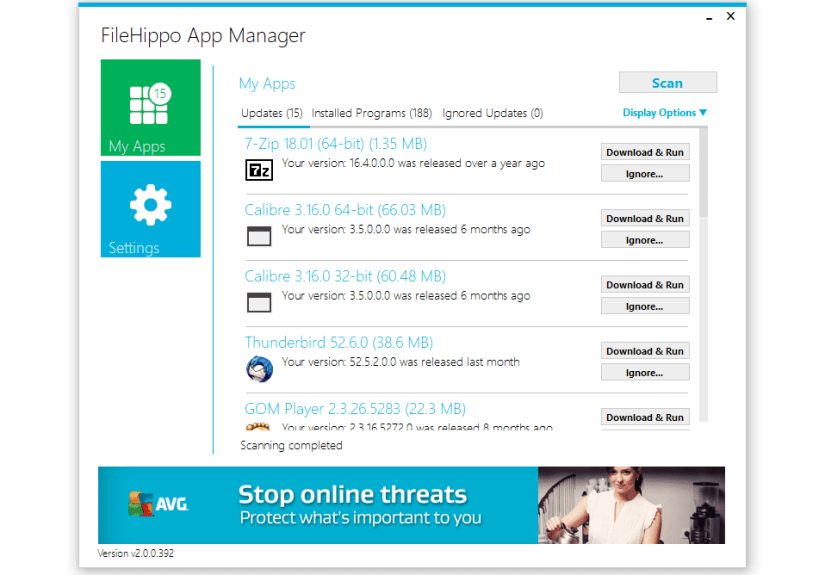
Zoom settings that help (and the ones that can betray you)
Use “Adjust for low light” when your room is dim
Zoom includes a low-light adjustment setting on desktop that can be set to automatic or manual. It can brighten the image when you can’t add a real light, though pushing it too far may add noise or reduce detail.
Enable HD video if available (and your internet can handle it)
HD won’t fix bad lighting, but good lighting plus HD makes a noticeable difference: your image looks cleaner, and details don’t smear. If your connection is shaky, prioritize lighting firstclear, well-lit SD beats noisy, dark HD every time.
“Touch up my appearance” is seasoning, not soup
A small amount can reduce harshness from webcams, but if you rely on it instead of lighting, you can look unnaturally smooth (like a wax figure who learned to speak). Use it lightly and fix the light first.
Camera controls (webcam apps) can rescue you
Many webcams and companion apps let you adjust exposure, white balance, and brightness. If your face looks too dark while the background is fine, a small exposure tweak can helpespecially if your lighting is already decent and the camera just needs a nudge.
Room-by-room lighting solutions
Small room, white walls (your secret weapon)
White walls bounce light beautifully. Aim a lamp or LED panel at a wall near your desk to create soft, indirect light. It’s like getting a bigger light source for free.
Big room, dark walls (light gets eaten)
Dark surfaces absorb light, so you’ll need either a brighter key light or to bring the light closer. The closer the light is (without entering the frame), the softer and more effective it becomes.
Glasses glare (the “two tiny suns” problem)
If you see bright reflections on your lenses, raise the light slightly higher than the camera and angle it down. You can also tilt your glasses a touch or raise the camera so reflections bounce away from the lens.
Night calls with warm lamps everywhere
Lean into warm lighting by matching your key light to the room’s warmth. If you add a cool daylight LED into a warm room, your face can look oddly blue while the background stays yellow. Consistency looks intentional.
Mixed daylight + lamp light (the “weird skin tone” trap)
Either turn off the lamps and use daylight, or close curtains and commit to indoor lighting. If you must mix, keep the key light dominant and the other sources subtle.
Common Zoom lighting mistakes (and how to fix them fast)
Mistake: Window behind you
Fix: Rotate your desk 90 degrees, or move the camera so the window is to the side. Add a front light.
Mistake: Overhead-only lighting
Fix: Add a light near the camera (lamp, ring light, LED panel). Overhead becomes “ambient,” not “interrogation.”
Mistake: Light too close and too bright
Fix: Back it up, dim it, or diffuse it. Softness comes from a larger apparent light source.
Mistake: Mixed color temperatures
Fix: Match bulbs or switch off competing light sources so your camera stops guessing.
Mistake: Bright background, dim face
Fix: Lower background brightness (close blinds, move a lamp), or increase key light on your face.
Mistake: Sitting too far from the camera
Fix: Move closer so your face occupies more of the frame. Lighting looks better when the camera doesn’t have to expose for a whole room.
Lighting for Zoom recordings and “video mode” moments
If you’re recording a Zoom presentation, interview, or training video, lighting matters even more because recordings are less forgiving. Compression artifacts and webcam noise show up faster in dim scenes. A strong, soft key light helps your video look cleaner and more “real camera” than “security footage.”
A quick pre-record checklist
- Face a soft light source (window with diffusion or LED light near camera).
- Keep the brightest light off the background (unless it’s intentional).
- Use one main color temperature for the scene.
- Check glare, then adjust angle/height of light and camera.
- Record a 10-second test clip and watch it back before the real take.
Conclusion: the simplest “look good on Zoom” formula
Great Zoom lighting isn’t about buying gear; it’s about direction (front light), softness (diffusion and distance), and consistency (one color of light). Start with the fastest wins: face a window, avoid backlighting, and add a lamp near your camera if needed. Then use Zoom’s low-light setting as backupnot as a substitute for real light.
If you remember only one thing: your face should be brighter than your background. That’s the difference between “clear and confident” and “mysterious shadow figure who may or may not be holding a coffee.”
Experience Add-On: what actually happens when you try these tips (500-ish words of real-life chaos)
The first time most people “fix their lighting,” they do it the way we all do everything now: five minutes before the call, while simultaneously answering a message, closing 37 tabs, and realizing the camera is pointed directly at the laundry chair. The fastest fix that consistently surprises people is simply turning the whole setup toward the window. It feels too easy, like it shouldn’t count. Then you open Zoom andboomyou look like a person with a job title.
The second most common “aha” moment is learning that overhead lights are not your friends. Plenty of rooms look bright to your eyes, but overhead lighting creates that shadowy under-eye look on camera. People often try to solve it by increasing screen brightness or enabling every beautifying filter they can find. That can help a little, but it rarely fixes the core problem: the light is coming from the wrong direction. The moment a lamp moves behind the webcam, faces stop looking tired and start looking evenly lit.
Then comes the classic ring light phase. A ring light can be amazingespecially if you’re in a dim room or do calls at night. But the first time someone turns it on at 100% brightness, they learn what “washed out” means. The trick is to dim it down and bring it closer, so it’s soft but not nuclear. If you wear glasses, you’ll probably also discover the “two perfect circles of doom” reflecting in your lenses. Raising the light slightly and aiming it down is usually the easiest way out. Sometimes a tiny tilt of the glasses or camera solves it instantly, which feels like cheating in the best way.
Another very real experience: mixed lighting makes you look strangely colored in ways you can’t unsee. One warm lamp, plus cool daylight, plus a monitor glow can turn skin tones into a confusing palette that does not exist in nature. People often blame the webcamsometimes correctlybut the bigger culprit is the room. Choosing one lighting “mood” (all daylight or all warm indoor) makes the camera stop guessing, and suddenly the image looks calmer and more natural.
Finally, there’s the “background betrayal.” You fix your face lighting and feel unstoppable… until you notice a bright window, a shiny framed poster, or a glossy cabinet behind you is stealing attention and making the camera constantly readjust exposure. The practical solution is boring but effective: reduce background brightness (close blinds, move reflective objects, turn off a back lamp) or add a tiny background light intentionally so the scene has balance. The best Zoom setups aren’t the brightestthey’re the most controlled. And once you’ve dialed it in, you’ll never go back to being a silhouette again. Probably.