Table of Contents >> Show >> Hide
- Why DIY Pallet Art Is So Popular
- Safety First: Not Every Pallet Belongs in Your Living Room
- How to Prep Pallet Wood the Right Way
- Cheap Supplies That Go a Long Way
- 10 Creative and Cheap DIY Pallet Art Ideas
- A Simple Step-by-Step Starter Project
- Design Tips for Pallet Art That Looks Stylish, Not Scrap-Like
- Common DIY Pallet Art Mistakes to Avoid
- Real Experiences With Creative and Cheap DIY Pallet Art Ideas
- Conclusion
If your walls are looking a little too “I just moved in and gave up,” pallet art might be the budget-friendly rescue mission your home needs. With a few reclaimed boards, a bit of sanding, and the courage to use a paintbrush before your morning coffee, you can turn scrap wood into rustic, stylish décor that actually looks intentional. That is the magic of DIY pallet art: it feels creative, costs very little, and gives old wood a second life instead of sending it to a landfill.
Better yet, pallet wood has character built right in. Knots, grain, weathering, and slight imperfections make each piece look warm and lived-in. In other words, it is the rare craft material that gets extra points for not being perfect. Whether you love farmhouse décor, modern rustic style, boho accents, or simple handmade wall art, there is a cheap pallet art idea that can fit your space.
In this guide, you will learn how to choose safe pallet wood, prep it properly, and turn it into eye-catching art without blowing your budget. We will also walk through easy project ideas, styling tips, common mistakes, and real-world DIY experiences that make pallet art more practical and less Pinterest fantasy.
Why DIY Pallet Art Is So Popular
DIY pallet art checks nearly every box for budget-conscious decorators. First, pallets are often free or cheap to find from local stores, warehouses, garden centers, or small businesses. Second, they work beautifully with leftover paint, stain, nails, twine, stencils, and other supplies many people already have at home. Third, the finished look feels custom. Even a simple pallet sign or geometric wood panel can look like a boutique décor find instead of a weekend project made in your garage while sneezing through sawdust.
Another reason pallet art works so well is flexibility. You can keep it rough and rustic, sand it smooth for a cleaner finish, paint it bright for a playful room, or distress it for that cozy farmhouse vibe. One pallet can become quote art, a family name sign, a photo display, seasonal décor, a wall organizer, or even string art. It is art material and conversation piece in one charming wooden package.
Safety First: Not Every Pallet Belongs in Your Living Room
Before you start making rustic masterpieces, choose your pallet carefully. This step matters more than people think. Some pallets are safe for DIY use, while others may have been exposed to chemicals, spills, pests, or heavy industrial use. A gorgeous wall sign is not worth mysterious warehouse drama.
What to look for
- Choose pallets that are clean, dry, and structurally sound.
- Look for pallets marked HT, which means heat-treated.
- Avoid pallets marked MB, which indicates methyl bromide fumigation.
- Skip boards with odd stains, strong odors, mold, or bright paint if you do not know their history.
- Inspect for protruding nails, cracked boards, splinters, and insect damage.
If you are unsure where a pallet came from, it is smarter to walk away. Pallet art is supposed to save money, not turn you into a detective with a tetanus booster appointment.
How to Prep Pallet Wood the Right Way
The secret to great pallet wall art is not fancy design. It is prep. Even the most creative pallet art idea can look sloppy if the boards are dirty, rough, or unevenly finished.
Step 1: Dismantle carefully
Use a pry bar, hammer, or pallet buster tool to separate the boards slowly. Rushing this part often splits the wood. Remove all nails, staples, and metal bits. If a nail refuses to leave, at least hammer it flat and make sure it will not snag fingers or scratch walls later.
Step 2: Clean the wood
Brush off dirt and dust first. Wipe the boards down and let them dry completely. If the pallet is especially grimy, use a mild soap-and-water cleaning, but do not soak the wood. Too much moisture can warp boards or encourage mold.
Step 3: Sand like you mean it
Start with a rougher grit to knock down splinters and grime, then move to a finer grit for a smoother touch. If you want a raw, weathered look, you do not need to sand every bit of personality away. Just make sure the wood is safe to handle and not rough enough to snag sweaters, skin, or dignity.
Step 4: Prime, paint, stain, or seal
You can leave pallet wood natural, stain it for depth, or paint it for stronger contrast. For outdoor pallet art, use a weather-resistant sealer. For indoor art, a light clear coat can still help reduce dust and make the surface easier to clean. If painting, thin layers usually look better than one heavy, gloopy coat that screams, “I panicked and kept going.”
Cheap Supplies That Go a Long Way
One reason cheap DIY pallet art ideas are so appealing is that you do not need a giant workshop. Most starter projects can be done with a short list of tools and low-cost materials:
- Pallet boards
- Hammer and pry bar
- Sandpaper or an orbital sander
- Wood glue
- Small nails or screws
- Paint, stain, or leftover sample pots
- Stencils or printed templates
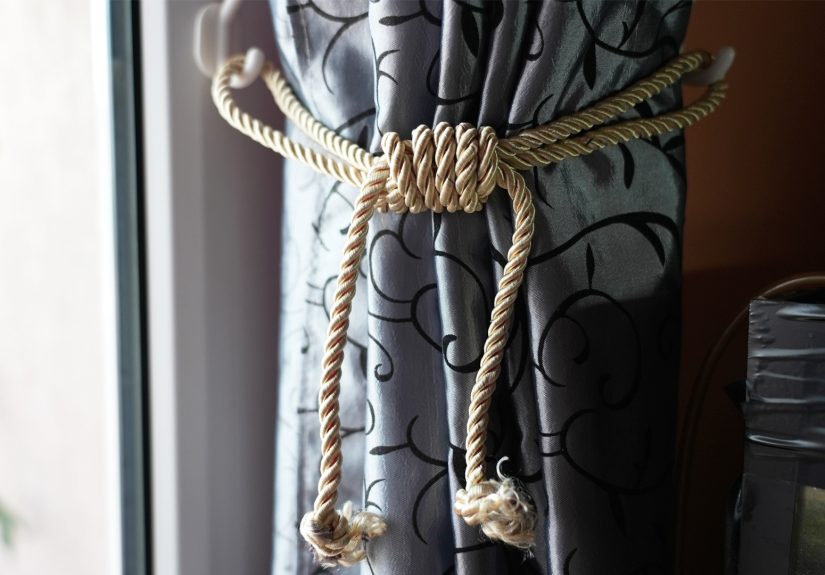
- Twine, hooks, clothespins, or photo clips
- Hanging hardware
Many beautiful pallet wood décor projects cost very little if the wood is free and you use leftovers from previous DIY jobs. That makes pallet art perfect for renters, students, first-time homeowners, and anyone whose decorating budget currently says, “Let us maybe not.”
10 Creative and Cheap DIY Pallet Art Ideas
1. Rustic Quote Sign
This is the gateway project of pallet art. Join a few boards, paint the background, and stencil on a short quote, lyric, or family phrase. Keep the words simple. A sign that says “Gather” is charming. A sign with your entire life philosophy in cursive is less art and more homework.
2. Family Name or Monogram Board
A large monogram or surname looks classic in an entryway, dining room, or porch. White paint on dark stain works well, but bold black, navy, sage, or terracotta can make it feel more modern.
3. Pallet Photo Display
Add twine across a pallet panel and clip on printed photos, postcards, or children’s artwork. It is part gallery wall, part memory board, and part excuse to finally print the photos living in your phone since 2022.
4. Geometric Wood Art
Cut or arrange pallet slats in angled patterns such as chevrons, sunbursts, or herringbone-inspired layouts. Use different stain shades or paint blocks of color for a trendy, high-end look on a tiny budget.
5. String Art on Pallet Wood
Pallet boards make a fantastic base for string art. Use small nails and yarn to create a heart, mountain, cactus, word, state shape, or holiday design. This project feels surprisingly polished for something made with nails and string. Kindergarten craft? No. Stylish wall décor? Absolutely.
6. Seasonal Pallet Sign
Make one sign base and swap out painted elements for fall, Christmas, spring, or summer. Pumpkins, snowflakes, stars, wreaths, and florals all work well. This saves money and storage space, which is good because seasonal décor has a way of multiplying like rabbits.
7. Mini Herb or Faux Greenery Wall Art
Turn a pallet frame into a wall-mounted decorative planter. You can add faux greenery for zero-maintenance style or use small containers for herbs in a kitchen or patio area. It doubles as art and function, which makes it feel very adult and organized.
8. Reclaimed Wood Map or State Art
Paint or trace the outline of your favorite state, a city skyline, or a simple world map. This is a great personalized project for travel lovers or housewarming gifts.
9. Distressed Painted Panel Art
Paint each board a different soft color, then lightly sand the edges for a distressed finish. This works especially well in cottage, farmhouse, and coastal spaces where a slightly weathered look feels warm instead of worn out.
10. Floating Shelf and Art Combo
Attach a narrow ledge to the bottom of your pallet panel so it can hold a small framed print, candle, or tiny plant. It is wall art with a practical side, which is basically the superhero version of décor.
A Simple Step-by-Step Starter Project
Make a Basic Pallet Welcome Sign
- Select three to five pallet boards of similar length.
- Sand the front and edges until smooth enough to handle safely.
- Attach support strips across the back to hold the boards together.
- Paint or stain the front and let it dry fully.
- Stencil “Welcome,” “Hello,” or another short phrase in contrasting paint.
- Lightly distress the edges if you want a rustic finish.
- Add hanging hardware on the back.
- Seal it if it will be displayed outdoors.
This project is beginner-friendly, low-cost, and easy to customize. Once you finish one, it becomes dangerously tempting to start making signs for every room, every holiday, and every mildly amusing quote that pops into your head.
Design Tips for Pallet Art That Looks Stylish, Not Scrap-Like
The line between “rustic chic” and “this fell off a loading dock” is often just a few smart design choices.
- Stick to a limited color palette for a cleaner look.
- Mix rough texture with crisp lettering or modern shapes.
- Use negative space so the design can breathe.
- Choose one focal point instead of cramming on too many details.
- Match the finish to the room: stained wood for warmth, painted wood for brightness, natural wood for subtle texture.
If you are decorating a modern home, keep the layout simple and the colors restrained. If you love farmhouse style, lean into distressed paint, script fonts, and soft neutrals. If your style is eclectic, mix bold paint with raw wood grain and have fun with it. Pallet art is flexible enough to meet you wherever your décor personality lives.
Common DIY Pallet Art Mistakes to Avoid
Using unsafe wood
This is the big one. Never ignore markings, stains, or odors.
Skipping sanding
Yes, rough wood has charm. No, splinters are not a design feature.
Overdecorating
Too many colors, words, and add-ons can make the project look cluttered. Let the wood do some of the visual work.
Forgetting about hanging weight
Pallet wood can be heavy. Use proper hanging hardware, especially for larger pieces.
Using indoor finishes outside
If your art is going on a porch, patio, or fence, protect it with an exterior-friendly finish. Rain has no respect for your hard work.
Real Experiences With Creative and Cheap DIY Pallet Art Ideas
One of the most interesting things about pallet art is how often people start with a tiny project and end up learning a lot more than they expected. The first experience many beginners have is surprise. A pallet that looked “good enough” in a parking lot suddenly becomes a beast once it is in the garage. The boards are uneven. Nails appear from nowhere. Dust flies like it has a personal grudge. That first lesson is simple: rustic charm takes more prep than people think.
Another common experience is realizing that imperfections are actually the point. Many DIYers start out trying to make pallet art look factory perfect, only to find that the slightly uneven stain, the visible grain, and the old nail holes are what make the piece feel warm and handmade. A crooked knot in the wood or a weathered edge often gives the finished art more personality than any store-bought décor could. In a funny way, pallet art rewards you for relaxing a little.
People also learn quickly that cheap does not have to mean boring. Someone might begin with a simple welcome sign because it feels safe, then gain confidence and try a painted mountain scene, a family photo board, or a layered seasonal display. Since the materials are inexpensive, there is less fear of messing up. That freedom often leads to better creativity. When you are not worrying about ruining an expensive canvas or fancy hardwood, you are more willing to experiment.
There is also a very practical satisfaction in using leftovers. Small jars of sample paint, half-used stain, old hooks, scrap twine, and random clips from a junk drawer suddenly become useful. Many people say pallet art feels less like shopping and more like solving a fun puzzle with materials already around the house. That gives the final piece a personal story, which is part of its charm.
Of course, not every experience is glamorous. Some projects end with aching shoulders, sawdust in your hair, and the realization that you absolutely should have measured before painting. But even those moments become part of the appeal. Handmade décor carries evidence of the person who made it. Maybe the stencil shifted a little. Maybe the boards are not perfectly aligned. Maybe you changed the design halfway through because your original idea looked like a raccoon made it. That is okay. Often, those changes make the art feel more alive.
Perhaps the best experience tied to DIY pallet art is the reaction from other people. Guests notice it. Family members ask where you bought it. And there is a special kind of pride in saying, “I made that,” especially when the total cost was low enough to avoid financial regret. In the end, pallet art is not just about décor. It is about creativity, resourcefulness, trial and error, and turning cast-off wood into something that makes a space feel more like home.
Conclusion
Creative and cheap DIY pallet art ideas prove that stylish home décor does not have to come with boutique prices. With safe wood, smart prep, and a little imagination, pallet boards can become rustic signs, string art, photo displays, geometric wall pieces, and seasonal accents that look thoughtful instead of thrown together. The beauty of pallet art lies in its balance of affordability and personality. It is practical, customizable, eco-friendly, and just rough around the edges enough to feel charming.
If you start simple and focus on clean design, proper sanding, and the right finish, even a beginner can create pallet wood décor worth hanging proudly. And if your first project turns out a little wonky? Congratulations. That just means it is authentic.