Table of Contents >> Show >> Hide
- What Is a Crochet Letter Board?
- Why Crochet a Letter Board Instead of Buying One?
- Supplies You Need
- Choosing the Right Yarn and Hook
- Best Stitches for a Crochet Letter Board
- How to Crochet This Letter Board: Step-by-Step Guide
- Creative Message Ideas for Your Crochet Letter Board
- Tips for a Professional-Looking Finish
- Common Mistakes to Avoid
- Variations to Try
- Care and Maintenance
- Extra Experience: What Making a Crochet Letter Board Teaches You
- Conclusion
Note: This article is written for web publication and synthesizes practical crochet and DIY letter-board guidance from reputable craft, yarn, home décor, and maker resources.
A letter board is already one of the most charming ways to display a quote, menu, reminder, seasonal greeting, or dramatic household announcement like “We are out of coffeepanic accordingly.” But when you crochet the board yourself, it becomes more than a message holder. It becomes soft wall art, a handmade conversation starter, and a customizable décor piece that feels warmer than the standard plastic-and-felt version.
“Crochet This Letter Board” is a beginner-friendly craft idea that combines the structure of a traditional letter board with the cozy texture of yarn. Instead of relying on rows of stiff felt, this project uses crochet stitches to create ridges, channels, and a textured surface where letters can sit, slide, or be attached. The finished piece can be framed, hung in a nursery, placed in a craft room, used for holiday messages, or turned into a personalized gift.
The best part? You do not need to be a crochet wizard with a cabinet full of mysterious hooks and yarn labels. If you can chain, single crochet, and maintain reasonably even tension, you can make a beautiful crochet letter board. And if your stitches are not perfect, congratulationsyou have achieved “handmade charm,” which is basically the craft world’s version of a standing ovation.
What Is a Crochet Letter Board?
A crochet letter board is a handmade version of the classic message board. Traditional letter boards usually use felt grooves or slats that hold plastic letters. A crochet version replaces that felt or board surface with crocheted rows, ridges, loops, or channels. These rows create spaces where letters can be placed, pinned, clipped, sewn, or attached with small backing pieces.
Some makers crochet the entire board surface as a flat rectangle and then add raised horizontal rows. Others crochet around dowels, cords, or foam strips to create more defined channels. A simpler version uses a crocheted background and attaches handmade crochet letters directly to the board. The method you choose depends on whether you want a changeable message board or a permanent decorative sign.
For SEO and reader clarity, the main keyword here is crochet letter board. Related keywords include DIY crochet board, crochet letters, crochet wall décor, handmade letter board, and crochet message board. These terms naturally describe the project without making the article sound like it was written by a robot trapped in a yarn basket.
Why Crochet a Letter Board Instead of Buying One?
Store-bought letter boards are convenient, but they can feel a little generic. A crocheted letter board has personality. It can match your home colors, your seasonal décor, or your exact level of “I like cute things but also need them to be useful.”
It Is Fully Customizable
You control the size, color, texture, frame, and style. Want a dusty rose board for a nursery? Done. Prefer a cream-and-tan farmhouse look? Easy. Need a bold black board with white letters for a modern office? Also possible. Crochet lets you build the design around your space instead of forcing your space to accommodate whatever was left on the craft-store shelf.
It Adds Texture to Your Décor
Interior design often benefits from layers of texture. Wood, fabric, metal, glass, and yarn all create visual interest. A crochet letter board adds softness and depth, making it especially lovely for bedrooms, playrooms, entryways, craft corners, and cozy kitchen spaces.
It Makes a Thoughtful Handmade Gift
A crochet letter board can become a baby shower gift, housewarming present, teacher appreciation sign, wedding decoration, or small-business display. Add a personalized message, a set of letters, or a few crocheted icons like hearts, stars, pumpkins, or flowers, and suddenly you have a gift that says, “I planned ahead,” even if you finished it at midnight with a snack nearby.
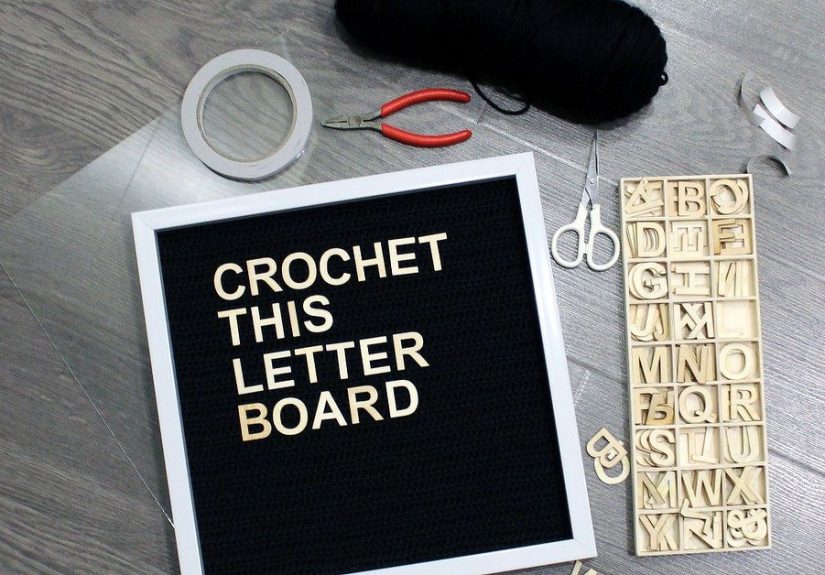
Supplies You Need
The exact materials depend on the version you want to make, but most crochet letter board projects use a similar supply list. Choose materials that create a firm, durable fabric. A floppy board is adorable in theory and annoying in practice.
Basic Materials
- Medium-weight cotton or acrylic yarn
- Crochet hook that matches your yarn label
- Scissors
- Yarn needle
- Frame, canvas board, foam board, or wooden backing
- Hot glue, craft glue, or sewing thread
- Plastic letter board letters, felt letters, or crocheted letters
- Optional: wooden dowels, cord, cardboard strips, or foam strips for raised channels
Cotton yarn is a strong choice because it usually creates crisp stitches and holds shape well. Acrylic yarn is budget-friendly and comes in many colors, but it may stretch more. For a polished crochet message board, use a hook size that creates a tight fabric. If the stitches are too loose, letters may wobble or sink into the texture.
Choosing the Right Yarn and Hook
For this project, structure matters more than drape. A scarf can be soft and flowy. A crochet letter board needs to behave itself. Medium-weight cotton yarn, often labeled worsted weight, is one of the easiest choices because it is sturdy, easy to find, and beginner-friendly.
If you want a rustic look, try a cotton-linen blend or a matte yarn in oatmeal, ivory, charcoal, or muted green. If the board is for a child’s room, brighter colors can work beautifully. Just remember that your letters need contrast. White letters on a cream background may look dreamy in person but disappear faster than cookies at a family gathering when photographed for a blog post.
Use a hook that gives you firm stitches. If your yarn label recommends a 5.0 mm hook, you may test a 4.5 mm hook for a tighter surface. Always make a small swatch first. It is not the most thrilling part of crochet, but it can save you from creating a board shaped like a sleepy lasagna.
Best Stitches for a Crochet Letter Board
The best stitches are simple, sturdy, and consistent. Fancy lace stitches are beautiful, but they do not create the best surface for holding letters. Think neat rows, subtle ridges, and enough density to support your message.
Single Crochet
Single crochet is one of the best stitches for a letter board because it creates a tight, stable fabric. It is beginner-friendly and works well for the main background panel. When worked evenly, it gives the board a clean handmade texture.
Half Double Crochet
Half double crochet works up faster than single crochet while still creating a fairly solid fabric. It has a slightly softer, more cushioned look. This stitch is good if you want a plush board with visible rows.
Back Loop Only Rows
Working stitches into the back loop only creates ridges. These ridges can mimic the horizontal grooves of a traditional letter board. For many DIY crochet board designs, back loop only single crochet is a smart technique because it creates texture without complicated shaping.
Surface Crochet
Surface crochet lets you add raised lines after the base panel is complete. This can help form letter channels or decorative borders. It is also useful if your board looks too plain and needs a little “I meant to do that” detail.
How to Crochet This Letter Board: Step-by-Step Guide
This method creates a decorative crochet letter board with a firm backing and raised horizontal rows. The letters can be attached with small pins, clips, adhesive dots, or sewn-on backing tabs depending on your preferred style.
Step 1: Decide the Board Size
Start by choosing your finished size. A small 8-by-10-inch board is ideal for desks, shelves, and gifts. An 11-by-14-inch board works well for wall décor. A larger 16-by-20-inch board is great for kitchens, classrooms, or small business displays.
Measure your frame or backing before you crochet. The crocheted panel should be slightly larger than the backing so you can wrap or secure the edges neatly.
Step 2: Crochet the Base Panel
Chain enough stitches to match the width of your board. Work in single crochet or half double crochet until the panel reaches your desired height. Keep your tension even and count stitches regularly. This is not the time for freestyle stitch math unless you enjoy suspense.
For a simple design, use one solid color. For a more playful style, alternate colors every few rows. Neutral backgrounds are best if you plan to change messages often, while colorful backgrounds work well for permanent signs.
Step 3: Add Raised Rows or Channels
To make the board function more like a traditional letter board, add raised horizontal rows. You can do this in several ways. One option is to crochet separate narrow strips and sew them across the panel. Another option is to use surface crochet to create raised lines. A third option is to crochet around thin dowels or cords, then attach them across the board.
Space the rows evenly. If you plan to use plastic letter board letters, test the spacing before securing everything permanently. Letters need enough room to sit straight. Nobody wants a motivational quote that looks like it has been through a windstorm.
Step 4: Attach the Crochet Panel to a Backing
Once your panel and raised rows are finished, attach the crochet piece to a firm backing. Foam board is lightweight and easy to cut. Wood is sturdier and gives the project a more premium feel. Canvas board is another simple option.
Stretch the crochet panel gently over the backing and secure it at the back with glue, staples, or hand stitching. Do not pull so tightly that the stitches distort. The goal is smooth and firm, not “yarn trampoline.”
Step 5: Frame the Board
A frame instantly makes the project look polished. You can use a thrifted frame, a basic craft frame, or a handmade wooden frame. Remove the glass if the frame has any. The crochet surface needs to remain exposed so letters can be changed or attached.
If you prefer a frameless look, finish the edges with a crocheted border. A simple single crochet border around the panel creates a clean handmade finish.
Step 6: Add Letters
There are several ways to add letters. Plastic letter board letters may work if your channels are firm enough. Felt letters can be pinned or lightly glued. Crocheted letters can be sewn onto the board for permanent messages. You can also create small letter tiles using cardboard, felt, or plastic backing.
For a changeable board, keep the letters lightweight. For a permanent sign, crocheted letters are charming and highly customizable. You can spell a child’s name, a family motto, a holiday phrase, or a short quote.
Creative Message Ideas for Your Crochet Letter Board
A crochet letter board is only as fun as the messages you put on it. Keep messages short, readable, and suited to the board size. A giant paragraph on a small board will look less like décor and more like a tiny yarn-based legal document.
Home Décor Messages
- Home Sweet Handmade Home
- Good Coffee, Good Mood
- Cozy Lives Here
- Welcome, Stay Awhile
- Today Feels Like Yarn
Seasonal Messages
- Hello Spring
- Sunshine and Stitches
- Pumpkin Spice Department
- Merry and Bright
- Snow Day, Crochet Day
Craft Room Messages
- Just One More Row
- Powered by Yarn
- Creative Chaos Welcome
- My Hook, My Rules
- Stitch Happens
Tips for a Professional-Looking Finish
A handmade project can look charming and polished at the same time. The secret is finishing. Clean edges, even rows, and thoughtful color contrast make a big difference.
Block the Crochet Panel
Blocking helps even out stitches and shape the panel before attaching it to the backing. Depending on your yarn, you may use wet blocking, steam blocking, or light spritz blocking. Always check yarn care instructions first, especially with acrylic yarn, which can react badly to too much heat.
Weave in Ends Carefully
Loose yarn tails can make the back of the project messy and may peek through the front. Use a yarn needle to weave ends securely through several stitches. Trim only after you are confident the ends will not escape like tiny yarn noodles.
Use Strong Contrast
For readability, choose letters that stand out from the background. White letters on dark yarn, black letters on light yarn, or colorful letters on a neutral board are reliable combinations. If your board will be photographed for a blog, shop, or social media, contrast matters even more.
Keep the Rows Straight
Use a ruler, measuring tape, or removable stitch markers when placing raised rows. Straight lines make the board look intentional. Crooked rows can be cute, but they may also make every message look mildly confused.
Common Mistakes to Avoid
Even simple crochet projects can go sideways. The good news is that most mistakes are easy to prevent with a little planning.
Using Yarn That Is Too Soft
Very soft yarn may feel wonderful, but it can create a floppy board surface. Save the silky, drapey yarn for scarves and shawls. For a letter board, choose yarn with structure.
Skipping the Gauge Test
A small swatch helps you estimate size and firmness. It also lets you test whether letters will stay in place. Skipping this step can lead to a board that is too loose, too small, or shaped like an abstract map.
Making Channels Too Far Apart
If the rows are spaced too far apart, letters may not sit properly. Test spacing with the actual letters you plan to use. This is especially important if you use store-bought plastic letters.
Choosing Low-Contrast Colors
Low contrast can make messages difficult to read. Soft-on-soft color palettes are beautiful, but for a functional board, readability comes first.
Variations to Try
Once you understand the basic concept, you can adapt the crochet letter board in many creative ways. This is where the project becomes addictive. One board becomes two. Two boards become “I might need a wall for these.”
Mini Crochet Letter Board
Make a tiny version for a desk, bookshelf, or tiered tray. Mini boards are great for short messages, table numbers, party signs, or product displays at craft fairs.
Nursery Name Board
Crochet a soft background and add permanent crochet letters spelling a baby’s name. Add small stars, clouds, rainbows, or flowers for extra sweetness.
Holiday Message Board
Create one board and change the letters seasonally. Use autumn colors for fall, red and cream for winter, pastels for spring, or bright cotton yarn for summer.
Menu or Meal Planning Board
Hang a crochet message board in the kitchen and use it for weekly menus, grocery reminders, or cheerful notes. A handmade menu board makes “leftovers again” feel slightly more official.
Care and Maintenance
A crochet letter board should be treated like soft décor, not a washable dishcloth. Dust it gently with a lint roller or soft brush. If the board gets stained, spot clean carefully with mild soap and water. Avoid soaking the entire board if it is attached to cardboard, foam, or wood.
Keep the board away from damp areas, direct heat, and curious pets who believe yarn is a personal invitation. If letters are removable, store extras in a small pouch or box so they do not disappear into the mysterious household dimension where buttons and matching socks also live.
Extra Experience: What Making a Crochet Letter Board Teaches You
One of the most enjoyable things about making a crochet letter board is that it teaches patience without feeling too serious. Unlike a sweater, there is no complicated shaping. Unlike a blanket, it does not take weeks unless you decide to make a board large enough to communicate with passing aircraft. The project is manageable, useful, and satisfying.
From experience, the first important lesson is that tension matters. When stitches are too loose, the board surface becomes soft and unstable. Letters may tilt or sink. When stitches are too tight, the panel can curl or become difficult to stretch over the backing. The sweet spot is firm but flexible. A small practice swatch helps you find that balance before committing to the full board.
The second lesson is that measuring saves the project. It is tempting to eyeball the raised rows, especially when the coffee is strong and confidence is high. But evenly spaced channels make the final piece look much more professional. Using stitch markers, a ruler, or even strips of paper as spacing guides can prevent a lot of frustration. Crochet is creative, but geometry still likes to show up uninvited.
The third lesson is that the backing changes everything. A beautiful crochet panel can look unfinished until it is mounted securely. Foam board keeps the project light and affordable. Wood gives it durability. A frame adds instant polish. If the board is intended as a gift or something to sell, a sturdy backing makes it feel more valuable and long-lasting.
Another useful experience is learning how colors behave together. A yarn color that looks gorgeous in the skein may not work well behind letters. For example, variegated yarn can be beautiful, but it may compete with the message. Solid or lightly textured yarn usually makes the words easier to read. If you want to use colorful yarn, keep the letters simple and bold.
Making crochet letters is a separate adventure. Some letters are easy. The letter “I” is practically a vacation. The letter “S,” however, may test your character. If you want a changeable board, store-bought letters can be more practical. If you want a permanent sign, handmade crochet letters add texture and personality. A combination also works well: plastic letters for messages and crocheted shapes for decoration.
This project is also a great reminder that handmade items do not need to be perfect to be beautiful. A slightly uneven row or a tiny tension shift does not ruin the board. In fact, those details are part of what makes the piece feel human. The goal is not factory precision. The goal is a functional, attractive, handmade board that makes people smile.
For bloggers, makers, and small business owners, a crochet letter board can also become excellent photo styling. Use it in product photos, seasonal blog headers, craft tutorials, or social media posts. A handmade board instantly adds warmth to images. It says, “There is creativity here,” without shouting. That subtle charm can help content feel more personal and memorable.
Finally, crocheting a letter board is a confidence-building project. It combines basic stitches, finishing skills, design choices, and practical assembly. By the end, you have not just practiced crochet; you have made something useful. That is the best kind of DIY project: attractive enough to display, simple enough to repeat, and customizable enough to make again in completely different styles.
Conclusion
A crochet letter board is the perfect blend of craft, décor, and everyday usefulness. It lets you turn yarn into a message center, a wall accent, a gift, or a seasonal display. With simple stitches, firm yarn, careful spacing, and a good backing, you can create a board that looks polished while still keeping the cozy personality of handmade crochet.
Whether you make a neutral farmhouse board, a cheerful nursery sign, a funny kitchen message display, or a craft-room quote board, this project gives you plenty of room to personalize. Start small, test your materials, and let your creativity stretch beyond the pattern. After all, the best crochet projects are the ones that look good, feel useful, and give you an excuse to buy more yarnresponsibly, of course.