Table of Contents >> Show >> Hide
- Why a Sharp Lawn Mower Blade Matters More Than Most People Think
- Signs It’s Time to Change the Blade
- Tools and Safety Gear You’ll Want Nearby
- How to Change Your Lawn Mower Blade Step by Step
- Step 1: Shut the mower down completely
- Step 2: Get the mower positioned correctly
- Step 3: Mark the blade before removing it
- Step 4: Keep the blade from spinning
- Step 5: Remove the retaining bolt and hardware
- Step 6: Inspect the old blade honestly
- Step 7: Match the new blade carefully
- Step 8: Install the new blade in the correct orientation
- Step 9: Tighten it securely
- Step 10: Set the mower back down and reconnect power
- Step 11: Test the cut
- Should You Sharpen or Replace the Blade?
- Common Mistakes to Avoid
- How Often Should You Change a Lawn Mower Blade?
- What a Sharp-Cut Lawn Actually Looks Like
- Real-World Experiences and Lessons From the Yard
- Conclusion
A lawn mower blade has one job: cut grass cleanly. When it does that job well, your yard looks crisp, healthy, and suspiciously like you know what you’re doing. When it does that job badly, your lawn ends up with torn, brown-tipped grass that looks like it lost a tiny sword fight. If your mower has started leaving ragged edges, patchy stripes, or an ugly gray cast after mowing, the blade may be dull, nicked, bent, or simply past its prime.
The good news is that changing a lawn mower blade is one of the most useful bits of mower maintenance you can learn. It is not glamorous. No one throws a parade because you used a socket wrench correctly. But the payoff is real: a cleaner cut, less stress on the grass, less strain on the mower, and fewer headaches during mowing season. Once you know the process, this becomes one of those satisfying homeowner skills that feels much more complicated than it really is.
In this guide, you’ll learn exactly how to change your lawn mower blade safely, how to tell whether you should sharpen or replace it, what tools you actually need, and which common mistakes can turn a quick maintenance task into a greasy afternoon. Let’s get your mower cutting like it means business.
Why a Sharp Lawn Mower Blade Matters More Than Most People Think
A sharp lawn mower blade does not just make your yard look prettier, though that is certainly a nice bonus. It also protects the grass itself. Cleanly cut grass blades recover faster, hold moisture better, and are generally less vulnerable to stress. A dull blade, on the other hand, tears and shreds grass instead of slicing it. That rough damage can leave the lawn looking brown at the tips and can make it easier for disease problems to show up.
There is also the machine side of the story. A sharp, balanced blade helps the mower run more smoothly. It can reduce vibration, lessen wear on parts, and keep mowing performance more consistent. If a blade is damaged, badly worn, or out of balance, the mower may shake, cut unevenly, or sound like it is auditioning for a demolition derby.
Put simply, the blade is not a background character. It is the star of the lawn-cutting show.
Signs It’s Time to Change the Blade
Before you crawl onto the garage floor and start removing hardware, make sure the blade is actually the problem. Here are the most common signs that it is time to replace your lawn mower blade:
1. The grass looks torn, not trimmed
If the lawn has frayed, white, yellow, or brown tips after mowing, your blade is probably dull. Grass should look sliced, not chewed.
2. The mower vibrates more than usual
Excess vibration can mean the blade is bent, cracked, loose, or unbalanced. That is not something to ignore. A vibrating mower is basically your machine’s way of yelling for attention.
3. The blade has visible damage
Nicks from rocks are common. Deep gouges, cracks, bent edges, severe rust, or worn-down cutting surfaces are not. At that point, replacement is usually the smarter move.
4. You hit something solid
Tree roots, hidden bricks, landscaping edges, large sticks, and rogue dog toys can all damage a blade in one dramatic moment. If you struck something hard, inspect the blade before mowing again.
5. It has been a full season or more
Many homeowners sharpen or replace a mower blade at least once a year. If you mow often, mow a large yard, or frequently encounter debris, you may need blade service more than once per season.
Tools and Safety Gear You’ll Want Nearby
You do not need a full mechanic’s shop to change a lawn mower blade, but you do want the basics ready before you start:
- Heavy work gloves
- Safety glasses
- Socket wrench or breaker bar
- Block of wood or blade removal tool
- Replacement blade that matches your mower model
- Marker or chalk to note blade orientation
- Shop rag for cleanup
- Torque wrench if your manual specifies a torque value
If you are working with a gas walk-behind mower, you may also want a siphon pump or a plan to run the tank nearly empty before service. If you have a cordless mower, life gets easier: remove the battery and you are already ahead of the game.
How to Change Your Lawn Mower Blade Step by Step
Step 1: Shut the mower down completely
Start on a flat, level surface. Turn the mower off and let the engine cool fully if it is a gas model. Then disconnect the spark plug wire. On a battery mower, remove the battery. On a corded electric mower, unplug it. If the mower has a key, remove that too. The goal here is simple: zero chance of accidental startup.
This is not the step to skip because you’re “just doing it real quick.” Famous last words, right up there with “I don’t need to write down that password.”
Step 2: Get the mower positioned correctly
If you are changing the blade on a walk-behind gas mower, tilt the mower onto its side with the air filter and carburetor facing up. That helps reduce the chance of fuel or oil flowing where it should not. Do not flip the mower completely upside down unless your manual specifically says that is fine for your model. Improper positioning can create engine problems you definitely did not invite.
For riding mowers and zero-turn mowers, the process is more involved because access often comes through the deck. Some models require deck removal, while others allow easier under-deck access. Always follow the operator’s manual for the exact method.
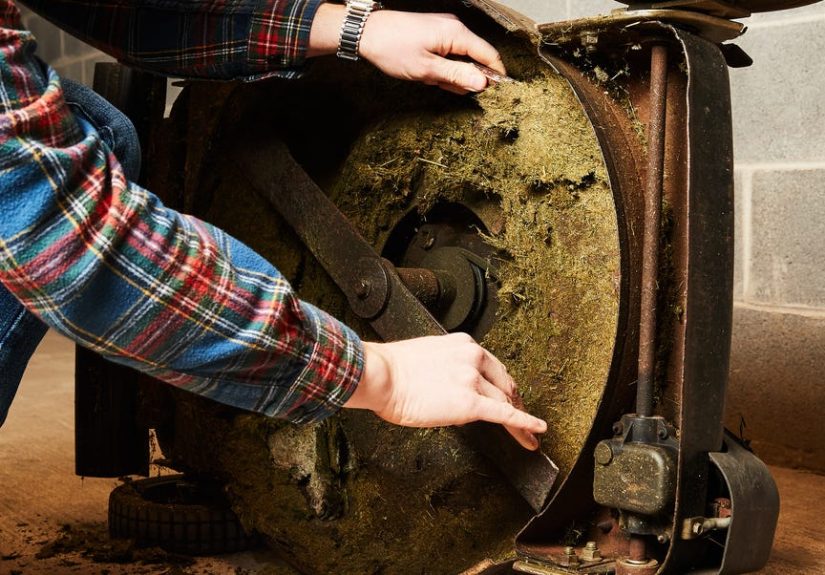
Step 3: Mark the blade before removing it
Use a marker, chalk, or a quick photo on your phone to note which side of the blade faces down and how the hardware is stacked. This tiny step saves a surprising amount of confusion later. Installing a blade upside down is one of the most common homeowner mistakes, and it leads to a terrible cut. In other words, the mower runs, the grass loses, and everyone is annoyed.
Step 4: Keep the blade from spinning
Wedge a sturdy block of wood between the blade and the deck to prevent the blade from rotating while you loosen the bolt. Some people use a blade removal tool instead. Either way, secure the blade before applying force to the fastener.
Step 5: Remove the retaining bolt and hardware
Use a socket wrench to loosen the blade bolt. On many mowers, the fastener loosens by turning counterclockwise, but do not assume every machine follows the same pattern. Check your manual if there is any doubt. Once the bolt is loose, carefully remove the hardware and the blade. Keep washers, supports, and spacers in the order they came off.
Step 6: Inspect the old blade honestly
Now is the moment of truth. If the blade is just a little dull, sharpening may have been enough. But if it is bent, cracked, heavily rusted, thinned out, or badly chipped, replacement is the right call. A damaged blade is not a “maybe I can get one more season out of it” situation. It is more of a “nice try, but your retirement starts now” situation.
Step 7: Match the new blade carefully
Install a blade designed for your specific mower model or one clearly listed as compatible. Pay attention to blade length, center-hole pattern, width, and style. Standard, high-lift, and mulching blades are not always interchangeable in a useful way. The correct blade helps the mower cut properly, move clippings the way it was designed to, and avoid clearance or performance issues.
Step 8: Install the new blade in the correct orientation
Place the new blade on the spindle or crankshaft exactly as the old one sat. Most blades have a marked side such as “bottom,” “grass side,” or an equivalent label. Reinstall the washers and supports in the proper order, then thread the bolt back in by hand first so you do not cross-thread it.
Step 9: Tighten it securely
Use the wrench to snug the blade bolt, then finish with a torque wrench if your mower manual provides a torque specification. This matters more than people think. Too loose, and the blade can work free. Too tight, and you risk damaging the hardware or shaft. The operator’s manual is your referee here, so let it make the call.
Step 10: Set the mower back down and reconnect power
Return the mower to its normal position carefully. Reconnect the spark plug wire, reinstall the battery, or plug the mower back in. Before mowing, give the blade area a final visual check for missing hardware, misalignment, or leftover tools. A socket rolling around on the deck is not a recommended accessory.
Step 11: Test the cut
Mow a small patch of lawn and inspect the results. A fresh blade should leave the grass looking even and cleanly clipped. If the mower vibrates unusually or the cut still looks ragged, stop and recheck blade installation, balance, and compatibility.
Should You Sharpen or Replace the Blade?
This is the classic lawn-care crossroads. If the blade is dull but still structurally sound, sharpening is a legitimate option. If the blade is bent, cracked, badly worn, or heavily pitted, replace it. No debate, no drama.
Sharpening makes sense when:
- The cutting edge is simply dull or lightly nicked
- The blade is not bent or cracked
- The metal still has good thickness and shape
- You can sharpen and balance it properly
Replacement makes more sense when:
- The blade has visible cracks
- The edge is bent or warped
- The blade has large chunks missing
- Rust or wear has weakened the metal
- You want a faster, cleaner fix with less guesswork
If you do sharpen instead of replace, balance the blade before reinstalling it. An unbalanced blade can cause vibration, rough operation, and faster wear on the mower.
Common Mistakes to Avoid
Installing the blade upside down
This is the lawn mower equivalent of putting your shoes on the wrong feet. The mower may still move, but it will not perform the way it should.
Skipping the safety disconnect
Never work around the blade with power connected. A disconnected spark plug wire or removed battery is non-negotiable.
Using the wrong replacement blade
A blade that is almost right is not right. Match the mower model, hole pattern, and blade style carefully.
Ignoring cracks or bends
Do not sharpen a compromised blade and hope for the best. Hope is lovely in many parts of life. It is not a blade repair strategy.
Forgetting about balance
A freshly sharpened blade still needs to be balanced. Otherwise, you may trade a better edge for a shakier mower.
Guessing on bolt tightness
When in doubt, use the manual’s torque spec. “That feels tight enough” is not a professional standard.
How Often Should You Change a Lawn Mower Blade?
There is no one-size-fits-all answer because mowing habits vary a lot. A homeowner with a small, clean suburban lawn may only need annual blade service. Someone mowing a large yard with sticks, seedheads, sandy soil, or hidden debris may need it two or three times a season.
As a practical rule, inspect the blade at the start of the mowing season, again around the middle, and anytime the mower suddenly starts cutting poorly or vibrating. If you mow weekly during the growing season, that simple inspection habit goes a long way. It is quick, and it beats discovering a trashed blade halfway through a humid July afternoon.
What a Sharp-Cut Lawn Actually Looks Like
Once the new blade is on, the difference is usually easy to spot. The lawn should look evenly trimmed, with clean tips and a more uniform color. Clippings should be more consistent, and the mower often feels smoother as it moves through the grass. In many cases, the engine sounds less strained too.
If your grass still looks ragged after a blade change, check mowing height, ground speed, and whether the lawn was too wet or overgrown when you cut it. A sharp blade helps a lot, but it cannot fully compensate for mowing soaked grass at race-car speed while pretending the yard is a speedrun challenge.
Real-World Experiences and Lessons From the Yard
One of the most common experiences people have after changing a lawn mower blade is pure disbelief at how much better the lawn looks. The first pass across the grass often reveals what the old blade had been doing all along. Instead of a fuzzy, slightly brown lawn that looks tired two hours after mowing, the yard suddenly appears cleaner, greener, and more even. Many homeowners assume their grass has a disease problem or a watering issue, when in reality the blade has just been dull for far too long.
Another familiar lesson is that blade condition sneaks up on you. Because the mower still starts and the grass still gets shorter, it is easy to think everything is fine. Then you install a fresh blade and realize the old one had been tearing rather than cutting for weeks. That is why regular inspection matters so much. You do not need to obsess over it, but you do need to look once in a while.
People also learn quickly that the little details matter. Marking the blade orientation before removal seems unnecessary until the new blade is in your hand and every side suddenly looks like the correct side. Using gloves seems optional until your knuckles meet the deck or the edge catches your palm. Keeping the hardware in order feels fussy until you are on the floor searching for the right washer like it is buried treasure.
There is also the classic first-timer experience with a stubborn blade bolt. Plenty of people expect a quick five-minute swap and then spend twenty minutes discovering that mower hardware has opinions. A breaker bar, a block of wood, and patience usually win. Panic, random hammering, and improvised bad ideas usually do not.
Another real-world takeaway is that not every blade deserves a heroic rescue mission. Some are sharpenable. Some are simply done. If the blade is bent from hitting a rock or has a crack near the mounting area, replacing it feels less like spending money and more like purchasing peace of mind. Most homeowners who replace a truly damaged blade end up glad they did, especially when the mower runs smoother afterward.
There is also a nice bit of satisfaction in doing this job yourself. It is not flashy, but it is practical. You save service money, you understand your machine better, and you stop treating mower maintenance like mysterious wizard work. After one successful blade change, most people are far less intimidated by the next one. The job becomes routine instead of dramatic.
And perhaps the best experience of all is the one right after the first mow with a fresh blade: the lawn looks sharp, the mower feels smoother, and you get that rare homeowner moment where something actually goes according to plan. You stand there for a second, pretending you always knew how to do this. Honestly, that is part of the fun.
Conclusion
Learning how to change your lawn mower blade is one of the simplest ways to improve the look of your lawn and the performance of your mower. The process is straightforward: disconnect the power source, position the mower safely, remove the old blade, inspect the hardware, install a compatible new blade in the correct orientation, and tighten everything to spec. That single maintenance habit can help your lawn stay cleaner, healthier, and less stressed all season long.
Whether you are dealing with brown-tipped grass, annoying vibration, or a blade that has clearly seen better centuries, replacing it is a smart move. A sharp-cut lawn starts with a sharp, properly installed blade. Your grass will notice. Your mower will notice. Even your neighbors may notice, though hopefully in a normal, healthy way.