Table of Contents >> Show >> Hide
- What Makes Ghost Decor Look “Hauntingly Beautiful” (Not Just… White Fabric)
- Quick Supply List (Mostly Stuff You Can Scavenge)
- Project 1: Classic Cheesecloth Floating Ghosts (The Crowd-Pleaser)
- Project 2: Balloon-and-Cheesecloth “Patio Ghosts” (Fast, Friendly, and Mass-Producible)
- Project 3: Chicken Wire Apparition (For the “Yes, I Do Own Pliers” DIYer)
- Project 4: Ghost Wreath (Front Door, But Make It Boo-tique)
- Project 5: Ghost Garland & Tabletop Minis (Cute, Easy, Apartment-Friendly)
- Project 6: Cozy “Sherpa” Ghosts (Spooky Season, But Make It Soft)
- Project 7: Ghost Window Silhouettes (Last-Minute, High Impact)
- How to Style Ghost Decor So It Looks Like a “Theme,” Not a Pile of Crafts
- Outdoor Setup Tips (Wind, Rain, and Other Party Crashers)
- Troubleshooting (Because Ghosts Are Dramatic)
- Storage Tips So You Can Reuse Everything Next Year
- Conclusion: Your Home, But Make It Slightly Haunted (In a Pretty Way)
- Experience Notes: What It’s Actually Like to Make DIY Ghost Decor (And What People Wish They Knew)
- SEO Tags
There are two kinds of Halloween decorating people: the “I bought one plastic pumpkin and that’s my whole personality”
crowd, and the “I turned my porch into a paranormal Airbnb” crowd. If you’re reading this, you’re probably at least
ghost-curiousand you’re in the right place.
DIY ghost decor is one of the rare seasonal wins that checks every box: it’s budget-friendly, wildly customizable,
surprisingly elegant (yes, ghosts can be chic), and it looks ten times better at night when you add the right
lighting. In true Hometalk spirit, we’re using simple materialsthink cheesecloth, wire, balloons, thrift-store
finds, and a little imaginationto create decorations that feel “hauntingly beautiful” instead of “party aisle panic.”
What Makes Ghost Decor Look “Hauntingly Beautiful” (Not Just… White Fabric)
The difference between a gorgeous ghost and a sad bedsheet situation comes down to four design moves:
- Silhouette: A clean, readable shape (rounded head + flowing body) is instantly ghosty.
- Texture: Gauze, cheesecloth, and distressed fabric create that airy, antique vibe.
- Movement: Even slight swaying makes it feel alive (or at least mildly unsettled).
- Lighting: Soft glow > harsh spotlight. Shadows and backlight are your best friends.
Quick Supply List (Mostly Stuff You Can Scavenge)
You don’t need a craft room the size of a garage. Start with these basics and mix in what you already have:
- Cheesecloth or gauze (the MVP of ghost crafts)
- Fabric stiffener or liquid starch or a glue-and-water mix
- Balloons, foam balls, or crumpled paper for “heads”
- Plastic bottles, cups, vases, tomato cages, or plant stands for forms
- Fishing line/monofilament for “floating”
- Wire hangers or floral wire for arms and posing
- Felt or paper for eyes/mouth (or a black marker for quick faces)
- LED tea lights or battery fairy lights (skip real flames)
- Hot glue gun + glue sticks, painter’s tape, scissors
Project 1: Classic Cheesecloth Floating Ghosts (The Crowd-Pleaser)
If you only make one ghost this year, make this one. It’s the iconic “floating spirit” look that works indoors or out,
and it’s easy to batch-produce once you do the first one.
Step-by-step
-
Build a simple ghost form. Tape a balloon (head) to the top of a bottle, vase, or upside-down cup.
Want arms? Twist a wire hanger into a T-shape and attach it under the balloon. -
Choose your stiffener.
- Fabric stiffener/liquid starch: fastest and least messy.
- Glue + water: a classic workaround; it dries firm and durable.
-
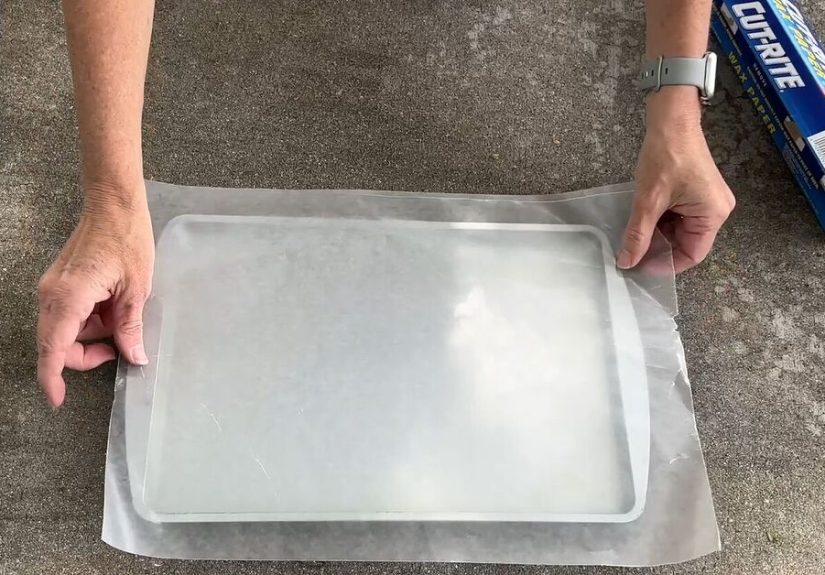
Soak and drape. Dunk cheesecloth, gently squeeze out excess (you want wet, not dripping), then drape
over the form. Smooth the fabric around the head so it “reads” as a face area, then let the bottom hang naturally. -
Shape the drama. Pull and pinch the edges into waves or tattered points. “Perfectly even” is the enemy
of spooky. - Let it dry fully. Give it time. If it feels cool or flexible, it’s not done yet.
-
Remove the form. Pop the balloon, slide the ghost off the base, and admire your work like a Victorian
scientist who definitely should not have been left alone in the attic. -
Add a face (optional but effective). Felt eyes look clean and modern. Marker eyes look charming and
kid-friendly. A slightly lopsided mouth looks… haunted. (Accidentally. Conveniently.)
Make it prettier (and spookier) with these upgrades
- Glow effect: Mix a small amount of glow-in-the-dark paint into your stiffener or dab it onto the edges.
- Antique tint: Lightly brush diluted beige acrylic or tea-stain the cloth for an aged look.
- Floating illusion: Add a small screw eye (or loop of glue-hardened string) at the top and hang with fishing line.
- Soft internal glow: Nestle battery fairy lights inside the body, keeping the battery pack accessible.
Project 2: Balloon-and-Cheesecloth “Patio Ghosts” (Fast, Friendly, and Mass-Producible)
Want a whole squad of ghosts without the full sculptural build? This variation starts with white balloons and uses
cheesecloth as a skirt. It’s perfect for railings, porch corners, or party clusters.
How to do it
- Draw simple eyes on a white balloon (or use black circle stickers).
- Brush on a thin layer of decoupage or glue mix where the cheesecloth will sit.
- Layer cheesecloth over the balloon and trim the bottom edge jagged for a floaty hem.
- Hang in groups at different heights for instant “haunted elegance.”
Project 3: Chicken Wire Apparition (For the “Yes, I Do Own Pliers” DIYer)
This one is a showstopper: a ghost figure you can shape and reshape, which looks incredible in a yard displayespecially
with low lighting and shadows. It’s more involved, but the result looks like something you’d see outside a haunted
historic mansion.
Basic approach
- Sketch the pose first: tall, slightly leaning, arms reaching = maximum creep.
- Shape the wire: form a torso and head, then add arms. Keep edges folded inward where possible to reduce sharp points.
- Drape lightly: add gauze or cheesecloth in strips so the wire silhouette still shows through.
- Light from below: a ground stake light or low LED spotlight makes the wire texture pop.
Safety note: Chicken wire is pokey. Wear gloves, and keep it out of high-traffic paths where trick-or-treaters
might bump into it.
Project 4: Ghost Wreath (Front Door, But Make It Boo-tique)
Ghost wreaths are popular for a reason: they’re compact, photogenic, and they make your entry feel intentional instead
of “I panicked at 9 p.m. and taped something to the door.”
Two easy wreath styles
-
Mini ghost cluster wreath: Make small cheesecloth ghosts (paper honeycombs or small foam balls work for heads),
then hot-glue them onto a wreath form. Add tiny LED lights for a gentle glow. -
Simple “one big ghost” wreath: Wrap the form in cheesecloth, then add oversized felt eyes and a mouth.
It’s minimal, modern, and still festive.
Project 5: Ghost Garland & Tabletop Minis (Cute, Easy, Apartment-Friendly)
Not everyone has a yardor the desire to explain to neighbors why a six-foot spirit is hanging from the oak tree. These
smaller projects deliver big Halloween energy in small spaces.
Ideas you can make in an afternoon
- Clay or paper ghost garland: Create small ghosts, string them with twine, and drape across a mantel or shelf.
- Book-page or paper ghosts: Fold or roll paper into cone shapes, then add faces for a vintage vibe.
- Doily ghosts: Fold paper doilies, snip a few cuts, draw eyesinstant sweet-spooky.
- Mason jar “spirit lanterns”: Add gauze around a jar, glue on eyes, and place a battery tea light inside.
Project 6: Cozy “Sherpa” Ghosts (Spooky Season, But Make It Soft)
If your aesthetic is more “neutral throw blankets” than “chainsaw soundtrack,” cozy ghosts are your gateway craft.
Plush fabric (like sherpa) gives you a ghost that looks adorable on a bookshelf, nightstand, or entry benchno jump scares,
just vibes.
Simple build
- Cut two ghost shapes from sherpa (or felt/fleece).
- Sew or hot-glue around the edge, leaving an opening.
- Stuff lightly so it stands up, then close the seam.
- Add minimal eyes for that “friendly haunting” look.
Project 7: Ghost Window Silhouettes (Last-Minute, High Impact)
Window ghosts are basically Halloween cheatingin the best way. During the day they’re cute; at night, when your indoor
lights are on, they look like a full-on haunting.
How to do it
- Cut ghost shapes from poster board or foam core.
- Add eyes and mouth with black tape or paper.
- Tape them to the inside of windows.
- Turn on a lamp nearby at night for crisp silhouettes.
How to Style Ghost Decor So It Looks Like a “Theme,” Not a Pile of Crafts
Pick a ghost “mood” and stick to it
- Haunted elegant: tea-stained cheesecloth, soft warm LEDs, minimal faces.
- Classic spooky: bright white ghosts, bold black eyes, clusters and movement.
- Whimsical cute: rounded shapes, friendly expressions, garlands and mini ghosts.
Use height like a decorator
The easiest way to make your display look professional is to vary heights: hang a few ghosts from tree branches, place
some on porch steps, and add small tabletop ghosts near the door. Your eye loves layers.
Lighting: the “special effects” you already own
- Backlight a floating ghost from behind for a halo effect.
- Uplight a yard ghost from below to exaggerate shadows.
- Use timers so your display turns on/off automatically and doesn’t blast light all night.
- Stick with LEDs outdoors (cooler, safer, and usually brighter per watt).
Outdoor Setup Tips (Wind, Rain, and Other Party Crashers)
Outdoor ghost decor looks amazinguntil the first gust of wind turns your floating specter into a tangled laundry
situation. Here’s how to keep things looking intentional:
- Anchor from two points: hang from above, then lightly tether the bottom with fishing line to a stake.
- Choose outdoor-rated lights: especially if your display is exposed to moisture.
- Protect connections: keep plugs off the ground and covered where possible.
- Skip fake spider webs outdoors: they can be harmful to wildlife and create a mess you’ll regret later.
Troubleshooting (Because Ghosts Are Dramatic)
“My cheesecloth keeps sliding off the form.”
Your fabric is too wet or your form is too smooth. Wring the cloth more, or wrap the form in plastic wrap or painter’s
tape to give it grip.
“It dried… but it’s floppy.”
Add another layer of stiffener or glue mix and let it dry again. Thin layers build strength without turning it into a
chalky board.
“The edges look too neat.”
Pull strands, snip unevenly, and lightly distress the hem. Haunted equals imperfect.
Storage Tips So You Can Reuse Everything Next Year
- Rigid ghosts: store in large boxes with tissue paper so they don’t get crushed.
- Garlands and silhouettes: label a large envelope or folder so pieces don’t bend.
- Lights: coil neatly and store dryfuture-you will be grateful.
Conclusion: Your Home, But Make It Slightly Haunted (In a Pretty Way)
The best DIY ghost decor isn’t about spending moreit’s about making a few smart choices: pick a style, use texture,
vary heights, and let lighting do half the work. Whether you hang floating cheesecloth spirits from the porch, build a
dramatic wire apparition for the yard, or keep it cozy with plush tabletop ghosts, you’re creating a Halloween look that
feels curated, creative, and completely you.
Now go forth and craft. And if someone asks where you bought your gorgeous ghost display, just smile mysteriously and say,
“Oh, this old thing? It followed me home.”
Experience Notes: What It’s Actually Like to Make DIY Ghost Decor (And What People Wish They Knew)
DIY ghost decor sounds simple on paper: “Drape cloth. Let dry. Haunt neighbors.” In real life, it’s a tiny adventure
filled with glue, judgmental drying times, and at least one moment where you stare at a half-finished ghost and think,
“Why does this look like a disappointed jellyfish?” Totally normal. Here are some experience-based insights that come up
again and again when people make ghosts at homeespecially the classic cheesecloth versions.
First: drying time is the boss level. Many crafters underestimate how long it takes for saturated fabric
to become truly rigidespecially in humid climates or when the ghost has multiple layers. The outside might feel firm
while the inner folds stay soft, which can lead to sagging later. A good trick is to place your ghost form somewhere with
airflow (a garage with the door cracked, a covered porch, or near a fan indoors). The fan method feels almost like
cheating, but it’s really just physics doing you a favor.
Second: the “perfect” stiffener mix is mostly about your patience level. Liquid starch and fabric
stiffener are convenient and consistent. Glue-and-water mixes can be sturdier, but they’re also messier and heavier.
People who want a truly sculptural ghostone that holds a dramatic swirl at the hemoften prefer a stronger mix and a
second coat after the first dry. People making a whole swarm of smaller ghosts (garlands, wreath minis, tabletop pieces)
often love starch because it’s faster to work with and easier to clean up.
Third: faces can make or break the vibe. This surprises people. Tiny dot eyes can look modern and cute.
Bigger eyes can turn “haunting” into “cartoonish” fast. Many decorators end up testing faces by lightly placing cut felt
pieces without gluing firstbecause once you commit, your ghost has an expression forever. (No pressure.) For a more
elegant look, some DIYers keep faces subtle: small eyes, no mouth, and let lighting and shape do the storytelling.
Fourth: outdoor ghosts are basically tiny kites. Even when they’re stiff, they catch wind. A common
“why didn’t I do this earlier?” solution is a gentle tether: a nearly invisible fishing line from the hem to a porch
railing, a plant pot, or a small stake in the ground. The goal isn’t to pin the ghost downit’s to stop it from spinning
like it’s auditioning for a Halloween-themed figure skating competition.
Fifth: the best-looking ghost displays are rarely “one big thing”. People who love their final results
usually build a scene: a couple of floating ghosts at different heights, a wreath on the door, window silhouettes for
nighttime drama, and maybe one “hero piece” like a wire apparition or a glowing porch corner. It feels layered and
intentional, even if every piece was made from dollar-store supplies and pure stubbornness.
Finally: making ghosts is weirdly fun. It’s one of those crafts that invites experimentationdistress
an edge, tint a layer, add a soft glow, try a different pose. And when it’s done, the payoff is immediate: you turn on
the lights at dusk and suddenly your home looks like it has a tasteful little haunting scheduled for the evening.
That’s the magic of DIY ghost decor. You’re not just decoratingyou’re building a mood.