
Table of Contents >> Show >> Hide
- Why a Crochet Heart Is the Perfect Beginner Project
- What You Need Before You Start
- Crochet Terms You Should Know First
- How to Crochet a Heart: Easy Step-by-Step Instructions
- A Simple Beginner Heart Pattern Cheat Sheet
- How to Make Your Crochet Heart Look Better
- Common Beginner Mistakes and How to Fix Them
- Fun Ways to Use a Crochet Heart
- Beginner Tips for Faster Success
- Real Experiences With Crocheting a Heart
- Final Thoughts
If you have ever looked at a tiny crochet heart and thought, “That is adorable, but my hands turn into overcooked noodles the second I hold a hook,” welcome. You are among friends. Learning how to crochet a heart is one of the best beginner-friendly projects because it is small, fast, cute, and forgiving. If your first one looks a little lopsided, you can simply call it “handmade character” and keep going with confidence.
This tutorial breaks the process into simple steps using standard American English crochet terms. You will learn what supplies to use, what the common abbreviations mean, how to shape the top curves and bottom point, and how to finish your crochet heart so it looks neat instead of like it survived a dramatic yarn tornado. Whether you want an applique, a gift topper, a garland piece, or a tiny pocket-sized love token, this guide will help you make one without needing a translator, a time machine, or a support group.
Why a Crochet Heart Is the Perfect Beginner Project
A crochet heart is a smart project for beginners because it teaches several useful skills in one small shape. You get practice making a starting loop, working into a center ring, using tall and short stitches for shaping, and finishing cleanly. In other words, it is tiny, but it pulls its weight.
It is also practical. Once you know how to crochet a heart, you can stitch them onto hats, bags, baby blankets, bookmarks, cards, and gift wrap. You can make them flat, puffy, colorful, striped, or ridiculously sparkly if that is your thing. Crochet hearts are like potato chips: you may plan to make one, but suddenly you have twelve and are brainstorming a heart garland for your wall.
What You Need Before You Start
Before you crochet a heart, gather a few basic supplies. Keeping things simple makes the learning curve much less dramatic.
- Yarn: Medium or worsted-weight yarn is the easiest choice for beginners because it is easier to see and hold.
- Crochet hook: A hook around 4 mm to 5 mm works well for many beginner yarns.
- Yarn needle: You will need this to weave in the ends.
- Scissors: Small, sharp scissors make finishing easier.
- Stitch marker: Optional, but helpful if you lose track of where a round starts or ends. And yes, that happens to everyone.
If you are brand-new to crochet, pick a smooth yarn in a light color. Black fuzzy yarn may look chic, but it is basically the final boss of beginner crochet.
Crochet Terms You Should Know First
Most heart patterns use abbreviations, so it helps to know the basics before diving in. Here are the most common terms you will see in a beginner crochet heart tutorial:
- ch = chain
- sl st = slip stitch
- sc = single crochet
- hdc = half double crochet
- dc = double crochet
- tr = treble crochet
- st = stitch
- sp = space
- rnd = round
One quick note: this article uses U.S. crochet terms. That matters. A double crochet in the U.S. is not the same stitch name in U.K. patterns, so always check which terminology a pattern is using before you start.
How to Crochet a Heart: Easy Step-by-Step Instructions
There are many ways to make a crochet heart, but one of the easiest methods is to work into a magic ring and build the heart shape with a combination of taller and shorter stitches. Tall stitches help create the curved top sections, while shorter stitches smooth the shape and keep things balanced.
Step 1: Make a Slip Knot
Start by making a slip knot and placing it on your hook. The knot should be snug enough to stay put but loose enough that the hook can still move easily. If it feels like your hook is wrestling the yarn for control, loosen it a little.
Step 2: Create a Magic Ring
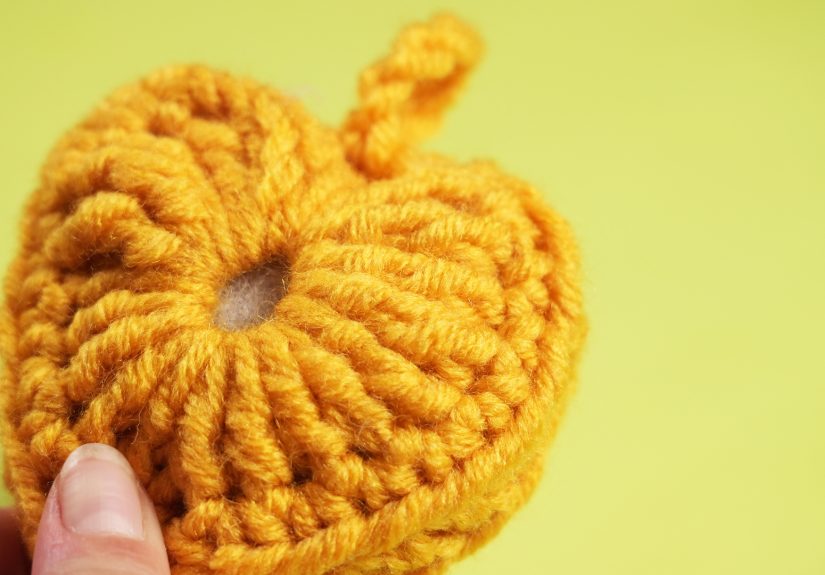
A magic ring, also called a magic circle, is a common way to begin a small shape worked in the round. It lets you pull the center closed neatly, which is especially helpful for a heart because you do not want a giant hole sitting in the middle like a missing tooth.
If the magic ring feels awkward at first, that is normal. Many beginners need a few tries before it clicks. If you truly hate it, you can make a small ring by chaining 4 and joining with a slip stitch. It works, although the center may stay a bit more open.
Step 3: Chain 2
Once your magic ring is ready, chain 2. This gives you a little height and helps set up the shape. In heart patterns, the first chains often act as part of the structure rather than as a full row by themselves.
Step 4: Build the First Top Curve
Work several tall stitches into the ring to form the first rounded side of the heart. A beginner-friendly sequence is to use treble crochets first, then double crochets. The taller stitches create the full top bump; the shorter ones begin to slope downward in a natural way.
Think of this section as sculpting with yarn. You are not just adding stitches; you are shaping the left “cheek” of the heart. Crochet is basically architecture with fluff.
Step 5: Form the Bottom Dip and Center Shape
After the first curve, place a tall stitch in the center area to help define the heart’s shape. This creates the depth between the top bumps and begins guiding the piece toward the point below. The transition from one stitch height to another is what makes the shape look like a heart instead of a confused red potato.
Step 6: Mirror the Second Top Curve
Now repeat the same idea on the other side: use double crochets followed by treble crochets to mirror the first bump. Your goal is symmetry, but do not panic if it is not perfect. Most crochet hearts improve instantly after you pull the center tight and smooth them out with your fingers.
Step 7: Chain and Close the Round
Finish the shape by chaining 2 and joining with a slip stitch. Then pull the yarn tail to close the magic ring. At this point, you should see a small flat heart shape appear. Pause for a second to admire it. This is an important crafting tradition.
Step 8: Fasten Off and Weave In the Ends
Cut the yarn, leaving a tail long enough to weave in securely. Pull the tail through the final loop to fasten off. Then thread the tail onto a yarn needle and weave it through the stitches. For a more secure finish, weave in one direction, then reverse direction before trimming the yarn. That small extra effort helps keep the heart from unraveling later.
A Simple Beginner Heart Pattern Cheat Sheet
If you want a quick reference, here is a simple one-round heart recipe in plain beginner-friendly language using U.S. terms:
This makes a small, quick crochet heart. If you want a slightly larger heart, work an additional shaping round using a mix of single crochet, half double crochet, and double crochet stitches around the outer edges, placing extra stitches at the curves and the bottom point.
How to Make Your Crochet Heart Look Better
Here is the part nobody tells beginners soon enough: most crochet pieces look better after a little finishing. If your heart seems uneven right off the hook, do not assume it failed. It may just be unfinished.
Use Even Tension
If one side of the heart looks bigger than the other, uneven tension is usually the culprit. Try not to grip the yarn like it owes you money. Relaxed, steady tension will help your stitches look more uniform.
Choose the Right Yarn and Hook Pairing
If your stitches look loose and holey, try a slightly smaller hook. If the stitches feel stiff and hard to insert into, try a slightly larger hook. The yarn label is a helpful starting point, but your personal tension also matters.
Shape It With Your Fingers
Before you judge the finished heart, flatten it gently and adjust the curves with your fingertips. A quick smoothing can make a big difference.
Block It If Needed
If the heart curls or twists, light blocking may help. Blocking is simply the process of shaping the piece and letting it dry into a cleaner finish. This is often more useful with natural fibers, but even a little steam or gentle shaping can improve the final look.
Common Beginner Mistakes and How to Fix Them
My Heart Has a Hole in the Center
This usually means the magic ring was not pulled tight enough. Tug the tail again before weaving it in. If you used a chain ring instead of a magic ring, a tiny opening is normal.
My Heart Looks Crooked
Double-check your stitch count. Missing one double crochet or adding an accidental extra stitch can throw off the balance. Also make sure you mirrored the same stitch sequence on both sides.
My Stitches Are Too Tight
Many beginners crochet too tightly, especially when nervous. Loosen your grip a bit and consciously keep the loops on the hook roomy enough to move. Crochet should feel controlled, not like you are defusing a bomb.
I Keep Losing My Place
Use a stitch marker or even a safety pin to mark the beginning or end of the round. Tiny projects move fast, which is fun, but they also make it easy to lose track.
Fun Ways to Use a Crochet Heart
Once you finish your first crochet heart, you will quickly realize it is not just a cute practice piece. It is a tiny multitool of crafting joy.
- Use it as an applique on hats, scarves, or tote bags.
- String several together for a heart garland.
- Add one to a handmade card or gift tag.
- Sew two together and lightly stuff them for a puffy ornament.
- Attach one to a bookmark, keychain, or zipper pull.
- Make a set in different colors for Valentine’s Day decor or baby shower accents.
In other words, learning how to crochet a heart is not just about making one shape. It is about unlocking a whole category of easy handmade decorations and gifts.
Beginner Tips for Faster Success
- Practice the magic ring by itself before adding the heart stitches.
- Say the stitch sequence out loud if it helps you remember the rhythm.
- Use a light-colored yarn so you can clearly see each stitch.
- Do not restart every time one stitch looks weird. Keep going, then assess the full shape.
- Make three hearts in a row. The third one will usually look much better than the first.
Real Experiences With Crocheting a Heart
The funny thing about learning how to crochet a heart is that the emotional journey is often bigger than the project itself. Many beginners start with the purest optimism. They sit down with fresh yarn, a shiny hook, and the belief that this tiny heart will take five minutes. Ten minutes later, they are squinting at a loop, whispering, “Why do you look like a jellyfish?” That, surprisingly, is part of the process.
A lot of first-time crocheters discover that the magic ring is the real plot twist. It can feel weird and floppy at first, like yarn has suddenly developed opinions. But once it clicks, it feels like unlocking a secret door. That is often the moment beginners go from “I am trying crochet” to “I may now require a basket for my yarn.” The heart becomes more than a small project; it becomes proof that unfamiliar techniques can become familiar with repetition.
Another common experience is realizing that crochet hearts teach patience in a sneaky way. Because the project is small, it seems like it should be easy. But small projects leave less room for hiding mistakes. If your tension changes halfway through, the heart tells on you immediately. If you forget a stitch, the shape goes slightly wonky. At first, that can be frustrating. Then it becomes oddly empowering. You start to understand that handmade does not mean machine-perfect. It means learned, adjusted, and improved.
People also tend to remember their first successful crochet heart with surprising affection. It is one of those little milestones that feels bigger than it sounds. A person who could not read a pattern last week is suddenly holding a recognizable heart made from yarn and determination. That tiny object often ends up pinned to a bulletin board, tucked in a drawer, clipped to a backpack, or gifted to someone with the sentence, “It is not perfect, but I made it.” Honestly, that sentence contains more charm than perfection ever could.
There is also a social side to it. Crochet hearts are the kind of project people share. Someone makes one and sends a photo to a friend. Another person makes six and turns them into garland. A parent teaches a child. A grandparent teaches a teenager. A beginner posts their wobbly first attempt online and discovers a whole crowd of crafters saying, “Mine looked weird too. Keep going.” That encouragement matters. It turns a solitary hobby into a shared experience.
Over time, crocheting a heart becomes less about following exact steps and more about developing feel. You begin noticing how the height of a stitch changes the curve. You learn how a tighter pull sharpens the point. You understand when a heart needs blocking and when it just needs a gentler touch. Those are the small experiences that make someone better at crochet without them even realizing it.
So yes, a crochet heart is cute. It is also a clever little teacher. It shows beginners how to shape fabric, recover from mistakes, read stitch language, and trust repetition. Most of all, it shows that a ball of yarn can become something meaningful in your hands, even if the first version looks slightly dramatic. Especially if the first version looks slightly dramatic.
Final Thoughts
If you want a small project that teaches real skills, a crochet heart is a great place to start. It introduces you to essential stitches, basic shaping, working in the round, and clean finishing, all without committing you to a giant blanket that may follow you around the house for six months.
The best way to improve is simple: crochet one heart, then another, then another. Change the yarn color, try a different hook, experiment with tighter or looser tension, and see what happens. Before long, you will have a sweet pile of handmade hearts and enough confidence to move on to bigger crochet projects. Not bad for something that starts with one hook, one strand of yarn, and one small loop.


