Table of Contents >> Show >> Hide
- Why Use a Steam Cleaner for Car Detailing?
- What You’ll Need
- Before You Start: Steam Safety
- The 6-Step Steam Detailing Process (with Pictures)
- Pro Tips That Make a Big Difference
- What Not to Steam
- How Long Does It Takeand Is It Worth It?
- Quick FAQs
- Conclusion
- Real-World Experience: What 12+ Full-Steam Details Taught Me
Skip the chemical fog and unleash the power of (very) hot water. Here’s your complete, pro-level guide to safely steam-cleaning a car so it looks, smells, and feels freshwithout wrecking leather, screens, or electronics.
Why Use a Steam Cleaner for Car Detailing?
Steam loosens gunk, lifts stains, and helps neutralize odors with minimal chemicals. Dry vaportypically produced at over ~200°Fpenetrates fabric, softens sticky residues on plastics, and gets into crevices that brushes and wipes miss. Used correctly, it’s a fast, eco-friendlier way to deep-clean interiors while reducing drying time compared with soaking methods.
That said, “steam clean” doesn’t automatically mean “disinfect.” Cleaning and sanitizing are different from disinfecting; when you actually need disinfection (e.g., illness cleanup), you still follow EPA-registered product directions and required dwell times. Steam is a great cleaning aidbut it’s not a free pass to skip proper disinfectant usage where needed.
What You’ll Need
- Steam cleaner with adjustable pressure and accessories (detail nozzle, triangular head, upholstery tool, brush set, and microfiber bonnet).
- Vacuum (crevice tool & brush), soft interior brushes, and plenty of clean microfiber towels.
- Dedicated leather cleaner/conditioner (for real leather only), and a gentle APC (all-purpose cleaner) for stubborn spots.
- LCD-safe cleaner and a very soft microfiber for the infotainment screen. Avoid ammonia-based glass cleaners on screens.
- Optional: enzyme odor remover for organic smells; replacement cabin air filter if odors persist from vents.
Safety first: Test in an inconspicuous spot, keep moving (don’t dwell heat), and avoid delicate materials like suede, alcantara, and some untreated leathers. Always defer to your vehicle and steam tool manuals.
Before You Start: Steam Safety
- Mind the heat. High heat helps lift soils but too much heat or dwell can warp plastics or raise nap on fabrics. Keep the tool moving and use microfiber bonnets to buffer heat on seats and headliners.
- Electronics & screens. Never blast steam directly into buttons, switches, or screen edges. Use a lightly damp (not wet) microfiber on screens.
- Engine bays? Skip them with household steamers. Sensitive electrical components don’t like heat + moisture. If you must, use a pro and protect electronicsbetter yet, leave it.
The 6-Step Steam Detailing Process (with Pictures)
Each step includes a suggested photo so you can mirror the angle and technique.
Step 1: Strip the Interior & Vacuum Like a Pro
Remove floor mats, trash, and personal items. Slide seats fully forward/back to expose rails. Vacuum from top down: headliner (lightly), seats, center console edges, door pockets, then floors and mats. A thorough dry vacuum means less wet mess later and fewer mud streaks when steam lifts soil.
Step 2: Pre-Treat Stains, Then Steam Fabrics
Spot-treat obvious stains (coffee, grease) with a fabric-safe cleaner. On cloth seats and carpets, set the steamer to a moderate setting. Wrap the triangular head with a clean microfiber bonnetthe steam lifts, the bonnet captures. Work in overlapping passes; replace bonnets as they load up. Avoid soaking foam under the seat fabric; you’re cleaning with heat, not flooding.
For headliners, use minimal pressure and very brief passesadhesive can fail with moisture and heat. If a spot persists, stop and switch to gentle chemistry + blotting to avoid sag.
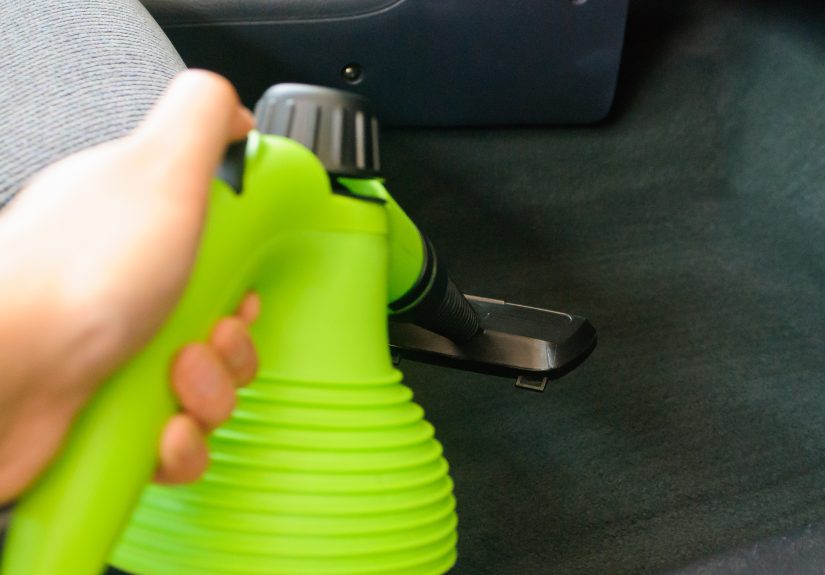
Step 3: Plastics, Vinyl, and Tight Nooks
Use the detail nozzle to lift grime out of cup holders, seat belt buckles, and console seams. Keep the nozzle a short distance away and immediately chase with a microfiber towel so loosened grime doesn’t resettle. For textured plastics, a nylon brush attachment (light pressure) speeds things up.
Door jambs and sills love steamquick passes make rubber seals and latches look new. Wipe dry to prevent spotting and squeaks.
Step 4: Leather the Right Way
Most modern automotive “leather” is coated and tolerates brief, buffered steam passesalways wrapped with a towel to diffuse heat. Never linger, avoid direct steam on perforations, and follow with a pH-appropriate leather cleaner/conditioner to replenish finishes. Skip steam entirely on suede/alcantara.
Step 5: Screens, Glass, and High-Touch Areas
Do not steam the screen. Use an LCD-safe cleaner and a dedicated, ultra-soft microfiber. For steering wheels, shifters, and controls, a short, off-axis puff of steam (or just APC on a towel) lifts body oils; immediately wipe dry. Finish interior glass last to remove haze created during steaming.
Step 6: Deodorize, Dry, and Replace the Cabin Filter (if needed)
Open all doors for ventilation. If odors linger after cleaning vents and carpets, check the cabin air filterfunky or restricted airflow is a classic sign it’s due. Replace as needed, then run the HVAC on fresh air to purge moisture.
Pro Tips That Make a Big Difference
- Sequence matters: Vacuum → fabrics → plastics → leather → screens → glass. You won’t re-soil what you just cleaned.
- Bonnet swap: When the bonnet looks dark or feels damp, swap itdirty bonnets smear soils back.
- Low moisture mantra: Steam is about vapor, not soaking. Over-wetting seats causes wicking and long dry times.
- Don’t chase mold with steam alone: Steam can clean, but established mold in fabrics requires proper remediation standards.
What Not to Steam
- Infotainment screens and digital clusters (use LCD-safe methods).
- Suede/alcantara and some delicate textilesconsult care labels.
- Under-hood electronics and sensorsskip engine-bay steaming with consumer units.
How Long Does It Takeand Is It Worth It?
A well-practiced DIYer can steam-detail an average sedan in 60–120 minutes depending on soil level and pet/kid situations. Compared with saturating shampoos or extraction-only methods, steam reduces chemical use and drying time, and it shines on hard-to-reach crevices and textured plastics. For severely soiled or biohazard scenarios, consider a pro who follows IICRC guidance.
Quick FAQs
Will steam ruin leather?
Not if you buffer with a towel, keep the tool moving, and follow with conditioner. Never use steam on suede/alcantara.
Can I steam the headliner?
Only with very light, brief passes. Excess heat/moisture can weaken the adhesive and cause sag.
Is steam enough to disinfect?
Cleaning ≠ disinfecting. If disinfection is required, use an EPA-registered product and follow the label’s dwell time.
Which tools do pros like?
Pros often use triangular heads wrapped in microfiber; many note steam can be faster than extraction on moderately dirty fabrics.
Conclusion
Steam detailing is the “cleaner clean” for modern interiorsless chemical residue, quicker drying, and better access to the crumb universe living in your car’s crevices. Respect heat, protect sensitive materials, and work in a smart sequence, and you’ll get pro-level results in an afternoon.
Main keywords (naturally used): steam clean car interior, car detailing with steam, steam cleaner for cars, clean car seats with steam, detail car at home.
Related LSI keywords: upholstery steam cleaning, microfiber bonnet, interior sanitizing, LCD-safe screen cleaning, cabin air filter, automotive leather care.
Meta for Publishers
Real-World Experience: What 12+ Full-Steam Details Taught Me
Here’s a practical, 500-word brain dump to smooth your first steam session.
1) Bonnet discipline is half the game. The first time I steamed a cloth seat, the bonnet loaded up after two minutes and started smearing haze. Swapping bonnets every section (seat base, seatback, bolsters) kept results crisp and prevented “wet dog” smells later. If you don’t have a stack of bonnets, wrap a fresh microfiber tightly and rotate clean faces as they soil.
2) Heat is a toolnot a dare. More heat ≠ better cleaning on every surface. I once overcooked a textured console and created faint gloss patches. Since then, I start low/medium on plastics, only bumping up when needed. On cloth, the triangular head with a bonnet at moderate steam punches above its weightless risk, plenty of cleaning.
3) Chase the steam with a towel. The coolest pros wipe immediately after each pass. The steam lifts; the towel grabs. If you steam a cup holder and admire your reflection instead of wiping, the loosened grime dries back as a film. Keep one hand on the nozzle and the other holding a folded towel like a catcher’s mitt.
4) Headliners demand restraint. A 5-second dwell on a greasy fingerprint workedbut a 10-second pass raised the nap and left a “clean halo.” Now I spot-treat with a gentle cleaner, dab, then give a <emquick steam kiss to blend. If your headliner is saggy or stained from above (sunroof leak), consider professional help.
5) Leather likes “little and later.” Quick, towel-buffered passes to lift grime; then a proper leather cleaner and light conditioner once the surface is cool. On perforated leather, I avoid direct steam entirely and use a soft brush with cleanersteam can push moisture into foam.
6) Vents and odors are a team sport. A short puff across the vent faces plus a nozzle near intake while the fan runs on fresh air helps, but if the cabin filter is ancient, smells return. Replacing the filter after a deep clean locks in that “new-car-ish” aroma. If there’s a stubborn mystery odor, check under seats and the spare tire well; I’ve found spilled latte graveyards and a half-eaten fry nation.
7) Sequence saves time. Doing glass last clears the light film that steam can kick up. A dedicated screen cloth (never used on anything else) prevents micro-marring on infotainment. It’s tedious to baby the screen, but one scratch is forever.
8) Know when to call it. If a stain keeps ghosting back after two cycles, don’t scorch it. Blot, neutralize with the right chemistry, and return when the fabric’s dry. Steam is powerful, but patience wins the long game.
Bottom line: Steam detailing rewards a light touch, fresh towels, and a smart order of operations. Once you find your rhythm, the cabin dries faster, fabrics look brighter, and you’ll retire half the harsh chemicals under your sink.