Table of Contents >> Show >> Hide
- Why Build a Toolbox Instead of Buying One?
- Best Toolbox Design for Beginners
- Materials Needed to Make a Wooden Toolbox
- Planning the Toolbox Dimensions
- Step-by-Step Guide: How To Make a Toolbox
- Step 1: Measure and Mark Your Wood
- Step 2: Cut the Bottom and Side Panels
- Step 3: Cut and Shape the End Panels
- Step 4: Dry-Fit the Toolbox
- Step 5: Glue and Clamp the Pieces
- Step 6: Drill Pilot Holes and Drive Screws
- Step 7: Install the Handle
- Step 8: Sand the Toolbox Smooth
- Step 9: Apply Paint, Stain, or Clear Finish
- Optional Toolbox Upgrades
- Safety Tips for Building a Toolbox
- Common Mistakes to Avoid
- Practical Uses for Your DIY Toolbox
- Real-World Experience: Lessons From Making a Toolbox
- Conclusion
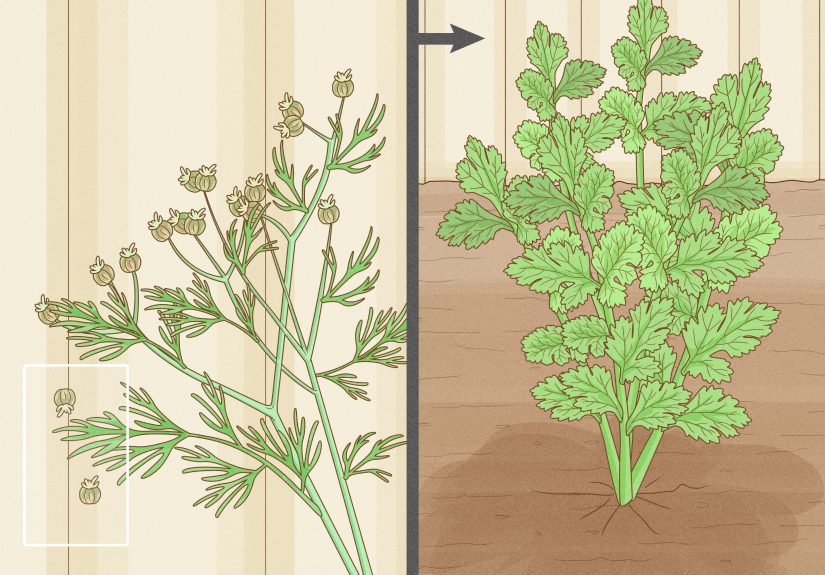
A good toolbox is more than a box with a handle. It is a portable command center, a small wooden sidekick, and the one thing standing between “I know exactly where my screwdriver is” and “why is the screwdriver in the laundry room?” If you enjoy DIY projects, learning how to make a toolbox is one of the most useful beginner woodworking projects you can tackle. It is simple enough for a first-time builder, practical enough for daily use, and customizable enough to make you feel like a workshop wizard with sawdust on your shoes.
This guide walks you through how to build a wooden toolbox from scratch using basic materials, common tools, and straightforward joinery. You do not need a professional cabinet shop, a wall full of expensive machinery, or a beard that looks like it came with a wood lathe. You only need a plan, patience, safety gear, and a willingness to measure twice before cutting once. Actually, measure three times if coffee is involved.
Below, you will learn how to choose the right wood, plan toolbox dimensions, cut the pieces, assemble the body, install a handle, sand the surface, apply a protective finish, and personalize the design. By the end, you will have a sturdy DIY wooden toolbox that can carry hand tools, gardening supplies, craft gear, paint brushes, fasteners, or whatever else currently lives in a suspicious pile on your workbench.
Why Build a Toolbox Instead of Buying One?
Store-bought toolboxes are convenient, but making your own toolbox has a charm that plastic bins simply cannot match. A wooden toolbox feels solid, looks good, and can be built to fit the tools you actually own. Instead of adjusting your tools to a box, you adjust the box to your tools. That is the difference between smart storage and a metal lunchbox having an identity crisis.
A homemade toolbox also teaches essential woodworking skills. You practice measuring, cutting, drilling, sanding, gluing, fastening, and finishing. These are the same basic skills used in shelves, benches, planters, cabinets, and many other DIY projects. In other words, this small build is a gateway project. Today it is a toolbox. Tomorrow you may be casually saying, “I built that bookcase,” while everyone at the barbecue suddenly respects you more.
Best Toolbox Design for Beginners
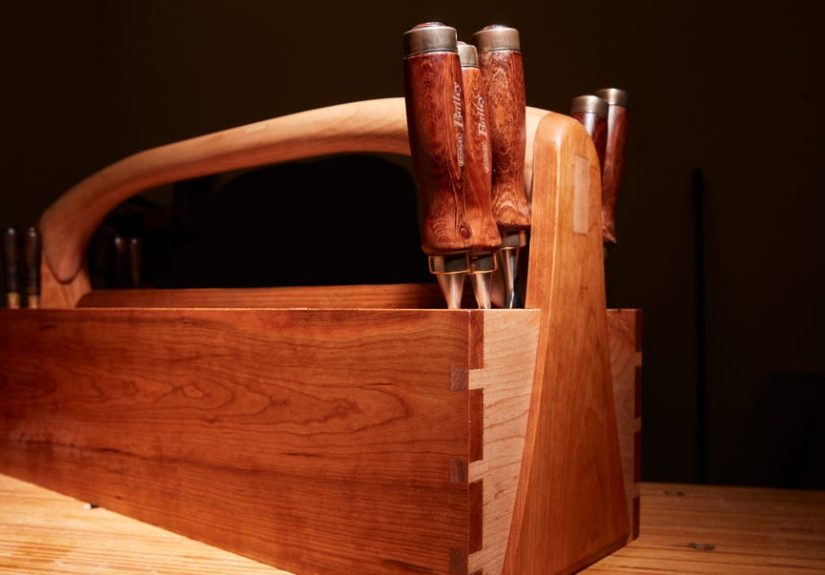
The easiest toolbox to build is an open wooden tote. It usually has a flat bottom, two long side panels, two end panels, and a dowel or wooden handle running across the top. This design is popular because it is lightweight, easy to assemble, and practical. You can see your tools at a glance, grab what you need quickly, and avoid digging through mysterious layers of sockets, tape, and old wall anchors.
For this article, we will focus on a classic open wooden toolbox with simple butt joints reinforced by wood glue and screws. If you want to upgrade the design later, you can add dividers, a removable tray, leather straps, a drawer, or a hinged lid. But for a first build, simple is strong. Fancy joinery is fun, but your hammer does not care whether the box has dovetails. It just wants a ride.
Materials Needed to Make a Wooden Toolbox
Here is a beginner-friendly materials list for a medium-size toolbox. You can adjust the dimensions depending on your tools, but this build works well for common household hand tools.
Wood and Hardware
- One 1×10 board, about 4 feet long, for the bottom and side panels
- One 1×6 board, about 3 feet long, for the end panels
- One 3/4-inch or 1-inch wooden dowel for the handle
- Wood glue
- 1 1/4-inch wood screws or trim screws
- 120-grit and 220-grit sandpaper
- Wood filler, optional
- Wood stain, paint, polyurethane, tung oil, or another protective finish
Tools You Will Use
- Tape measure
- Pencil
- Combination square or speed square
- Handsaw, circular saw, jigsaw, or miter saw
- Drill and drill bits
- Clamps
- Sanding block or random orbital sander
- Safety glasses
- Dust mask or respirator
- Hearing protection if using power tools
Pine is a great choice for a first toolbox because it is affordable, lightweight, and easy to cut. Plywood is another smart option, especially if you want a sturdy box that resists seasonal wood movement. Half-inch plywood keeps the toolbox lighter, while 3/4-inch plywood makes it stronger but heavier. If you plan to carry heavy tools, do not make the box too large. A huge toolbox full of tools can quickly turn into a portable gym membership.
Planning the Toolbox Dimensions
Before cutting wood, decide what the toolbox needs to carry. Lay your longest tool on the board and add 2 to 3 inches of extra length. This gives the tool room to fit without turning every cleanup into a puzzle. For many homeowners, an 18-inch to 22-inch long toolbox is plenty. A practical size is about 20 inches long, 8 inches wide, and 9 to 10 inches tall including the handle.
Here is a simple cut list for a classic wooden toolbox:
- Bottom panel: 20 inches long by 7 inches wide
- Two side panels: 20 inches long by 5 inches high
- Two end panels: 7 inches wide by 9 inches high
- Handle dowel: about 20 inches long
The end panels can be shaped with angled shoulders or a simple house-like profile. A common design is to cut the end panels as rectangles first, then mark a centered point near the top and draw angled lines down to the side edges. This creates a peak where the handle will pass through. The shape is not only attractive; it also gives the toolbox clearance for taller tools.
Step-by-Step Guide: How To Make a Toolbox
Step 1: Measure and Mark Your Wood
Start by marking all your pieces clearly. Use a tape measure and square so the lines are straight. Label each part: bottom, side, side, end, end. This sounds unnecessary until the boards are lying on the bench looking suspiciously similar. A pencil label can save you from accidentally turning a side panel into modern art.
Check the width of your boards before finalizing the plan. Dimensional lumber does not always match its name exactly. For example, a 1×10 board is usually about 3/4 inch thick and 9 1/4 inches wide, not a full 1 inch by 10 inches. This is normal in lumber land, where numbers are more like polite suggestions.
Step 2: Cut the Bottom and Side Panels
Cut the bottom panel first, then cut the two side panels to the same length. If using a circular saw, clamp the board securely and use a straightedge guide when possible. If using a handsaw, take your time and let the saw do the work. For clean cuts, support the board near the cut line so the offcut does not snap away at the end.
After cutting, place the side panels against the bottom panel to check the fit. They should be equal in length and sit flush with the bottom. Minor imperfections can be sanded later, but large gaps may weaken the assembly.
Step 3: Cut and Shape the End Panels
Cut two end panels to size. To create the classic peaked shape, find the center of the top edge and mark it. Then measure down equally on both sides and draw diagonal lines from those side marks to the center point. Cut along the lines with a jigsaw or handsaw.
Next, mark the hole for the handle dowel. The hole should be centered near the top of each end panel. Use a drill bit or hole saw that matches the dowel diameter. For a snug fit, test the hole on a scrap piece first. A handle that rattles is annoying. A handle that does not fit at all is a small wooden tragedy.
Step 4: Dry-Fit the Toolbox
Before adding glue, assemble the pieces without fasteners. This is called a dry fit, and it is one of the best habits in woodworking. Place the bottom panel flat, position the side panels along the long edges, and set the end panels at each end. Slide the dowel through the handle holes to see how everything lines up.
If the pieces do not sit square, adjust them now. A toolbox does not need to be furniture-grade perfect, but it should not look like it survived a minor earthquake. Use a square to check the corners and make sure the box sits flat on the work surface.
Step 5: Glue and Clamp the Pieces
Apply a thin, even bead of wood glue along the edges where the panels meet. Too much glue creates messy squeeze-out, while too little glue weakens the joint. Spread the glue lightly if needed, then clamp the pieces together. Wipe away excess glue with a damp rag before it dries.
Wood glue adds strength, but screws provide immediate holding power. Together, they make a reliable joint for a toolbox that will be lifted, bumped, and occasionally treated with the emotional gentleness of a football.
Step 6: Drill Pilot Holes and Drive Screws
Drill pilot holes before inserting screws. Pilot holes help prevent the wood from splitting, especially near board ends. Countersink the holes slightly if you want the screw heads to sit below the surface. Then drive screws through the side panels into the bottom and through the end panels into the side and bottom pieces.
Do not overdrive the screws. If the screw head buries too deeply, it can weaken the wood around it. Aim for snug, not savage. Your drill is a tool, not a tiny thunder machine.
Step 7: Install the Handle
Slide the dowel through the holes in the end panels. Add a dab of wood glue inside each hole before seating the handle. If you want extra strength, drive a small screw through the outside of each end panel into the dowel. Make sure the screw is centered and short enough that it does not poke through the handle.
The handle should feel comfortable in your hand. If the dowel has sharp edges or rough spots, sand it smooth before installation. You can also round the ends slightly for a cleaner look.
Step 8: Sand the Toolbox Smooth
Sanding turns a rough project into something you actually want to touch. Start with 120-grit sandpaper to smooth saw marks, sharp corners, and glue residue. Then move to 220-grit sandpaper for a finer surface before finishing. Sand with the grain whenever possible to reduce visible scratches.
Pay special attention to the handle, top edges, and corners. A toolbox should be comfortable to carry. Sharp corners look crisp for about five minutes, then they start attacking your knuckles. Lightly easing the edges makes the box feel better and helps the finish wear more evenly.
Step 9: Apply Paint, Stain, or Clear Finish
A finish protects the wood from dirt, moisture, and everyday workshop abuse. For a rustic look, apply stain and then a protective clear coat. For a cheerful garage upgrade, use paint. For a natural appearance, apply tung oil, Danish oil, or water-based polyurethane.
If using polyurethane or another film finish, let each coat dry fully and sand lightly between coats with fine sandpaper. Remove sanding dust before applying the next coat. Two or three thin coats usually look better and last longer than one heavy coat. Thick finish can drip, bubble, or dry unevenly, which is your toolbox’s way of saying, “Please stop frosting me like a cupcake.”
Optional Toolbox Upgrades
Add Dividers
Dividers help separate screwdrivers, pliers, measuring tools, and fasteners. Cut thin strips of plywood or pine and glue them inside the box. A center divider can keep tall tools standing upright instead of sliding around like passengers on a bus with bad brakes.
Add a Removable Tray
A removable tray is useful for small items such as nails, bits, pencils, tape, and utility blades. Build a shallow tray that rests on cleats attached to the inside walls. Make sure the tray is narrow enough to lift out easily.
Add a Bottle Opener or Tape Hook
For a garage or workshop toolbox, you can attach a metal bottle opener to one end. For a painting or repair toolbox, install a hook for painter’s tape or masking tape. Small custom details make the toolbox more useful and give it personality.
Burn, Brand, or Stencil a Name
A personalized toolbox makes a great gift. Add a name, initials, workshop logo, or simple stencil. If the box is for a child learning basic tools, personalization makes it feel special and encourages responsibility. Also, it reduces the chance of someone “borrowing” it forever, which is the official fate of many nice things.
Safety Tips for Building a Toolbox
Woodworking safety matters, even for small projects. Wear safety glasses when cutting, drilling, or sanding. Use hearing protection when operating loud power tools. Wear a dust mask or respirator while sanding or cutting, especially indoors. Keep loose clothing, jewelry, and long hair away from spinning blades or bits.
Clamp your workpieces whenever possible. A board held by your hand can shift suddenly, and that is how simple projects become exciting in the wrong way. Keep your workspace clean so you are not stepping on offcuts, screws, cords, or the pencil you just spent five minutes blaming everyone else for moving.
If children are helping, give them age-appropriate tasks such as measuring, sanding, painting, or applying stickers. Adults should handle power saws and supervise drilling. A first toolbox can be a wonderful family project, but safety should stay in charge from the first pencil mark to the final coat of finish.
Common Mistakes to Avoid
Making the Toolbox Too Big
A large toolbox seems practical until it is full. Tools are heavy, and a giant wooden box can become difficult to carry. Build for the tools you use most often, not every tool you have ever owned since 2009.
Skipping Pilot Holes
Screws driven near the ends of boards can split the wood. Pilot holes take only a few seconds and can save the project from cracks that look like the wood is frowning.
Ignoring the Handle Comfort
A rough or narrow handle makes carrying uncomfortable. Use a smooth dowel, sand it well, and consider rounding the edges of the end panels near the handle area.
Rushing the Finish
Paint and clear coats need time to dry. Rushing the finish can leave fingerprints, dust bumps, tacky spots, or a surface that never looks quite right. Let the finish cure before loading the toolbox with metal tools.
Practical Uses for Your DIY Toolbox
Once finished, your wooden toolbox can serve far beyond the garage. Use it as a gardening caddy for gloves, pruners, seed packets, and plant labels. Turn it into a painting kit with brushes, rollers, painter’s tape, and drop cloth clips. Use it as a craft organizer for scissors, glue, markers, and rulers. It can even become a rustic centerpiece filled with jars, greenery, or seasonal decorations. Your toolbox does not have to know it is decorative. Let it enjoy the promotion.
For home repairs, keep the essentials inside: hammer, tape measure, screwdrivers, pliers, adjustable wrench, utility knife, level, pencil, flashlight, and a small container of screws and wall anchors. With those basics ready to go, you can handle loose cabinet pulls, wobbly chairs, picture hanging, minor repairs, and the mysterious things homes do at 8:47 p.m. on a Sunday.
Real-World Experience: Lessons From Making a Toolbox
The first thing you learn when making a toolbox is that simple projects are not always “easy” in the way people promise online. They are easy in the sense that the steps are understandable, not in the sense that your first cut will be perfect while sunlight beams through the shop window and a bald eagle nods approvingly. In real life, the pencil rolls away, the clamp is always one inch too far, and at least one board has a personality problem.
One useful experience is to start by arranging your actual tools on the bench. This sounds obvious, but many beginners choose dimensions from a plan without checking their own tool collection. A toolbox that is too short for your handsaw or too shallow for your favorite screwdriver becomes a very handsome inconvenience. Lay out the tools you use most: hammer, tape measure, pliers, screwdrivers, wrench, utility knife, and small level. Then build around that group. The best toolbox is not the one with the most dramatic design. It is the one that fits your real habits.
Another lesson is that sanding matters more than you expect. A toolbox is handled constantly, so rough edges become annoying fast. The handle is especially important. Spend extra time smoothing the dowel and rounding the top corners of the end panels. The difference between “homemade” and “handmade” often comes down to the final 20 minutes of sanding. Nobody compliments a splinter.
Clamping is another area where experience teaches humility. Wood glue is slippery, and panels can slide around when pressure is applied. Dry-fit the pieces first, then glue one section at a time if needed. If you try to assemble everything at once, you may feel like you are wrestling a wooden octopus. Use clamps, check for square, and pause before driving screws. A calm builder makes a better box.
Finishing also teaches patience. Stain can highlight uneven sanding, and paint can reveal gaps you thought were invisible. A clear finish looks best when applied in thin coats. Let each coat dry, sand lightly, remove dust, and repeat. It is tempting to rush because the toolbox already looks done, but finish is what protects the wood from dirty hands, damp floors, and daily use. Think of it as armor, not makeup.
One of the most satisfying parts of the project is using the toolbox after it is finished. You notice little things immediately: whether the handle height feels right, whether the box balances well, whether the tools rattle too much, and whether you need a divider. These observations are not failures. They are the beginning of customization. Add a center divider, screw a small magnet strip inside for bits, install a hook for tape, or attach rubber feet to the bottom. A handmade toolbox can evolve with you.
Finally, making a toolbox builds confidence. It proves that useful things do not have to be complicated. A few boards, a dowel, glue, screws, and finish can become something you use for years. Every scratch it earns later becomes part of its story. Store-bought toolboxes get damaged; handmade toolboxes develop character. That is a generous way of saying dents are allowed.
Conclusion
Learning how to make a toolbox is one of the best beginner woodworking projects because it is practical, affordable, and genuinely satisfying. You can build a strong wooden toolbox with basic lumber, a simple handle, glue, screws, sandpaper, and finish. The project teaches measuring, cutting, drilling, assembly, sanding, and finishing without overwhelming you with complicated joinery.
The key is to design the toolbox around your actual tools, keep the size manageable, use pilot holes, smooth the handle, and protect the wood with a durable finish. From there, you can customize it with dividers, trays, paint, stain, labels, or personal details. Whether it lives in your garage, garden shed, craft room, or under the kitchen sink, a handmade toolbox brings order to chaos and gives your tools a home that looks much better than “somewhere in that drawer.”
Build it carefully, use it proudly, and do not be surprised if this simple wooden toolbox becomes the project that gets you hooked on DIY woodworking.