
Table of Contents >> Show >> Hide
- What Are Greek Theatre Masks?
- Best Materials for Making a Greek Theatre Mask
- Choose Your Greek Mask Style
- Method 1: How to Make a Greek Theatre Mask with Cardstock
- Method 2: How to Make a Papier-Mâché Greek Theatre Mask
- How to Design the Expression
- Color Ideas for Greek Theatre Masks
- How to Add Photos and Videos to Your Mask Project
- Classroom Tips for Making Greek Theatre Masks
- Common Mistakes to Avoid
- Experience Notes: What Making Greek Theatre Masks Teaches You
- Conclusion
- SEO Tags
Greek theatre masks are dramatic, expressive, slightly mysterious, andlet’s be honestwonderfully over-the-top. They do not whisper, “I am feeling a little sad today.” They shout, “BEHOLD, HUMAN MISERY!” from the back row of an open-air theater. That is exactly what makes them such a fun craft project for students, drama clubs, homeschool lessons, costume parties, and anyone who believes cardboard should occasionally become art.
In ancient Greek theatre, masks helped actors show emotion, switch characters, and communicate with large audiences. Today, making your own Greek theatre mask is a creative way to explore history, performance, design, and storytelling. You can keep the project simple with cardstock and paint, or go full drama-god mode with papier-mâché, sculpted brows, curling hair, and a mouth big enough to announce tragedy before breakfast.
This guide explains how to make Greek theatre masks step by step, including materials, design ideas, photo suggestions, video ideas, decorating tips, and classroom-friendly shortcuts. No toga required, although nobody is stopping you.

What Are Greek Theatre Masks?
Greek theatre masks were face coverings used by performers in ancient drama, especially tragedy, comedy, and satyr plays. They were designed with exaggerated expressions so audiences could quickly understand a character’s mood, age, gender, or social role. A giant frown meant tragedy was entering the chat. A huge grin meant comedy had arrived wearing sandals and bad ideas.
Ancient Greek performances were often held in large outdoor theaters. Because spectators could sit far from the stage, actors used strong gestures, powerful voices, costumes, and masks to make characters readable from a distance. Masks also helped a small number of actors play several roles. A performer could leave as a king, return as an old servant, and then reappear as a furious godall with a quick costume and mask change.
Most ancient masks were likely made from organic materials such as linen, wood, cork, leather, or similar lightweight substances. Because those materials decay, very few original performance masks survive. However, vase paintings, terracotta examples, sculpture, and ancient writing give us strong clues about their appearance and theatrical purpose.
Best Materials for Making a Greek Theatre Mask
You can make a Greek theatre mask in several ways. The best method depends on your time, age group, budget, and patience level. Papier-mâché gives the most sculptural result, while cardstock is faster and cleaner. Foam sheets are flexible and lightweight. A paper plate is the hero of last-minute school projects everywhere.
Basic Materials
- Cardstock, cardboard, paper plate, or a plastic mask base
- Newspaper strips or tissue paper for papier-mâché
- White school glue, flour paste, or papier-mâché paste
- Masking tape
- Scissors or a craft knife for adult use
- Pencil and eraser
- Acrylic paint, tempera paint, or markers
- Paintbrushes and water cup
- Elastic cord, ribbon, yarn, or a wooden dowel handle
- Hole punch
- Optional: yarn, raffia, paper curls, craft foam, air-dry clay, feathers, or fabric scraps
Safety Supplies
- Apron or old shirt
- Table covering
- Non-toxic glue and paint for kids
- Adult supervision for cutting eye holes
- Good ventilation if using sealers or spray finishes
Choose Your Greek Mask Style
Before cutting or gluing, decide what kind of character your mask will represent. Greek theatre masks were not subtle selfies. They were clear visual signals. Think of your mask as a billboard for emotion.
Tragedy Mask
A tragedy mask usually has downturned eyebrows, wide sorrowful eyes, hollow cheeks, and a frowning mouth. Use dark lines, cool colors, and dramatic shadows. This is the mask for doomed heroes, grieving queens, betrayed friends, and anyone who just realized they forgot their lines.
Comedy Mask
A comedy mask has raised brows, bright eyes, round cheeks, and a large smiling or laughing mouth. Use warm colors, playful shapes, and lively details. This mask is perfect for tricksters, servants, fools, gossiping neighbors, and characters who absolutely should not be trusted with a prophecy.
Old Person, God, Hero, or Chorus Mask
You can also make a mask for an old man, old woman, warrior, messenger, god, goddess, or chorus member. A chorus mask may look simpler and more uniform, especially if a group is making matching masks for a performance. A god mask can include gold paint, strong symmetry, and a high crown. A hero mask might feature strong brows, a proud nose, and bold colors.

Method 1: How to Make a Greek Theatre Mask with Cardstock
This is the fastest and easiest method. It is ideal for younger students, classroom activities, drama warm-ups, or anyone who wants less mess and more instant applause.
Step 1: Draw the Face Shape
Place a sheet of cardstock vertically. Draw a large oval, slightly longer than a normal face. Greek-inspired masks often look larger than life, so do not be afraid to exaggerate. A long chin, high forehead, or wide cheeks can make the mask more theatrical.
Step 2: Add Exaggerated Features
Draw large eye openings, bold eyebrows, a strong nose, and a dramatic mouth. For a tragedy mask, curve the mouth downward. For a comedy mask, draw a big open smile. Remember: if the expression looks too much, you are probably doing it right.
Step 3: Cut Out the Mask
Cut around the outer shape. Carefully cut out the eye holes. If children are making the mask, an adult should handle sharp cutting tools. Try the mask against your face to make sure you can see clearly.
Step 4: Reinforce the Sides
Add small pieces of tape to the left and right edges where the elastic or string will attach. Punch one hole on each side. Reinforcing the holes helps prevent tearing, especially if the mask will be worn during performance.
Step 5: Paint and Decorate
Paint the base color first. Tan, cream, white, brown, bronze, and terracotta shades work well for a classical look. Once dry, outline the eyebrows, eyes, nose, and mouth with darker paint or marker. Add hair with paper strips, yarn, or painted curls.
Step 6: Add Elastic or a Handle
Tie elastic cord through the side holes so the mask can be worn. For a safer classroom option, tape a wooden craft stick or dowel to the back and hold the mask in front of the face like a stage prop.
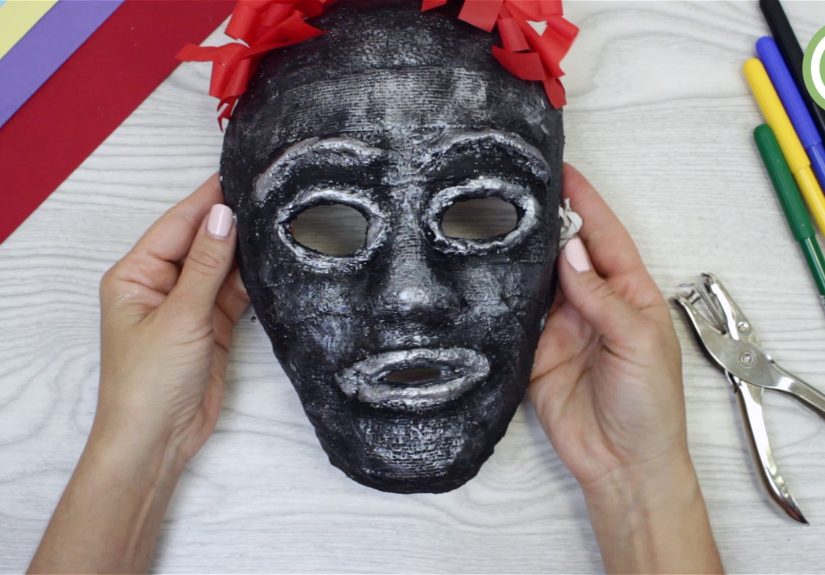
Method 2: How to Make a Papier-Mâché Greek Theatre Mask
For a more realistic and durable mask, use papier-mâché. This method takes longer because it needs drying time, but the finished mask can look wonderfully sculptural. It is also satisfying in the way only glue-covered newspaper can be.
Step 1: Make a Face Form
You need a curved base to shape the mask. You can use a plastic mask form, a balloon, a bowl, or crumpled newspaper taped into an oval. If using a balloon, inflate it to about head size and place it in a bowl so it does not roll away like a tiny escaping planet.
Step 2: Prepare Papier-Mâché Paste
Mix white glue with a little water until it has a brushable consistency. You can also use a flour-and-water paste. Tear newspaper into strips. Torn edges blend more smoothly than cut edges.
Step 3: Build the First Layers
Dip each strip into paste, remove excess glue with your fingers, and smooth it onto the form. Apply strips in overlapping directions. Two or three layers make a light mask; four or five layers create a stronger one. Leave space for the lower edge if you plan to trim the mask later.
Step 4: Sculpt the Features
Use folded cardboard, wadded paper, or air-dry clay to build raised eyebrows, a nose, cheekbones, lips, and a chin. Tape the shapes onto the mask base, then cover them with more papier-mâché strips. For a Greek theatre look, make the eyebrows bold and the mouth large. A tiny mouth will disappear on stage faster than a snack in a rehearsal room.
Step 5: Let It Dry Completely
Drying may take at least a day, and thick masks can take longer. Place the mask in a warm, dry area with airflow. Do not paint while it is damp, or the surface may wrinkle, soften, or develop unpleasant smells. Patience is part of the craft. So is checking it every ten minutes even though nothing has changed.
Step 6: Trim and Cut Openings
When dry, remove the mask from the form. Trim rough edges. Cut eye holes carefully. If you want the large Greek-style open mouth to be functional, cut that out too. Make sure the wearer can breathe comfortably and see safely.
Step 7: Paint the Mask
Apply a white base coat first if you want brighter colors. Then add skin tones, shadows, hair, facial lines, and emotion marks. For tragedy, paint shadows under the eyes and around the mouth. For comedy, brighten the cheeks and exaggerate laugh lines.
Step 8: Seal and Finish
If the mask will be reused, add a clear acrylic sealer after the paint dries. Use sealer in a ventilated area and follow the product instructions. Attach elastic, ribbon, or a handle. Add padding inside the forehead area if needed for comfort.

How to Design the Expression
The expression is the heart of the mask. A Greek theatre mask should communicate instantly, even from across the room. Before painting, hold your sketch at arm’s length. Can you tell what emotion it shows? If not, exaggerate the eyebrows, eyes, and mouth.
Use Eyebrows Like Emotional Arrows
Eyebrows are powerful. Slant them upward in the middle for sadness. Angle them downward toward the nose for anger. Lift them high for surprise. Make them curved and relaxed for joy.
Make the Mouth Stage-Ready
A large mouth is one of the most recognizable features of Greek-inspired masks. For tragedy, create a long oval or downturned shape. For comedy, use a crescent smile or open laughing mouth. Paint the inside dark to create depth.
Add Hair and Head Shape
Hair can show age, status, and personality. Use yarn for curls, raffia for wild hair, paper spirals for stylized locks, or painted shapes for a cleaner design. A high headpiece or crown can suggest a ruler, deity, or important character.
Color Ideas for Greek Theatre Masks
Traditional-inspired masks often look great in earthy colors: ivory, ochre, clay, charcoal, bronze, brown, black, and deep red. However, classroom and performance masks can use any color palette that supports the character.
- Tragedy: gray, blue, deep purple, black, white, muted brown
- Comedy: yellow, orange, red, pink, bright green, warm tan
- God or goddess: gold, white, silver, royal blue, deep red
- Chorus: matching neutral tones with small variations
- Monster or satyr: dark green, brown, black, copper, wild hair textures
How to Add Photos and Videos to Your Mask Project
If you are publishing this project online, photos and videos make the tutorial much easier to follow. Readers want to see the shape, the layers, the painting stages, and the final performance look. A Greek theatre mask is visual by nature, so do not hide the drama.
Recommended Photos
- Materials laid out on a table
- Initial pencil sketch
- Cut-out mask shape
- Papier-mâché layering process
- Close-up of sculpted eyebrows, nose, and mouth
- Base coat painting stage
- Final comedy and tragedy masks side by side
- Student or actor holding the mask during performance practice
Recommended Videos
- A quick materials overview
- A time-lapse of papier-mâché layering
- A painting demonstration for facial shadows
- A before-and-after transformation from sketch to finished mask
- A short performance clip showing how body language changes when wearing a mask
Classroom Tips for Making Greek Theatre Masks
If you are teaching this project, keep the first version simple. Students can create a cardstock mask in one class period, then build a more advanced papier-mâché version later. Start with a short discussion about Greek theatre, comedy, tragedy, chorus, and character types. Then ask each student to choose one emotion and design every feature around that emotion.
For younger students, pre-cut the eye holes or use mask templates. For older students, challenge them to research a Greek play, choose a character, and explain how their mask design reflects that role. A student designing Medea, for example, might use sharp angles, intense eyes, and dark colors. A student designing a comic servant might create raised eyebrows, a crooked grin, and lively hair.
Group projects work especially well. One group can create a chorus with similar masks. Another can create comedy and tragedy pairs. A third can film a short “behind the mask” video explaining their design choices. This turns a craft activity into a full arts integration project with history, writing, visual art, and performance.
Common Mistakes to Avoid
Making the Features Too Small
Small features may look cute up close, but they disappear from a distance. Greek theatre masks need bold shapes. Make the eyes, mouth, brows, and nose bigger than you think they should be.
Painting Before the Mask Is Dry
Wet papier-mâché and paint are not friends. Let the mask dry fully before decorating. If it feels cool, soft, or damp, give it more time.
Forgetting Comfort
A beautiful mask is not useful if it scratches, slips, or blocks vision. Test the fit before final performance. Add soft felt or folded tissue inside pressure points if needed.
Skipping the Performance Test
A mask changes how the body communicates. Once the mask is finished, practice walking, turning, bowing, pointing, and reacting. Big gestures are not silly here; they are historically on theme.
Experience Notes: What Making Greek Theatre Masks Teaches You
Making Greek theatre masks is one of those projects that looks simple at first and then quietly teaches half a dozen lessons while everyone is busy getting glue on their sleeves. The first lesson is that expression is design. A tiny change in the eyebrow can transform a character from worried to furious. A mouth tilted a few degrees lower can take a mask from “mildly disappointed” to “tragic hero who has just heard thunder and knows it is personal.”
The second lesson is that theatre is not only about the face. Once students or makers put on the mask, they quickly realize that normal facial expression is gone. They have to use posture, head angle, hands, shoulders, and movement. A sad character may curve inward. A proud hero may lift the chest. A comic character may bounce, lean, or move with exaggerated timing. This is where the craft becomes performance.
Another valuable experience is learning to solve practical problems. The mask may be too floppy, so you reinforce it with extra layers. The elastic may tear the side holes, so you add tape or cardboard patches. The paint may look flat, so you add shadows around the nose and mouth. The hair may fall off, so you discover that glue needs time and gravity is a ruthless critic. These little fixes build patience and creative confidence.
For classroom use, the most exciting moment often happens when students compare masks side by side. Even with the same instructions, every mask has a different personality. One comedy mask looks friendly, another mischievous, another slightly unhinged in a way that deserves its own subplot. Tragedy masks vary too: some look noble, some haunted, some like they just opened an email marked “urgent.” That variety helps students understand that ancient theatre used recognizable types, but artists still had room for interpretation.
Filming the process adds another layer of learning. A short time-lapse video helps makers see how rough materials become a finished character. Close-up photos reveal texture, brushstrokes, and construction choices. A final performance clip shows whether the mask reads clearly on camera. If the audience understands the emotion without explanation, the design works.
The best advice from experience is to make the mask stronger, bolder, and simpler than your first instinct. Stronger, because wearable crafts take more stress than flat artwork. Bolder, because theatre masks need to communicate at a distance. Simpler, because too many tiny decorations can distract from the expression. Focus on the big emotional signals first: eyes, brows, mouth, and silhouette. Add details only after the character is clear.
Most importantly, enjoy the theatrical weirdness of it all. Greek theatre masks are not meant to look like everyday faces. They are symbolic, heightened, and a little magical. When the finished mask is held up, it should feel like a character has entered the room before anyone says a word.
Conclusion
Learning how to make Greek theatre masks is more than a craft project. It is a hands-on way to explore ancient performance, visual storytelling, character design, and dramatic expression. Whether you use quick cardstock, sturdy cardboard, or layered papier-mâché, the goal is the same: create a bold face that communicates emotion instantly.
Start with a clear character. Exaggerate the features. Use color with purpose. Test the mask from across the room. Then bring it to life with movement, voice, and a little theatrical courage. After all, a Greek theatre mask sitting on a table is artbut a Greek theatre mask in performance is drama with eyebrows.


