Table of Contents >> Show >> Hide
- Why an Old Door Makes a Great Hall Tree
- Before You Start: Pick the Right Door
- Tools and Materials You May Need
- How to Transform an Old Door into a Hall Tree: Step by Step
- Design Ideas for Different Styles
- Common Mistakes to Avoid
- Why This DIY Project Is Worth It
- Real-World Experiences: What People Learn When They Turn an Old Door into a Hall Tree
- Conclusion
- SEO Tags
An old door is basically a second chance with hinges. One day it is leaning sadly in a garage, collecting dust and judgment. The next, it is the star of your entryway, holding coats, bags, scarves, and the daily avalanche of “where are my keys?” energy. If you love DIY projects that save money, add character, and make guests think, Wait, did you buy that at some charming antique market?, turning an old door into a hall tree is a smart project to tackle.
A hall tree is one of the hardest-working pieces of furniture in a home. It brings order to entryway chaos by combining hanging storage, seating, and often a shelf or cubby space. An old wooden door gives you the perfect vertical backbone for the project, especially if it has beautiful panels, worn paint, or vintage hardware details worth showing off. Better yet, it adds real personality that mass-produced entry furniture often lacks.
In this guide, you will learn how to transform an old door into a hall tree step by step, how to make it look polished instead of patched together, and how to customize it for your space. Whether your style leans farmhouse, cottage, rustic, vintage, or clean modern with a little soul, this project can be adapted to fit your home without losing its one-of-a-kind charm.
Why an Old Door Makes a Great Hall Tree
Repurposing an old door into a hall tree works so well because a door already has the right proportions. It is tall, sturdy, and visually substantial enough to anchor an entryway. Once you add hooks, a bench, or a shelf, it becomes a functional landing zone for everyday life.
There is also the style factor. A salvaged door brings texture, paneling, and age that new lumber tries very hard to imitate. Sometimes it has chipped paint, old knob holes, beveled details, or a weathered patina that gives the finished project depth. In other words, your DIY hall tree starts with character already built in.
And then there is the practical side. A hall tree made from an old door can be designed for compact entryways, narrow hallways, mudrooms, laundry rooms, or even the back door where shoes mysteriously multiply overnight. If you build it thoughtfully, it can combine vertical storage, a bench seat, shoe baskets, and wall-friendly organization in one footprint.
Before You Start: Pick the Right Door
Not every old door is a great candidate, so choose wisely. Solid wood doors are ideal because they are sturdy and easy to sand, patch, drill, and paint. Hollow-core doors can work for lightweight decorative versions, but they are less forgiving if you want heavy-duty hooks or a bench attached.
Look for these features
- A door that feels structurally sound and not warped beyond reason
- Interesting panels or molding that add visual appeal
- A size that fits your wall without swallowing the room
- Wood thick enough to hold screws and coat hooks securely
- Manageable damage, such as nail holes or surface scratches, rather than major rot
If the door came from an older home, especially one built before 1978, be careful with old paint. Test or treat it as a possible lead-paint surface before sanding or scraping. That one safety step is much less exciting than picking paint colors, but it is also much more important.
Tools and Materials You May Need
- Old door
- Screwdriver or drill/driver
- Sander or sanding block
- Wood filler
- Primer and paint or stain and sealer
- Paintbrushes and small roller
- Drop cloths
- Level and measuring tape
- Coat hooks
- Bench seat or lumber for a bench base
- Shelf board and brackets, if desired
- Wall anchors or stud-mounted screws
- Safety gear, including gloves, eye protection, and a dust mask or respirator
You do not have to build a bench from scratch if that sounds like a great way to lose your weekend and your patience. You can attach the door to a ready-made bench, a storage cubby, or a simple seat base. Many successful DIY hall tree projects mix a salvaged door with a new or repurposed bench underneath, and the combination looks intentional when the proportions are balanced.
How to Transform an Old Door into a Hall Tree: Step by Step
1. Measure Your Entryway First
Before you touch the door, measure the wall where the hall tree will live. Check width, height, depth, door swing clearance, and walking space. This matters more than people think. A hall tree that is too deep can make an entryway feel cramped, awkward, and slightly hostile. You want enough room to hang coats and sit down, but not so much bulk that guests have to turn sideways like they are squeezing through a crowded restaurant.
If your hallway is narrow, keep the design slim. Use a shallower bench, fewer protruding hooks, and a narrower shelf. A compact hall tree can still do a lot if every part earns its place.
2. Clean the Door and Remove Hardware
Take off knobs, locksets, plates, and any random mystery hardware from the door’s previous life. Give the surface a good cleaning with a degreasing cleaner so you are not sanding decades of grime into the air. Dirt, wax, and oily residue can ruin paint adhesion, so this is not a step to rush.
If you love the old hardware, save it. Some vintage backplates or knobs can be reused decoratively, especially if you want your finished hall tree to lean rustic or antique.
3. Repair the Surface Without Erasing Its Charm
Fill nail holes, dents, and deep scratches with wood filler. Tighten any loose joints if needed. If the door has beautiful age marks, keep some of them. A repurposed door should not look like it had a total identity crisis. The goal is not to make it look brand new. The goal is to make it look clean, stable, and intentionally finished.
Old knob holes give you options. You can patch them smoothly, cover them with a decorative plate, add a small mirror above them, or treat them as part of the vintage story. Sometimes the “imperfections” end up being the most interesting design details.
4. Sand and Prep the Right Way
Light sanding helps primer or paint grip the surface better. Use a medium grit, such as 120-grit, for general prep. Focus on rough spots, peeling areas, and patched sections. Wipe away the dust thoroughly before painting. If you are painting a paneled door, a sanding sponge can help you reach detailed edges and recessed sections more easily.
If the old finish is in rough shape, do not assume “more sanding” is always the answer. With older painted doors, safe prep matters more than aggressive sanding. Work carefully, ventilate the space, and contain dust if there is any chance the coating is old enough to be hazardous.
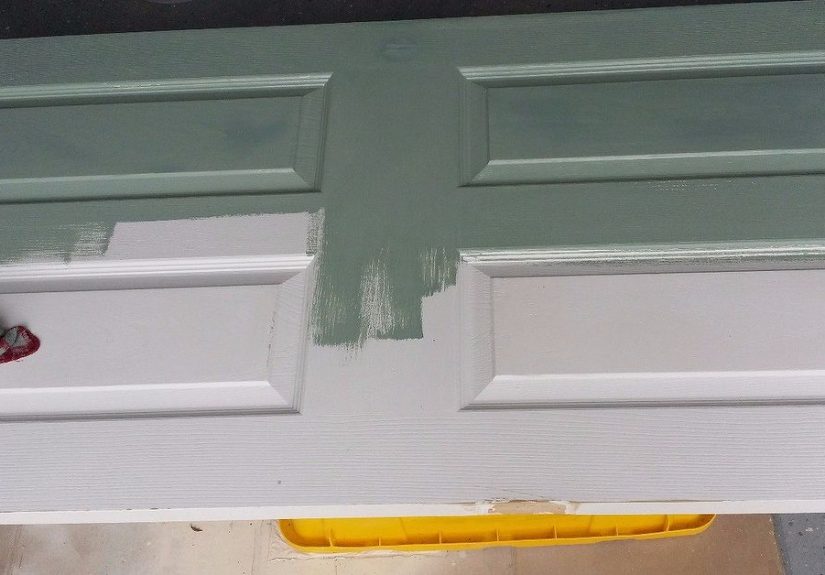
5. Choose Your Finish
This is where the personality comes in. Paint gives you a crisp, customizable look and helps mismatched parts feel unified. Stain highlights the wood grain and often suits rustic or farmhouse spaces best. A distressed paint finish can work beautifully if done lightly. The key word is lightly. There is a fine line between “charming vintage” and “this furniture fought in three wars.”
Popular choices include:
- Soft white or creamy off-white for cottage and farmhouse interiors
- Charcoal, navy, or deep green for a dramatic entryway statement
- Natural wood stain for a warm, timeless look
- Two-tone finishes, such as a painted door with a stained bench seat
Apply primer if needed, then paint in the correct order for paneled doors: recesses first, then panels, then rails and stiles. Let each coat dry fully before the next. If possible, lay the door flat on sawhorses for easier painting and fewer drips.
6. Build or Attach the Bench
A hall tree can be as simple as a door mounted to the wall with hooks, but the bench is what turns it into a true entryway workhorse. You have a few good options:
- Attach the door to an existing bench: Fast and beginner-friendly
- Build a simple box bench: Great for hidden shoe storage
- Use open cubbies below: Ideal for baskets, boots, and grab-and-go gear
- Skip the bench entirely: Best for very narrow spaces
When pairing the door with a bench, aim for visual balance. The bench should look proportionate to the door width and sturdy enough to support sitting. If the bench is too tiny, the project looks top-heavy. If it is too chunky, the door can disappear behind it. This is one of those “trust your eyes and your tape measure” moments.
7. Add Hooks, a Shelf, or Decorative Details
Once the main structure is done, decide how you want the hall tree to function. Coat hooks are the obvious must-have, but placement matters. Mount them at a comfortable height, and do not overcrowd them. Too many hooks turn into a visual traffic jam.
You can also add:
- A top shelf for hats, baskets, or seasonal decor
- A small mirror for last-minute checks before leaving
- Label hooks for family members
- A narrow mail slot or floating cubby
- Decorative trim or beadboard accents
- Baskets under the bench for shoes, dog leashes, or umbrellas
If you want a cleaner, less cluttered look, install only the number of hooks your household actually needs. A hall tree should organize the entryway, not encourage every jacket in North America to move in permanently.
8. Anchor It Securely
This part is non-negotiable. A tall hall tree made from a solid door can be heavy, especially once you add a bench, hooks, bags, and a shelf. Secure it to wall studs whenever possible. If children live in or visit the home, anchoring becomes even more important.
Even beautifully built furniture can become unsafe if it is not stabilized. A hall tree should feel sturdy and grounded, not wobbly or dramatic. Save the drama for the paint color debate.
Design Ideas for Different Styles
Farmhouse Hall Tree
Use a paneled door, painted white or sage green, with black iron hooks and a stained bench top. Add woven baskets below and maybe a small wreath or framed sign above the shelf.
Vintage Cottage Look
Keep some of the door’s original patina. Use porcelain hooks, soft pastel paint, and a lightly distressed finish. A floral cushion on the bench can soften the look.
Rustic Entryway Organizer
Pair the door with reclaimed wood for the bench and shelf. Use darker stain, chunky hooks, and wire baskets for a rugged, practical feel.
Modern Repurposed Door Hall Tree
Go with a simple slab or flat-paneled door, matte paint, clean-lined hooks, and minimal accessories. Keep the silhouette slim and the storage edited.
Common Mistakes to Avoid
- Skipping measurements: A hall tree that blocks the door swing is not charming. It is annoying.
- Using weak materials: If the door or bench is flimsy, the finished piece will not hold up.
- Overloading with hooks: More hooks are not always better. Think function, not coat-jungle.
- Ignoring safety: Test old finishes, control dust, and anchor the final piece securely.
- Overdecorating: Your hall tree should look welcoming, not like a craft store exploded in the foyer.
Why This DIY Project Is Worth It
Transforming an old door into a hall tree checks a lot of boxes at once. It repurposes something old instead of sending it to a landfill. It creates valuable entryway storage. It gives you a practical furniture piece with custom dimensions. And it adds character that is hard to fake.
Unlike many quick DIY projects that look fun for one weekend and questionable forever after, this one can become a genuinely useful feature in your daily routine. You will use it every time you leave the house, every time you come back, and every time someone drops a backpack in the wrong place and you heroically point to the hooks.
Real-World Experiences: What People Learn When They Turn an Old Door into a Hall Tree
The experience of turning an old door into a hall tree is almost never a straight line from “found door” to “designer-worthy entryway.” It is usually a little messier, a little funnier, and a lot more educational than expected. That is part of what makes this project memorable.
One of the first lessons people learn is that old doors have personalities. Some are cooperative and sand beautifully. Others arrive with layers of paint, old hinge scars, and hardware holes that seem to have been created by three different centuries of homeowners making bold decisions. What looks like a quick afternoon project at the thrift store can turn into a thoughtful restoration once you get it home. But that is not a bad thing. In many cases, those quirks are exactly what make the finished hall tree feel special.
Another common experience is discovering just how much an entryway affects daily life. Before the hall tree, shoes may have drifted across the floor like tumbleweeds, coats may have landed on dining chairs, and keys may have developed supernatural disappearing abilities. After the project is finished, the entryway starts working better. People naturally hang things up, sit down to remove shoes, and use baskets or cubbies because the furniture quietly tells them where everything belongs. It is not magic, but on a busy weekday morning it can feel suspiciously close.
Many DIYers also realize that the bench matters more than they expected. At first, some people plan to make the project purely decorative, with a door and a few hooks. Then they live with it for a week and think, Wow, I really wish I had a place to sit while taking off boots. The bench turns the piece from wall decor into hardworking furniture. It becomes the place where kids drop backpacks, where guests set purses, where dogs wait for leashes, and where you sit for thirty seconds pretending you are not already late.
Painting is another part of the experience that teaches patience. A paneled door has grooves, recesses, edges, and trim details that do not care about your schedule. The people happiest with their finished hall tree are usually the ones who slowed down during prep, filled holes properly, sanded enough, wiped off dust, and let coats dry completely. The people who rush? They often end up doing what every DIYer knows too well: the “touch-up phase,” which is a polite term for fixing things you swore were fine yesterday.
There is also a surprisingly emotional side to the project when the door has history. Some homeowners use a salvaged door from a family farmhouse, a remodeling project, or an older home they loved. In those cases, the hall tree becomes more than storage. It becomes a daily reminder of a place, a season of life, or a relative who never threw away good wood. That kind of sentimental value cannot be bought flat-packed in aisle seven.
And finally, people often come away from this project with more confidence than they expected. A repurposed door hall tree looks impressive, but the build can be broken into approachable steps: clean, repair, sand, paint, attach, anchor, style. It teaches basic woodworking, finishing, layout, and problem-solving without demanding expert-level skills from the start. By the end, many DIYers are already looking around the house wondering what else can be transformed. An old shutter? A cabinet door? A headboard? This is how DIY projects multiply. Proceed with caution.
Conclusion
If you want a DIY project that blends style, storage, sustainability, and everyday usefulness, learning how to transform an old door into a hall tree is well worth your time. Start with a sturdy salvaged door, plan the dimensions carefully, prep the surface properly, and build around the way your household actually uses the entryway. The result can be a custom piece that looks charming, works hard, and makes your home feel more organized the moment you walk in.
Best of all, this is the kind of furniture that tells a story. It is practical, yes, but it is also personal. And that is what makes a great DIY project feel less like a weekend task and more like a lasting upgrade.