Table of Contents >> Show >> Hide
- What Is a Sofa Table, Really?
- Why This Sofa Table Needed a Makeover
- Why Unicorn SPiT Works for a Sofa Table Makeover
- Step One: Clean Like You Mean It
- Step Two: Inspect the Wood, Veneer, and Damage
- Step Three: Sand Without Declaring War
- Step Four: Choose the Color Story
- Step Five: Apply the SPiT
- Step Six: Let It Dry Completely
- Step Seven: Seal the Finish
- How to Style the Finished Sofa Table
- Common Mistakes to Avoid
- How to Care for the Finished Table
- Why DIY Furniture Makeovers Feel So Satisfying
- My Extra of Experience: The Day the Sofa Table Got SPiT-Tacular
- Conclusion
There are normal Saturday projects, and then there are the projects where you stand in your garage holding a bottle of brightly colored gel stain with the word “SPiT” on it and think, “Well, this is either going to become a furniture makeover or evidence.” Fortunately, this story ends with a sofa table that looks charming, colorful, and completely intentionaldespite beginning as the kind of tired wooden piece people usually shove behind a couch and hope no one notices.
Let’s clear up the title before anyone calls the upholstery police: this is not about actual spit. It is about Unicorn SPiT, a concentrated gel stain and glaze used by DIYers for furniture refinishing, wood staining, painting, faux finishes, and colorful upcycling projects. The name is silly, the colors are dramatic, and the results can make a forgotten sofa table look like it wandered out of a boutique instead of a dusty corner of the garage.
A sofa table is already one of the most useful pieces in a living room. It can sit behind a couch, define an open floor plan, hold lamps, display books, store remotes, and quietly prevent your living room from looking like all the furniture got pushed there during a mild panic. But when that table is scratched, orange-toned, water-stained, or just painfully boring, a makeover can turn it into the kind of accent piece that makes guests ask, “Where did you buy that?” That is when you smile mysteriously and say, “I SPiT on it.”
What Is a Sofa Table, Really?
A sofa table is typically a narrow table placed directly behind a sofa. It is often close to the height of the sofa back and long enough to feel visually balanced without overwhelming the room. Console tables are similar, but they are more versatile and often appear in entryways, hallways, dining rooms, and behind couches. In everyday decorating language, people use the terms almost interchangeably, which is fine unless you are arguing with a furniture salesperson, in which case bring snacks.
The best sofa table does three jobs at once: it adds function, supports the room’s layout, and gives you a styling surface. Behind a sofa, it can hold table lamps for reading, baskets for blankets, a tray for remotes, or a stack of coffee-table books that you definitely intend to read someday. In an open-concept room, it creates a soft boundary between the seating area and the rest of the space without building a wall or making the room feel chopped up.
Why This Sofa Table Needed a Makeover
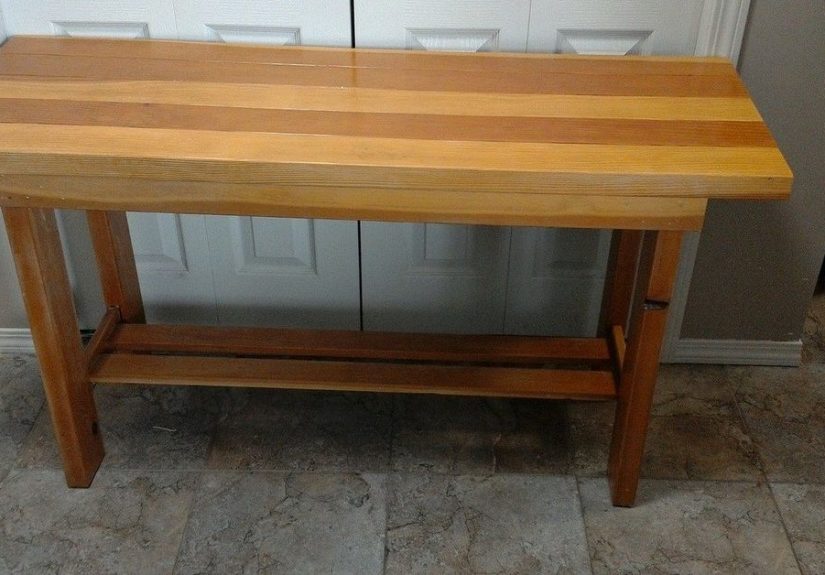
The sofa table in this story had good bones but questionable life choices. It was sturdy, narrow, and practical, but the finish had seen better decades. There were small scratches, dull patches, and a few cloudy marks that looked suspiciously like someone once placed an icy drink on it and said, “It’ll be fine.” Famous last words in the furniture world.
Instead of sending it to the donation pile, the smarter move was to refinish it. A sofa table is a perfect candidate for a DIY furniture makeover because it is large enough to make an impact but not so huge that the project takes over your life. You can experiment with color, stain, glaze, texture, or a two-tone finish without committing to something terrifying like refinishing an entire dining set while questioning every decision you have made since high school.
Why Unicorn SPiT Works for a Sofa Table Makeover
Unicorn SPiT is popular because it behaves differently depending on how you use it. Applied more heavily, it can act like paint or a strong glaze. Diluted with water, it can behave more like a stain, letting the wood grain peek through. That flexibility makes it a fun choice for wood furniture projects, especially when you want color but do not want to completely hide the character of the piece.
The product is often used on wood, glass, fabric, metal, wicker, pottery, concrete, and other craft surfaces. For a sofa table, the key advantage is control. You can blend colors while the product is workable, mist with water to soften edges, pull pigment across the grain, or layer tones for a more dimensional finish. It is the kind of material that rewards creative bravery. Or, at minimum, it forgives a few “oops” moments before everything dries.
Step One: Clean Like You Mean It
Before any stain, paint, or glaze touches the table, cleaning matters. Furniture collects dust, oil, furniture polish, fingerprints, candle soot, snack residue, and mysterious household grime that nobody wants to identify under laboratory conditions. If you skip cleaning, the finish may not adhere evenly, and your dramatic makeover can turn into a peeling, blotchy little tragedy.
Start with a mild cleaner or degreasing furniture-safe solution. Wipe the entire piece, including the legs, apron, shelves, edges, and underside if you plan to paint or stain those areas. Let it dry completely. This is not glamorous work, but neither is watching your fresh finish chip because you painted over old dust bunnies with confidence.
Step Two: Inspect the Wood, Veneer, and Damage
Before sanding like a person in a home-renovation montage, inspect the table carefully. Is it solid wood, veneer, laminate, or particleboard with a wood-like finish? This matters because aggressive sanding can damage veneer, and some manufactured surfaces need different preparation than bare wood. Look at edges, undersides, drawer interiors, and any chipped corners to understand what you are working with.
If the table has loose joints, missing hardware, dents, or deep scratches, fix those before staining. Wood filler, clamps, glue, or new hardware can make the final result look thoughtful instead of chaotic. A beautiful finish cannot hide a wobbly leg that makes the lamp shimmy every time someone walks by.
Step Three: Sand Without Declaring War
Sanding is where many DIY furniture makeovers either become successful or become a cautionary tale. The goal is not to punish the table for its past. The goal is to remove gloss, smooth rough areas, and help the new finish grip properly. For many refinishing projects, medium-grit sandpaper followed by finer grit works well. Sand with the grain whenever possible, and do not over-polish the surface so much that stain struggles to absorb.
If the old finish is thick, damaged, or stubborn, chemical stripper may be an option, but it requires ventilation, gloves, eye protection, and careful attention to product directions. For a simple sofa table refresh, light sanding may be enough, especially if you are glazing or painting rather than fully stripping down to bare wood.
Step Four: Choose the Color Story
This is where the project starts to feel less like chores and more like mischief. A sofa table can go classic, coastal, farmhouse, bohemian, modern, moody, or wildly artistic. The best color depends on your room. If your living room already has a lot happeningpatterned rugs, colorful pillows, dramatic artthe table can be calmer. If your room is mostly neutral, the table can become the personality piece.
For a Unicorn SPiT sofa table makeover, consider layered colors rather than one flat shade. Deep blue and teal can create a coastal or jewel-toned look. Brown, black, and amber can mimic aged wood. Purple, turquoise, and green can feel whimsical and artistic. Whitewashing over color can soften everything, while a dark glaze in grooves can bring out carved details.
Step Five: Apply the SPiT
Once the table is clean, dry, sanded, and dust-free, apply the gel stain or glaze with a brush, foam pad, cloth, sponge, or even gloved hands if you like the full art-class experience. Work in small sections so the product stays manageable. If it begins drying too quickly, a light mist of water can help keep it workable and allow blending.
For a stained look, thin layers are your friend. For a painted or glazed look, use richer applications. Pull the color in the direction of the grain to keep the piece feeling natural. Blend multiple colors while they are still workable, then step back. This is important. Furniture makeovers need pauses. Otherwise, you keep touching it until your elegant finish turns into “kindergarten galaxy mud.”
Step Six: Let It Dry Completely
Drying time depends on material, humidity, temperature, application thickness, and technique. A thin layer may dry faster than a heavy artistic blend. The finish may appear dull or chalky before sealing, which can make you question your entire vision. Do not panic. Many colorful gel stains and glazes become dramatically richer once sealed.
Patience is not the most exciting DIY tool, but it is one of the most useful. Rushing the next step can trap moisture, smear color, or create a finish that feels tacky. Give the table the time it needs, even if that means walking past it twelve times and whispering, “Are you done yet?”
Step Seven: Seal the Finish
A sofa table is a working surface. People set drinks on it, slide books across it, bump it with baskets, and occasionally use it as a landing zone for keys, mail, and one random screw nobody can identify. That means the finish needs protection. A compatible non-water-based topcoat, oil-based sealer, clear coat, or resin-style finish can deepen the color and add durability.
Choose the sheen based on the final look you want. Gloss can make colors appear richer and more dimensional, while satin or matte finishes feel softer and more understated. Apply thin, even coats and follow the drying and recoat times on the sealer. Thick coats are tempting, but they can drip, cloud, or cure unevenly. In DIY, “more” is not always more. Sometimes “more” is just sanding later while muttering.
How to Style the Finished Sofa Table
Once the table is finished and fully cured, it is time to style it. The goal is not to bury your hard work under seventeen tiny objects. Let the finish breathe. A pair of lamps can create symmetry and provide cozy lighting behind the couch. A tray can corral remotes or candles. Books can add height. A small plant or vase can bring in organic shape. Baskets underneath can hold blankets, toys, gaming controllers, or the emotional weight of clutter.
Keep sight lines in mind. If the table sits behind a sofa in the middle of a room, avoid tall decor that blocks conversation or makes the sofa feel boxed in. Low branches, small bowls, short stacks of books, and compact lamps often work better than oversized art or giant floral arrangements. Save the dramatic branches for a wall console, unless your goal is to make guests feel like they are talking through shrubbery.
Common Mistakes to Avoid
Skipping the Prep
Cleaning, sanding, and dust removal are not optional if you want a lasting finish. Prep work is the difference between “custom furniture makeover” and “painted in a hurry before dinner guests arrived.”
Ignoring the Table’s Height
A sofa table should usually sit close to the height of the sofa back or slightly lower. If it towers over the couch, it can look awkward and expose unfinished surfaces. If it is too short, it may disappear visually and lose function.
Using Too Much Product
Layering color is beautiful; drowning the table is not. Start with less than you think you need. You can always add more color, but removing a heavy, muddy blend takes more effort.
Forgetting the Topcoat
A colorful finish without a protective coat is like wearing a fabulous outfit in a rainstorm with no umbrella. It may look great briefly, but life is coming for it.
How to Care for the Finished Table
After the makeover, protect the surface with coasters, trays, and gentle cleaning habits. Avoid harsh chemicals unless the sealer specifically allows them. Dust with a soft cloth. Clean spills quickly. If a white water ring appears on a sealed wood surface, some household remedies may help, but always test in a hidden spot first. Dark water stains are more serious because they may indicate moisture has reached the wood itself, which can require refinishing.
The simplest maintenance plan is also the most boring: use coasters, avoid standing water, and do not drag sharp objects across the top. Boring works. Boring keeps your beautiful sofa table from becoming a future blog post titled “That Time I Ruined the Thing I Just Fixed.”
Why DIY Furniture Makeovers Feel So Satisfying
A sofa table makeover is not just about saving money, although that part is delightful. It is about seeing potential in something ordinary. You take a piece that looked dated or unwanted and turn it into something personal. The table becomes a story, not just a surface. It carries the marks of your choices: the color you selected, the sanding you survived, the moment you nearly panicked, and the final coat that made everything come alive.
There is also a practical beauty in reusing furniture. Older pieces are often solid, repairable, and full of character. A refresh keeps them out of the landfill and gives your home something more unique than a flat-pack table assembled with an Allen wrench and silent rage.
My Extra of Experience: The Day the Sofa Table Got SPiT-Tacular
The first thing I learned from this project is that confidence arrives about fifteen minutes after fear. At the beginning, I stared at the sofa table like it was a medical patient and I was the surgeon who had watched one video online. The table had a warm brown finish, but not the good kind of warm brown. It was the sort of brown that says, “I came free with the house.” The top had scratches, the legs were dull, and the lower shelf looked like it had hosted several generations of abandoned magazines.
Cleaning it was humbling. Every wipe of the cloth revealed more grime, which is both satisfying and mildly horrifying. I thought the table was just dusty. It was not. It was wearing a historical record of fingerprints, furniture polish, and possibly one ancient soda incident. After cleaning, I sanded gently because the top seemed like veneer, and I did not want to create a bald patch in the name of enthusiasm. That is a real DIY lesson: sometimes restraint is the power tool.
When I finally opened the Unicorn SPiT, the color looked almost too bright. I chose a mix of teal, deep blue, and a little dark brown because I wanted the table to look artistic but still live comfortably in a room with normal adults and throw pillows. The first swipe looked alarming. Then the second swipe blended into the grain. By the fifth swipe, I started making the kind of approving noises people make when they taste good soup. The table was changing right in front of me.
The most enjoyable part was blending the colors along the edges and legs. Straight stain can be predictable, but this felt more like painting with personality. A damp cloth softened a few areas where I got too bold. A dry brush dragged darker pigment into the corners. The carved details suddenly looked intentional instead of dusty. I had one moment where the top became too blue, so I added a little brown glaze and wiped it back. Crisis avoided. Ego restored.
Sealing was the magic trick. Before the topcoat, the surface looked chalky and slightly uncertain. After the clear finish, the colors deepened, the grain popped, and the whole table looked richer. It went from “craft project in progress” to “statement piece with a backstory.” I let it cure, styled it with a lamp, a short stack of books, a small plant, and a basket underneath, and suddenly the living room looked more finished.
The best part was that the makeover did not look perfect in a factory-made way. It looked handmade, layered, and alive. A tiny uneven spot on one leg became part of its charm. A darker streak across the top looked like aged wood rather than a mistake. That is the secret joy of DIY furniture refinishing: you stop chasing flawless and start creating character. And yes, every time someone compliments it, I still get to say, “Thanks, I SPiT on it.” That joke has not gotten old yet, and frankly, I hope it never does.
Conclusion
That time I SPiT on a sofa table turned out to be less of a strange confession and more of a reminder that furniture makeovers should be fun. With good prep, careful sanding, creative color blending, and a durable topcoat, a tired sofa table can become a useful, stylish, conversation-starting piece for the living room. Whether you love classic wood tones, bold color, layered glaze, or a finish that looks like it has a tiny bit of magic trapped under the clear coat, a DIY sofa table makeover is a manageable project with a big payoff.
The real lesson is simple: do not underestimate the boring little table behind the couch. Give it cleaning, color, patience, and protection, and it might become the most interesting piece in the room. And if the product name makes you giggle while you work, that is not a flaw. That is called bonus entertainment.
Note: This article is written as original, publish-ready web content based on real DIY furniture refinishing, sofa table styling, wood-care, and Unicorn SPiT product-use information, without source-code citation placeholders.