Table of Contents >> Show >> Hide
- Why Cleaning Rubber Stamps Actually Matters
- What You Need Before You Start
- How to Clean Rubber Stamps: 12 Steps
- Step 1: Clean the Stamp as Soon as You Finish Using It
- Step 2: Identify the Stamp Type
- Step 3: Identify the Ink Type
- Step 4: Wipe Off Fresh Ink First
- Step 5: Use Water for Everyday Water-Based Ink
- Step 6: Use a Stamp Scrubber for Detailed Images
- Step 7: Bring in Stamp Cleaner for Stubborn Residue
- Step 8: Handle Permanent or Solvent Ink With Extra Care
- Step 9: Clean the Edges, Crevices, and Acrylic Block
- Step 10: Keep Wood Mounts Damp, Not Soaked
- Step 11: Dry the Stamp Completely Before Storing It
- Step 12: Restore Cling and Store It Properly
- Common Mistakes to Avoid
- Best Cleaning Methods by Stamp Type
- Quick Example: The Right Cleaning Choice
- Final Thoughts
- Experience-Based Lessons From Cleaning Rubber Stamps
- SEO Tags
Rubber stamps are tiny workhorses. One minute they are making perfect florals, labels, borders, or business logos. The next minute they are covered in ink, glitter, mystery fuzz, and the consequences of your “I’ll clean it later” decision. The good news? Learning how to clean rubber stamps is not difficult. The better news? Once you build a simple routine, your stamps stay crisp, last longer, and stop leaving behind blotchy impressions that look like they had a rough night.
If you stamp for card making, scrapbooking, journaling, or office use, proper stamp care matters. Clean stamps transfer ink more evenly, show fine details better, and are less likely to stain your next project with yesterday’s color choices. This guide walks you through 12 practical steps for cleaning rubber stamps, cling stamps, and clear photopolymer stamps, plus a few smart habits that save you from future frustration.
Why Cleaning Rubber Stamps Actually Matters
Let’s start with the obvious: dried ink is rude. It fills in detailed lines, dulls crisp edges, and turns beautiful stamped impressions into fuzzy little disappointments. Regular cleaning helps preserve the stamp surface, improves print quality, and keeps residue from transferring onto paper, acrylic blocks, stamp platforms, or storage sheets.
It also helps you match the cleaning method to the ink you used. Fresh water-based ink usually comes off with water or a damp shammy. Stubborn pigment, archival, or solvent-based ink may need a dedicated stamp cleaner. Clear and photopolymer stamps can also lose cling over time if lint, dust, and ink buildup collect on the back. In other words, a quick cleanup now saves a lot of dramatic sighing later.
What You Need Before You Start
- A damp stamp shammy, microfiber cloth, or lint-free towel
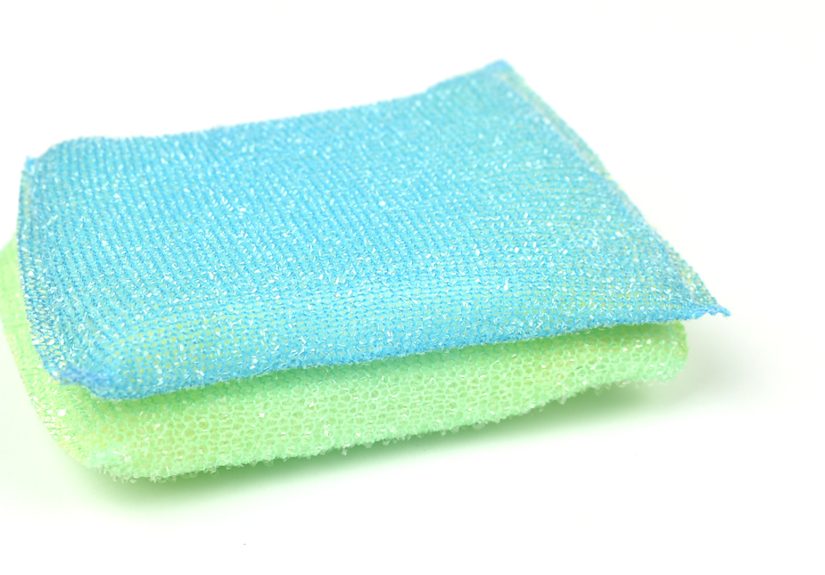
- A stamp scrubber or cleaning pad
- A stamp cleaner made for rubber or clear stamps
- Mild soap and lukewarm water
- Paper towels or a dry lint-free cloth
- A soft toothbrush or detail brush for deeply etched designs
You do not need every tool on earth. You just need the right tool for the type of ink and the type of stamp in front of you.
How to Clean Rubber Stamps: 12 Steps
Step 1: Clean the Stamp as Soon as You Finish Using It
The easiest ink to remove is the ink that has not yet settled in for a long-term lease. As soon as you finish stamping, wipe away surface ink. This prevents buildup in grooves and keeps dark colors from hanging around like an overstaying guest.
Step 2: Identify the Stamp Type
Before you start scrubbing, know what you are cleaning. Traditional rubber stamps, wood-mounted rubber stamps, cling stamps, and clear photopolymer stamps do not all behave the same way. Rubber is usually tougher and more forgiving. Clear stamps need a gentler approach, especially with strong cleaners. Wood-mounted stamps also require care so the wooden block does not stay wet too long.
Step 3: Identify the Ink Type
This step is more important than most beginners realize. Dye ink and many water-based inks are usually easy to remove with water or a damp shammy. Pigment ink may need more wiping because it sits on the surface longer. Archival and solvent inks are tougher customers and often need a dedicated cleaner. If you skip this step, you may spend ten minutes fighting the wrong battle with plain water.
Step 4: Wipe Off Fresh Ink First
Use a lint-free cloth, paper towel, or damp shammy to remove excess ink before adding any cleaner. This first wipe matters because it lifts the loose residue and makes the deeper clean easier. It also keeps your cleaning pad from turning into a colorful crime scene too quickly.
Step 5: Use Water for Everyday Water-Based Ink
If you used a standard water-based ink, a lightly damp cloth or stamp shammy is often all you need. Wipe the rubber surface gently until the fresh ink is gone. For many routine stamping sessions, this is the fastest and safest method. It is simple, inexpensive, and kind to both rubber and clear stamps.
Step 6: Use a Stamp Scrubber for Detailed Images
Detailed stamps trap ink in tiny grooves, lettering, and textured backgrounds. That is where a stamp scrubber earns its keep. Spray cleaner or a little water on one side, then rub the stamp gently across the textured surface. Use the dry side to remove moisture and leftover residue. This is especially useful for floral outlines, script sentiments, and background stamps with lots of tiny etched areas.
Step 7: Bring in Stamp Cleaner for Stubborn Residue
When plain water is not enough, use a stamp cleaner formulated for crafting stamps. Spray or dab a small amount onto the stamp or cleaning pad, then wipe clean. Dedicated cleaners are helpful for water-resistant ink, heavily pigmented residue, and stains that refuse to leave politely. Always use a product meant for rubber or clear stamps rather than random household cleaners. Your stamps are tools, not bathroom tiles.
Step 8: Handle Permanent or Solvent Ink With Extra Care
If you used archival, permanent, or solvent-based ink, expect a deeper cleanup. These inks are designed to stay put, which is wonderful on paper and slightly less wonderful on your stamp. Use the appropriate stamp cleaner recommended for tougher inks, and work gently. Do not soak the stamp in harsh chemicals. For clear or photopolymer stamps, use stronger cleaners sparingly and follow the manufacturer’s guidance. Aggressive cleaning can shorten the life of a stamp faster than the ink ever could.
Step 9: Clean the Edges, Crevices, and Acrylic Block
Ink loves to sneak onto the edges of the stamp, the sides of the block, and the corners of your stamping platform. Wipe those areas too. If necessary, use a soft toothbrush or detail brush to reach recessed lines in the stamp design. This prevents dried residue from transferring later and helps maintain sharp impressions.
Step 10: Keep Wood Mounts Damp, Not Soaked
For wood-mounted rubber stamps, focus your cleaning on the rubber image and avoid soaking the wooden block. A quick wipe is fine. A long bath is not. Too much moisture can affect adhesives, labels, and the wood itself. If the block gets wet, dry it promptly with a clean towel.
Step 11: Dry the Stamp Completely Before Storing It
Once the stamp is clean, dry it thoroughly. Use a lint-free cloth or allow it to air-dry on a clean surface. Clear stamps should be fully dry before going back onto storage sheets. Rubber stamps should not be packed away damp, especially in closed containers. Moisture plus storage equals a bad surprise later, and nobody enjoys opening a craft box to discover a mildew-themed plot twist.
Step 12: Restore Cling and Store It Properly
If clear or photopolymer stamps lose their stickiness, they may simply be dirty. Wash them gently with mild soap and lukewarm water, rinse well, and let them air-dry. Once dry, many regain their cling. Store clear stamps on their backing sheet or a clean storage panel. Store rubber stamps flat or upright in a cool, dry place away from direct heat and sunlight. Good storage is part of good cleaning because it prevents fresh dust, lint, and warping from undoing all your hard work.
Common Mistakes to Avoid
Using harsh household cleaners
A dedicated stamp cleaner is the safer choice. General cleaning sprays can dry out rubber, damage clear materials, or leave residues you definitely do not want on your next handmade card.
Panicking over stains
Some clear stamps stain, especially after dark or highly pigmented inks. Staining does not always mean the stamp is dirty, damaged, or unusable. If the surface is clean and the image still stamps clearly, the stamp is usually fine.
Scrubbing like you are removing ancient wallpaper
Firm does not need to mean aggressive. Over-scrubbing can wear down delicate surfaces or distort clear stamps over time.
Storing stamps while damp
This is the sneaky mistake. A stamp that feels “basically dry” can still collect lint, stick poorly, or transfer moisture to storage sheets and containers.
Best Cleaning Methods by Stamp Type
Wood-mounted rubber stamps
Use a damp cloth, stamp shammy, or stamp cleaner on the rubber only. Keep the wood dry whenever possible, and never soak the whole stamp.
Cling rubber stamps
Clean the rubber image with water or cleaner, then dry before returning it to the storage backing. Check both the stamping side and the cling side for dust and fibers.
Clear photopolymer stamps
Use water, a shammy, or a cleaner made for clear stamps. If the stamp loses cling, wash it gently with mild soap and water, rinse, and let it dry completely before storing.
Quick Example: The Right Cleaning Choice
Imagine you stamp a floral image with black dye ink for a greeting card. A damp shammy will probably clean that stamp in seconds. Now imagine you stamp on acetate with a solvent ink. Water will not do much except make you annoyed. That situation calls for the correct cleaner and a gentler, more deliberate wipe-down. Same stamp family, very different cleanup strategy.
Final Thoughts
Cleaning stamps is not the glamorous part of stamping, but it is one of the smartest habits you can build. A simple routine keeps your impressions crisp, your tools in better condition, and your future self much happier. The secret is not buying ten miracle products. It is matching the method to the ink, using a gentle touch, drying thoroughly, and storing stamps properly once they are clean.
So yes, your stamps can absolutely have a long and useful life. They just need a little basic maintenance and a little less “I’ll deal with it tomorrow.” Clean them well, store them dry, and they will keep showing up ready for work like the tiny overachievers they are.
Experience-Based Lessons From Cleaning Rubber Stamps
Anyone who uses rubber stamps regularly eventually learns the same lesson: the actual stamping is the fun part, but the cleanup determines whether tomorrow’s project feels smooth or annoying. One of the most common experiences crafters talk about is the moment they pull out a favorite stamp, ink it beautifully, press it down, and get a fuzzy, uneven image because yesterday’s ink never fully came off. That is usually when good cleaning habits are born. It is not a dramatic revelation. It is more of a quiet moment of realizing that a 20-second cleanup would have saved a 20-minute do-over.
Another very real experience is confusing staining with damage. Many people see a clear stamp turn pink, gray, or slightly shadowy after use and assume it is ruined. In practice, that cosmetic staining often does not affect performance at all. The first time you realize a stained stamp can still create a crisp impression is oddly freeing. You stop chasing visual perfection and start focusing on whether the stamp is actually clean and functional. That shift alone makes stamp care feel less stressful and much more practical.
There is also the classic lesson involving the wrong cleaner. Plenty of stampers have tried whatever spray or wipe happened to be nearby, only to learn that craft tools prefer craft-specific care. A cleaner that seems harmless on a counter can be too strong for clear photopolymer or unnecessarily harsh on rubber. Once you have had one bad experience with a stamp feeling dry, cloudy, or less clingy, you become much pickier about what touches your supplies. That is usually a good thing. Stamps last longer when you stop experimenting like a kitchen chemist.
Then there is the wood-mounted stamp experience. At some point, nearly everyone cleans one too enthusiastically and gets the wooden block wetter than intended. Nothing catastrophic may happen, but you quickly understand why gentle wiping is better than soaking. Labels can wrinkle, adhesive can weaken, and the stamp just feels less tidy overall. After that, most people clean the rubber carefully and treat the wood like a piece of furniture that somehow wandered into the craft room.
One of the more satisfying experiences is restoring cling to a clear stamp that seemed “dead.” A stamp that no longer sticks to the acrylic block often just has lint, dust, skin oils, or dried residue on it. Washing it gently with mild soap and water, rinsing it, and letting it dry can feel like reviving a tiny piece of clear plastic magic. Suddenly it clings again, lines up properly, and behaves like it remembers its job. That moment makes people feel far more confident about maintaining their supplies instead of replacing them too quickly.
Finally, regular stamp users often discover that cleaning is really part of creative momentum. When your stamps, blocks, and scrubbers are already clean, starting the next project feels easy. You are not sorting through sticky tools, mystery smudges, or half-dry cleaning cloths. You just sit down and make something. Over time, that may be the biggest lesson of all. Good stamp cleaning is not only about preserving rubber or photopolymer. It is about protecting the flow of the hobby itself. A clean stamp is ready when inspiration shows up, and that is worth a lot more than the few seconds it takes to wipe it down.