Table of Contents >> Show >> Hide
- Before You Start: Know What You Are Cleaning
- Tools and Supplies You May Need
- How to Clean Smoke Off of a Ceiling in 14 Steps
- Step 1: Make Sure the Ceiling Is Safe to Clean
- Step 2: Clear the Room and Protect Everything Below
- Step 3: Wear the Right Protective Gear
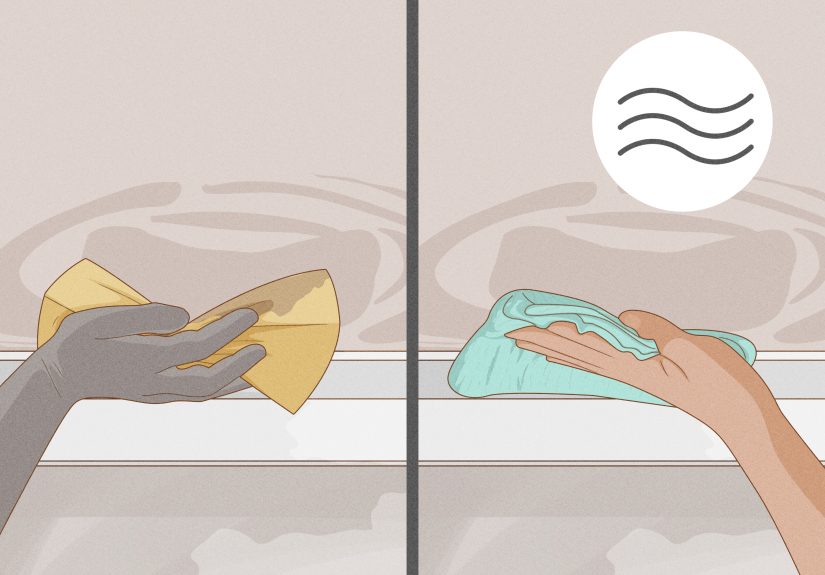
- Step 4: Ventilate the Space
- Step 5: Remove Loose Soot Without Rubbing It In
- Step 6: Use a Dry-Cleaning Sponge First
- Step 7: Test Your Wet Cleaning Solution in a Hidden Spot
- Step 8: Mix a Gentle but Effective Cleaner
- Step 9: Wash the Ceiling Gently in Small Sections
- Step 10: Rinse Often and Change Dirty Water Frequently
- Step 11: Dry the Ceiling Completely
- Step 12: Tackle Any Remaining Smoke Odor
- Step 13: Prime Stubborn Stains Before Repainting
- Step 14: Repaint the Ceiling or Call a Pro
- Mistakes to Avoid When Cleaning Smoke Off a Ceiling
- When Smoke on a Ceiling Means Bigger Trouble
- Real-World Experiences and Lessons From Cleaning Smoke Off a Ceiling
- Conclusion
Smoke on a ceiling has a special talent for turning a room from “cozy” to “why does my house look like it lost a bar fight?” in record time. Whether the mess came from a kitchen flare-up, fireplace puff-back, candle habit, or years of cigarette smoke, the residue it leaves behind is stubborn, oily, and weirdly clingy. The good news is that you can often remove smoke stains and soot without turning your ceiling into a drywall science project.
This guide walks you through exactly how to clean smoke off of a ceiling in 14 practical steps. You will learn how to remove loose soot first, choose the right cleaning method for painted or textured surfaces, control smoke odor, and know when a stain-blocking primer is the smarter move. If you have been searching for the best way to clean smoke off a ceiling, remove soot from a ceiling, or deal with smoke damage cleanup without losing your mind, you are in the right place.
Before You Start: Know What You Are Cleaning
Not all smoke residue behaves the same way. Fresh soot from a minor fire may look dry and powdery. Nicotine buildup from long-term smoking tends to be sticky and yellow-brown. Greasy kitchen smoke can feel tacky. And textured ceilings, especially popcorn ceilings, need a gentler touch because too much scrubbing or moisture can damage the finish.
If your ceiling is sagging, blistered, soft, or crumbling, or if the damage came from a serious house fire, skip the DIY heroics and call a smoke damage restoration professional. Likewise, if you have an older popcorn ceiling and suspect asbestos, do not disturb it until it has been properly evaluated.
Tools and Supplies You May Need
- Step ladder
- Drop cloths or plastic sheeting
- Gloves, goggles, and a quality mask or respirator
- Vacuum with brush attachment
- Dry-cleaning sponge or soot sponge
- Microfiber cloths or soft sponges
- Bucket of clean water
- Mild dish soap or degreasing cleaner
- TSP substitute or another wall-safe smoke cleaner
- Fans for drying
- Odor-blocking or stain-blocking primer
- Ceiling paint, if repainting is needed
How to Clean Smoke Off of a Ceiling in 14 Steps
Step 1: Make Sure the Ceiling Is Safe to Clean
Start with a quick reality check. Cosmetic smoke staining is one thing. Structural damage is another. If the ceiling has deep charring, peeling drywall tape, bubbling paint, water damage from firefighting, or a burnt smell that makes your eyes sting the second you walk in, the job may already be beyond simple cleaning.
For light to moderate residue, you can usually continue. For heavy smoke damage, severe odor, or a ceiling that feels compromised, call a pro before you make things worse with water, pressure, or wishful thinking.
Step 2: Clear the Room and Protect Everything Below
Ceiling cleaning is gravity’s favorite sport. Cover floors, furniture, light fixtures, and vents with drop cloths or plastic sheeting. Remove anything fabric-based if possible, because soot loves soft surfaces the way glitter loves your last clean shirt.
This step matters even if the ceiling damage looks minor. As soon as you start vacuuming or using a soot sponge, loose particles can drift onto walls, upholstery, and rugs.
Step 3: Wear the Right Protective Gear
Smoke residue is not just ugly. It can irritate your eyes, skin, and lungs. Put on gloves, eye protection, and a good mask before you begin. If you are cleaning after a fire or dealing with heavy soot, use a properly fitted respirator rather than relying on courage and shallow breathing.
This is especially important if you are working overhead. Falling dust plus cleaning solution in your face is not a personality-building exercise anyone asked for.
Step 4: Ventilate the Space
Open windows if outdoor conditions are reasonable, and set up fans to move air through the room. Ventilation helps reduce airborne particles and speeds drying later, but do not expect it to magically remove the smoke smell by itself. Airing out the room can dilute odors, but permanent odor removal usually requires cleaning away the residue causing the smell.
Step 5: Remove Loose Soot Without Rubbing It In
Use a vacuum with a soft brush attachment to lift loose soot from the ceiling. Work slowly and keep the nozzle from grinding against the surface. The goal is to pull residue away, not massage it deeper into the paint like an unwanted spa treatment.
Always clean from the top down and in small sections. If the soot smears when the vacuum touches the ceiling, back off slightly and let suction do the work.
Step 6: Use a Dry-Cleaning Sponge First
A dry-cleaning sponge, also called a soot sponge, is one of the best tools for smoke residue on ceilings. Use it completely dry. Wipe in one direction with light pressure, then rotate to a clean area of the sponge as it darkens. If the sponge gets saturated with soot, trim off the dirty layer or switch to a new one.
This dry method is especially helpful on drywall, flat paint, and textured ceilings because adding moisture too soon can spread the stain or damage the finish.
Step 7: Test Your Wet Cleaning Solution in a Hidden Spot
Before washing the whole ceiling, test your chosen cleaner on a small, inconspicuous area. Smoke damage is sneaky: one cleaner may work beautifully on a semigloss painted ceiling and behave like a tiny disaster on flat paint or acoustic texture.
Give the test patch time to dry so you can check for discoloration, softening, peeling, or texture loss. This step feels boring, which is exactly why it saves people from very exciting mistakes.
Step 8: Mix a Gentle but Effective Cleaner
For many ceilings, warm water with a small amount of dish soap or a degreasing cleaner is a solid place to start. If the residue is more stubborn, a TSP substitute or smoke-cleaning product made for painted walls and ceilings may work better. Follow the label directions exactly and avoid making the solution stronger “just because.” That is how people end up cleaning off the paint along with the smoke.
If the stain comes from years of nicotine or greasy cooking smoke, expect to clean more than once. That yellow film is often more like removal by persistence than removal by miracle.
Step 9: Wash the Ceiling Gently in Small Sections
Dampen a microfiber cloth or soft sponge with your cleaning solution and wring it out well. Then gently wipe the ceiling in small areas. Do not soak the surface. A ceiling is not a driveway, and it does not appreciate aggressive scrubbing.
For standard painted ceilings, soft circular or straight-line motions work well. For textured ceilings, blot or dab rather than scrub. Too much friction can flatten or loosen the texture, which is a very annoying way to discover you now have a repair project.
Step 10: Rinse Often and Change Dirty Water Frequently
One of the easiest ways to make a ceiling look worse is to keep washing with dirty water. Rinse your sponge or cloth often, and refresh your rinse bucket whenever it starts looking like weak coffee. A final wipe with clean water helps remove leftover cleaner and loosened residue.
This matters because dried cleaner residue can attract dirt later and leave the ceiling looking dull or streaky.
Step 11: Dry the Ceiling Completely
Once you finish washing, let the ceiling dry thoroughly. Keep windows open if weather allows and use fans to speed the process. Moisture left hanging around overhead is never a charming design feature.
If you cleaned a textured ceiling, drying is even more important. Too much lingering moisture can weaken the texture or create new staining problems that feel deeply unfair after all that effort.
Step 12: Tackle Any Remaining Smoke Odor
If the stain is gone but the room still smells like smoke nostalgia no one asked for, address odor separately. Replace the HVAC filter, clean nearby vents if needed, and use bowls of baking soda or activated charcoal to help absorb lingering smells. Keep cabinets and interior doors open so trapped odor can dissipate.
If the smell is severe after a fire, do not jump straight to consumer “odor bombs” or random miracle gadgets. Persistent odor often means residue is still hiding in porous materials, ductwork, or paint layers.
Step 13: Prime Stubborn Stains Before Repainting
If yellowing, shadowing, or odor remains after cleaning, use a stain-blocking or odor-blocking primer. This is often the smartest fix for nicotine stains, old smoke damage, or ceiling discoloration that keeps bleeding through. Look for a primer labeled for smoke, fire, or odor sealing.
Shellac-based, oil-based, and some high-performance water-based restoration primers are commonly used for this job. Prime only after the ceiling is clean and fully dry. Painting directly over smoke residue is usually a short-term cover-up, not a true solution.
Step 14: Repaint the Ceiling or Call a Pro
Once primed, apply ceiling paint that matches the existing finish, or repaint the whole ceiling for a uniform result. In many cases, repainting the entire surface looks better than touching up one patch that ends up standing out like a bad haircut.
Call a professional if the smoke keeps returning through the paint, the odor persists despite cleaning, the ceiling has heavy fire damage, or you suspect contamination inside insulation, ducts, or other hidden materials. Sometimes the most efficient DIY move is knowing when to stop DIY-ing.
Mistakes to Avoid When Cleaning Smoke Off a Ceiling
- Skipping dry cleanup first: Wet cleaning loose soot often turns a powdery mess into a smeared one.
- Using too much water: Especially risky on flat paint, drywall, and popcorn ceilings.
- Scrubbing too hard: More force does not always mean more clean. Sometimes it means more repainting.
- Ignoring odor sources: If walls, vents, insulation, or fabrics still hold smoke, the smell can come right back.
- Painting too soon: Prime only after the ceiling is clean and dry, or the stain may bleed through again.
- Using the wrong cleaner: Always spot-test first, because ceiling finishes vary more than people think.
When Smoke on a Ceiling Means Bigger Trouble
A small kitchen incident may leave behind little more than surface soot. But heavy smoke from a house fire, repeated fireplace backdrafts, or years of indoor smoking can seep into paint, drywall, insulation, and ventilation systems. That is when ceiling cleaning becomes only one part of a bigger smoke damage cleanup plan.
If you notice sticky residue on walls, strong odor in closed rooms, yellow drips, or stains returning after paint, the ceiling is likely not the only affected surface. In that case, a whole-room strategy works better than battling the ceiling alone like it personally offended you.
Real-World Experiences and Lessons From Cleaning Smoke Off a Ceiling
One of the most common homeowner experiences is underestimating how much residue can collect overhead. People will clean countertops, scrub the stove, wash curtains, and still wonder why the room smells smoky. Then they finally look up and realize the ceiling has been quietly hosting the entire problem. That “aha” moment is usually followed by the less exciting “oh no” moment when a white cloth turns brown in one swipe.
Another frequent lesson comes from fireplace or wood stove users. After a puff-back or a few smoky fires, the ceiling near the mantel often develops a gray film that looks like dust until someone tries to wipe it with water. That first wet swipe tends to create a lovely streaky comet tail. Homeowners who have gone through it usually say the same thing afterward: dry removal first would have saved a lot of frustration.
People dealing with cigarette smoke stains often describe a different challenge. Instead of black soot, they find a yellow or tan buildup that seems to reappear even after one round of washing. In these cases, the experience is less “clean once and done” and more “clean, rinse, clean again, then prime.” It can feel excessive, but smoke from long-term indoor smoking settles into paint over time, so two rounds of cleaning and an odor-blocking primer are often what finally wins.
Textured ceilings create their own category of regret. Plenty of homeowners start with noble confidence, only to learn that popcorn texture does not enjoy vigorous scrubbing. Dab too hard, use too much liquid, or attack it with the wrong sponge, and suddenly the cleanup turns into a patching project. The people who come out happiest are usually the ones who move slowly, test first, use minimal moisture, and accept that “gentle” is not the same thing as “ineffective.”
There is also the emotional side of the job, especially after a minor fire. Even when the damage is not severe, cleaning smoke off a ceiling can feel discouraging because the odor keeps reminding you something happened. Many homeowners say progress becomes much easier once they break the project into zones: clean one small section, let it dry, check the result, and move on. That approach turns the task from overwhelming into manageable.
The biggest takeaway from real-life experience is simple: smoke residue rewards patience more than brute force. The best results usually come from a boringly smart sequenceprotect the room, remove dry residue, test the cleaner, wash gently, dry thoroughly, and prime only when needed. In other words, the ceiling can absolutely become clean again, but it is much less of a dramatic rescue and much more of a methodical cleanup. Which, honestly, is probably better for your ceiling and your blood pressure.
Conclusion
If you want to clean smoke off of a ceiling successfully, the trick is not fancy equipment or superhero scrubbing. It is following the right order. Remove loose soot first, clean gently with the correct solution, dry the surface completely, and use a stain-blocking primer when the residue has gone from “surface mess” to “permanent roommate.”
For light smoke damage, these 14 steps can restore a ceiling and dramatically improve the room’s look and smell. For heavier damage, persistent odor, or fragile textured finishes, professional help may save time, money, and one very long weekend on a ladder. Either way, the ceiling does not have to keep telling the story of that smoky incident forever.