Table of Contents >> Show >> Hide
- Before You Send: Prepare Your Photos on Windows
- 1. Send Photos as Attachments in Outlook for Windows
- 2. Send Photos Directly from File Explorer
- 3. Send Photos from the Microsoft Photos App
- 4. Send Photos Through Gmail, Yahoo Mail, or Outlook.com in a Browser
- 5. Send Large Photo Collections with OneDrive, Google Drive, or Dropbox
- Bonus Method: ZIP Photos Before Attaching Them
- Which Method Should You Choose?
- Common Problems When Emailing Photos from Windows
- Safety and Privacy Tips for Sending Photos by Email
- Real-World Experience: What Actually Works Best
- Conclusion
- SEO Tags
Sending photos by email on a Windows computer should be simple: choose the pictures, click send, and wait for the compliments to roll in. In real life, Windows sometimes behaves like a polite maze. Your pictures may be too large, your email app may not appear in the Share menu, or your vacation folder may contain 74 photos named IMG_20260521_083944, because apparently cameras are allergic to meaningful file names.
The good news is that there are several easy ways to send photos via email on Windows. Whether you use Outlook, Gmail, the Microsoft Photos app, File Explorer, OneDrive, Google Drive, or another cloud service, you can send pictures from your PC without turning the process into a full-time job. This guide walks through five practical methods, explains when each one works best, and shares tips for avoiding common attachment problems.
Before you start, remember one golden rule: email is best for a small number of photos. If you want to send a full wedding album, a product shoot, or 300 pictures of your dog looking heroic on the couch, a cloud link is usually smarter than a traditional attachment.
Before You Send: Prepare Your Photos on Windows
A little preparation can save you from the dreaded “message too large” error. Most email services limit attachment size, and high-resolution photos from modern phones or cameras can become huge quickly. One photo may be 3 MB to 10 MB, and a handful of images can push your email over the limit.
Check the file size
Open File Explorer, find your photos, right-click a file, and choose Properties. If you select multiple photos, Windows can show their combined size. This helps you decide whether to attach the photos directly or use a cloud-sharing link.
Rename files before sending
Clear file names make life easier for the recipient. Instead of sending DSC_4471.jpg, rename it to something useful, such as kitchen-remodel-before.jpg or family-reunion-group-photo.jpg. If you are sending business photos, this small step looks more professional.
Resize photos when needed
If the recipient only needs to view the images on a screen, you usually do not need to send full-resolution originals. Windows tools such as Microsoft Photos, Paint, and some email apps can help reduce image dimensions or file size. Smaller photos upload faster, send faster, and are less likely to make your email app sigh dramatically.
Group photos into a folder
For multiple images, place them in one clearly named folder first. This makes it easier to select the right set, compress them into a ZIP file, or upload them to OneDrive, Google Drive, or Dropbox.
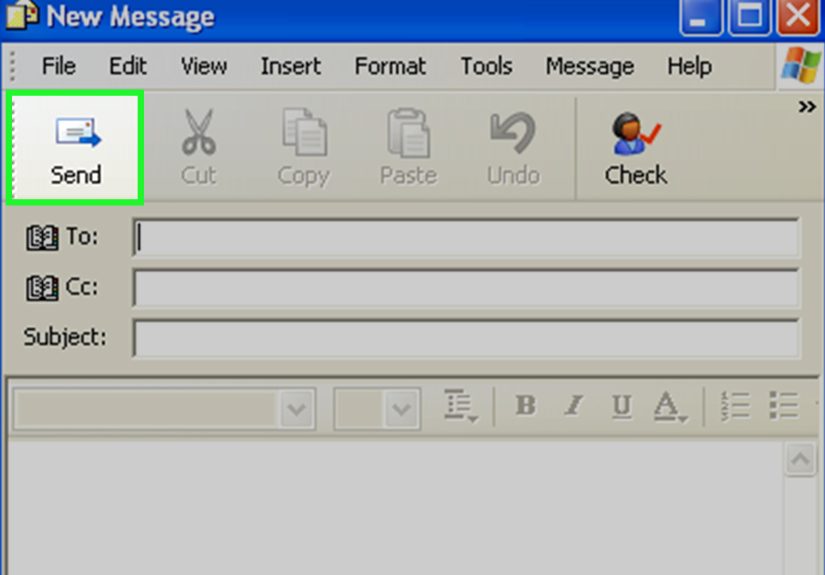
1. Send Photos as Attachments in Outlook for Windows
Outlook is one of the most common ways to email photos from a Windows computer. It works well for everyday image sharing, especially when you only need to send a few pictures. You can attach photos from your local drive, insert them directly into the email body, or upload them to OneDrive when the files are too large.
How to attach photos in Outlook
- Open Outlook or new Outlook for Windows.
- Select New Email.
- Enter the recipient’s email address and subject line.
- Click Attach File or the paperclip icon.
- Choose Browse This PC.
- Select the photo or photos you want to send.
- Write a short message and click Send.
This method is ideal for sending a few family photos, screenshots, receipts, project images, or product photos. If your email becomes too large, Outlook may suggest uploading the files to OneDrive instead. That is not a punishment; it is Outlook gently preventing your message from getting stuck in email traffic like a digital minivan during rush hour.
Attach vs. insert: What is the difference?
When you attach a photo, the recipient downloads it as a file. When you insert a photo into the body of the email, it appears inside the message itself. Use attachments when the recipient needs to save, edit, print, or forward the image. Use inserted images when you want the email to look more visual, such as a quick design preview or event invitation.
Best use case
Use Outlook attachments when you are sending a small batch of photos and want the most familiar, professional email workflow. It is especially useful for work, school, invoices, documentation, and client communication.
2. Send Photos Directly from File Explorer
File Explorer is the fastest method when your photos are already sitting in a folder. Instead of opening your email app first, you can start from the files themselves. This is helpful when you are sorting through images and decide, “Yes, these three are the winners; the blurry one where everyone has laser eyes can stay behind.”
How to share photos from File Explorer
- Open File Explorer.
- Go to the folder containing your pictures.
- Select one or more photos.
- Right-click the selected photos and choose Share, or use the Share button in the toolbar.
- Choose your email app, such as Outlook, if it appears.
- Complete the email and send it.
On some Windows setups, you may also see an option like Send to > Mail recipient. This older shortcut can create a new email with the selected photos attached, depending on your installed email program and default app settings.
What to do if your email app does not appear
If Windows does not show your email app, check your default app settings. Go to Settings > Apps > Default apps and make sure your preferred email program is set for email-related actions. Windows can only share through apps that support the Windows sharing feature, so webmail services like Gmail in a browser may not always appear in this menu.
Best use case
Use File Explorer when you already know exactly which photos you want to send. It is quick, direct, and especially good for people who organize photos into folders by event, date, project, or client.
3. Send Photos from the Microsoft Photos App
The Microsoft Photos app is useful when you want to preview images before sending them. It lets you browse, view, organize, lightly edit, and share pictures from one place. This method is great when you need to inspect photos before attaching them, because nobody wants to email the version where someone blinked unless it is for comedy purposes.
How to send photos from Microsoft Photos
- Open the Photos app on Windows.
- Browse to the picture or group of pictures you want to send.
- Select the photos.
- Click the Share icon.
- Choose an available email app.
- Finish the message and send it.
The Photos app may show sharing options based on the apps installed on your PC. If your favorite email service does not appear, you can still use Photos to locate and review your images, then attach them manually through Outlook, Gmail, Yahoo Mail, or another email service.
Why this method is helpful
The Photos app gives you a better visual preview than File Explorer. You can open an image, check whether it is sharp, crop or adjust it if needed, and then share it. It is a practical choice for sending personal photos, social event images, travel pictures, and before-and-after shots.
Best use case
Use Microsoft Photos when image quality matters and you want to review pictures before emailing them. It is especially helpful if you imported photos from a phone, camera, SD card, or cloud account and want to avoid sending the wrong file.
4. Send Photos Through Gmail, Yahoo Mail, or Outlook.com in a Browser
You do not need a desktop email app to send photos from Windows. Browser-based email services such as Gmail, Yahoo Mail, and Outlook.com work well from Chrome, Edge, Firefox, or another modern browser. This method is one of the most flexible because it works on almost any Windows PC, even if Outlook is not installed.
How to attach photos in Gmail
- Open your browser and go to Gmail.
- Click Compose.
- Click the paperclip attachment icon.
- Choose photos from your Windows computer.
- Wait for the files to upload.
- Add your message and click Send.
How to attach photos in Outlook.com or Yahoo Mail
- Open your email account in a browser.
- Create a new message.
- Click Attach or the paperclip icon.
- Select photos from your PC.
- Wait for the upload to finish before sending.
Browser email is excellent when you are using a shared computer, a work laptop, or a PC where you do not want to configure a full desktop email client. It also makes drag-and-drop easy: open File Explorer beside your browser, drag photos into the compose window, and let the email service upload them.
Watch the attachment limit
Most email services have attachment limits. If your photos exceed the limit, Gmail may convert the attachment into a Google Drive link, while Outlook may suggest OneDrive. This is normal. It means the recipient will get access to the photos through a link instead of receiving the full files inside the email.
Best use case
Use browser-based email when you want a simple, universal method that does not depend on Windows sharing settings. It is also a good choice for users who already live in Gmail or Outlook.com all day and have no desire to open another app just to send a picture of a receipt.
5. Send Large Photo Collections with OneDrive, Google Drive, or Dropbox
When you need to send many photos or high-resolution originals, cloud sharing is usually the best method. Instead of attaching every file to the email, you upload the photos to a cloud folder and email a link. This keeps the message small, reduces upload failures, and makes it easier for the recipient to download everything.
How to send photos with OneDrive
- Move or upload your photos to a folder in OneDrive.
- Right-click the folder or photos.
- Select Share.
- Choose whether recipients can view or edit.
- Copy the sharing link.
- Paste the link into your email and send it.
How to send photos with Google Drive
- Open Google Drive in your browser.
- Click New and upload photos or a folder.
- Right-click the uploaded folder or file.
- Choose Share or Copy link.
- Set the correct access permission.
- Paste the link into your email.
How to send photos with Dropbox
- Upload the photos to Dropbox.
- Right-click the file or folder.
- Choose Share or Copy link.
- Set viewing permissions if available.
- Paste the link into your email message.
Cloud sharing is the cleanest way to send large photo collections. It also gives you more control. Depending on the service, you may be able to stop sharing later, change permissions, or replace files without sending a new email. For business use, this is much better than sending five separate emails named “Photos part 1,” “Photos part 2,” and “Photos final final really final.”
Best use case
Use cloud links for large batches, high-resolution images, client galleries, school projects, real estate photos, event albums, and any situation where attachment size might become a problem.
Bonus Method: ZIP Photos Before Attaching Them
A ZIP file bundles multiple photos into one compressed folder. This does not always shrink JPEG photos dramatically because many image files are already compressed, but it does make multiple photos easier to attach and download.
How to create a ZIP file in Windows
- Put your photos in one folder.
- Right-click the folder.
- Select Send to > Compressed (zipped) folder.
- Rename the ZIP file clearly.
- Attach the ZIP file to your email.
ZIP files are useful when sending related images as a package. For example, a designer might send logo-options.zip, a teacher might send class-field-trip-photos.zip, or a homeowner might send roof-damage-insurance-claim.zip. The recipient downloads one file instead of chasing scattered attachments around the email like digital confetti.
Which Method Should You Choose?
The best way to send photos via email on Windows depends on the number of photos, file size, and recipient needs.
- Use Outlook for professional messages and small photo attachments.
- Use File Explorer when your photos are already organized in folders.
- Use Microsoft Photos when you want to preview and select images visually.
- Use Gmail or webmail when you prefer sending from a browser.
- Use cloud links for large photo collections or high-resolution originals.
- Use ZIP files when you want to bundle multiple photos into one attachment.
For most people, the simplest rule is this: attach one to five ordinary photos directly; use a cloud link for anything larger. That one habit prevents most email photo problems before they begin.
Common Problems When Emailing Photos from Windows
The email will not send
The total attachment size may be too large. Try removing some photos, resizing them, creating a ZIP file, or uploading the images to OneDrive, Google Drive, or Dropbox and sending a link instead.
The recipient cannot open the photos
Send common formats such as JPG, PNG, or HEIC only if the recipient can open HEIC files. JPG is usually the safest format for general sharing. If the photos came from an iPhone and appear as HEIC files, consider converting them to JPG before sending to users who may have older systems.
The photos look blurry
Some apps compress images automatically. If quality matters, send the original file as an attachment or upload the full-resolution photos to a cloud folder. Avoid copying and pasting images into the body of an email when the recipient needs the original quality.
The Share button does not show my email app
Your preferred email app may not be set as the default, or it may not support Windows sharing. Use the manual attachment method through your email app or webmail account.
The upload is slow
Large photos take time to upload, especially on slower connections. Resize images, send fewer files at once, or use a cloud service that can upload in the background.
Safety and Privacy Tips for Sending Photos by Email
Photos can contain more information than you realize. Some images may include location data, personal documents in the background, license plates, addresses, children’s faces, or sensitive business details. Before sending, zoom in and check the image carefully. The trash can in the background may not be a privacy issue, but your whiteboard full of client notes definitely is.
For private images, send them only to trusted recipients. Double-check the email address before clicking send, especially when autocomplete suggests similar names. If you use a cloud link, review the sharing permission. “Anyone with the link” is convenient, but “specific people” is safer for sensitive content.
If you are sending work-related photos, use your organization’s approved storage and email tools. Many companies have policies about sharing files externally, especially when images include customers, employees, documents, equipment, or private locations.
Real-World Experience: What Actually Works Best
After helping many Windows users send photos by email, one pattern becomes clear: the “best” method is rarely the fanciest one. It is the one that matches the situation. For example, if someone wants to send two pictures of a broken appliance to customer support, opening Gmail or Outlook and attaching the files directly is perfect. It is fast, simple, and does not require a cloud folder, permission settings, or a small ceremony under the full moon.
But when the job gets bigger, attachments become less friendly. A common mistake is trying to send 30 full-resolution phone photos in one email. The user clicks Send, waits, waits some more, and then receives an error message that feels personally judgmental. In that case, cloud sharing is the better answer. Upload the photos to OneDrive or Google Drive, create a folder named clearly, and send one link. The recipient gets a cleaner email, the sender avoids attachment limits, and everyone gets to continue their day with fewer dramatic sighs.
For business photos, naming and organization matter more than people think. A contractor sending repair photos, a real estate agent sharing listing images, or a small business owner emailing product shots should avoid random file names. A simple structure like front-view.jpg, kitchen-angle-1.jpg, or invoice-photo-august.jpg can prevent confusion. The recipient should not need detective skills to understand what each file shows.
The Microsoft Photos app is especially useful for people who like to review images visually. It is easy to select the best photo when you can actually see it large on the screen. This helps avoid classic mistakes such as sending the duplicate, the blurry shot, or the version where someone’s thumb is making a surprise guest appearance in the corner.
File Explorer remains the speed champion for organized users. If your photos are already sorted into folders, right-click sharing or manual attachment from File Explorer is quick and efficient. However, if Windows does not show your email app in the Share menu, do not fight it for an hour. Open your email service, click Attach, and choose the same photos manually. Sometimes the “boring” method wins because it works.
Another practical lesson: resizing is underrated. Many people send massive images when the recipient only needs to view them on a screen. A resized image can look perfectly fine in an email and upload much faster. Save full-resolution files for printing, editing, professional photography, or cases where detail truly matters.
Finally, always think about the recipient. A tech-savvy coworker may be comfortable with a cloud link. A grandparent may prefer regular attachments. A client may appreciate a neat folder with clear file names. Good photo sharing is not just about getting files out of your computer; it is about making them easy for someone else to receive, open, understand, and use.
Conclusion
Sending photos via email on Windows is easy once you know which route to take. Outlook is excellent for traditional attachments, File Explorer is fast for folder-based sending, Microsoft Photos helps you preview images first, browser-based email works almost anywhere, and cloud services are the smartest choice for large photo collections. Add a little preparation, such as checking file size, renaming images, resizing when appropriate, and setting the right sharing permissions, and you can avoid most problems before they appear.
The simple takeaway: use direct attachments for small batches and cloud links for bigger ones. Your email will send faster, your recipient will have an easier time, and your Windows PC will not have to pretend it is a pack mule carrying 600 megabytes of beach photos.
Note: This article is written for Windows 10 and Windows 11 users and reflects common workflows in Outlook, File Explorer, Microsoft Photos, Gmail, Outlook.com, OneDrive, Google Drive, and Dropbox. Menus may vary slightly depending on app version, account type, and Windows settings.