Table of Contents >> Show >> Hide
- Introduction: When a Pocket Computer Meets a Soldering Iron
- What Was the Cybiko?
- Why a Cybiko Repair-A-Thon Matters
- Common Cybiko Problems Found During Repair
- The Memory Upgrade: What Actually Changes?
- A Practical Cybiko Repair-A-Thon Workflow
- Why the Cybiko Still Fascinates Collectors
- Specific Example: From Dead Board to Upgraded Survivor
- Mistakes to Avoid During a Cybiko Repair
- Experience Notes: What a Cybiko Repair-A-Thon Feels Like in Real Life
- Conclusion: A Tiny Handheld Worth Saving
- Note
- SEO Tags
A deep dive into reviving one of the strangest, smartest, and most delightfully neon handheld computers of the early 2000s.
Introduction: When a Pocket Computer Meets a Soldering Iron
The phrase Cybiko Repair-A-Thon With Memory Upgrade sounds like something shouted across a hacker basement at 2 a.m., probably between the smell of flux and the discovery of one missing screw. But for fans of retro handhelds, it is much more than a quirky title. It represents a growing movement: saving forgotten electronics before they become little plastic fossils in a drawer.
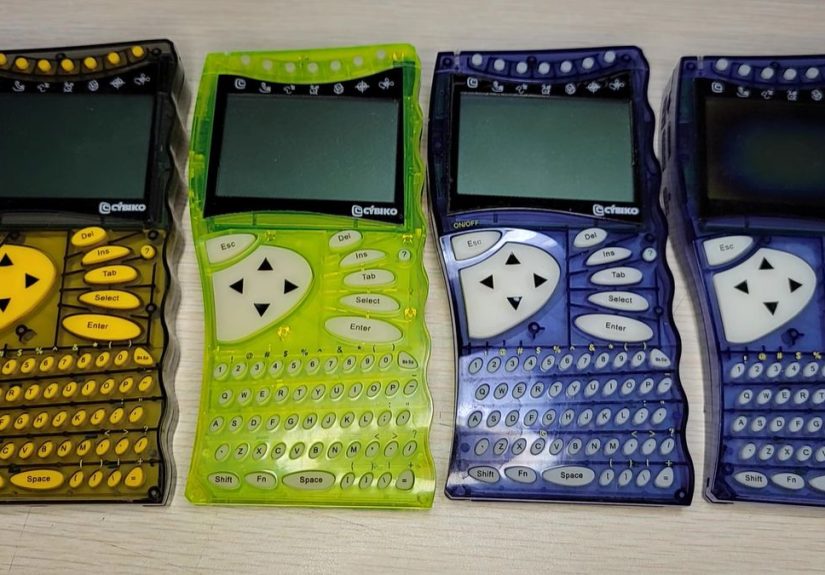
The Cybiko was a wireless handheld computer released around the turn of the millennium, aimed mostly at teenagers who wanted messaging, games, apps, and a bit of futuristic swagger. Before smartphones ate the world, the Cybiko offered a tiny keyboard, a monochrome screen, downloadable applications, radio-based communication, and colorful transparent plastic that practically screamed, “Yes, I was born in the year 2000.”
Today, restoring one is not simply a matter of popping in new batteries and hoping the early internet smiles upon you. Many units suffer from battery corrosion, aging flash memory, failing screens, broken rumble motors, damaged traces, and years of mystery storage conditions. A repair-a-thon brings several devices to the bench at once, allowing a restorer to compare symptoms, test parts, transplant components, and sometimes perform a memory upgrade that gives the machine more breathing room than it had when flip phones still felt fancy.
What Was the Cybiko?
The Cybiko was part PDA, part handheld game system, part walkie-talkie, and part teenage social network before social networks became algorithmic snack machines. It had a small rubber QWERTY keyboard, a grayscale LCD screen, wireless communication, organizer tools, games, and the ability to connect with other nearby Cybiko users.
In practical terms, it was a pocket computer for young users. In cultural terms, it was a charming attempt to predict mobile life before mobile life had fully arrived. Users could chat, play games, exchange data, and load apps from a computer. The device had its own personality: slightly awkward, extremely ambitious, and shaped like someone tried to combine a calculator, a pager, and a Game Boy during a brainstorming session fueled by soda.
Key Cybiko Features
- Compact handheld design with a rubber QWERTY keyboard
- Monochrome 160 x 100 pixel LCD display
- Radio-based wireless messaging between nearby devices
- Downloadable games and applications
- Expansion accessories, including memory and music-related add-ons
- Serial or USB connectivity depending on the model
The original Cybiko Classic used a Hitachi H8S-family processor and an Atmel coprocessor involved in radio functions. The later Cybiko Xtreme improved performance, design, sound, connectivity, and available memory. Neither model became a mainstream giant, but both earned a loyal following among collectors, hackers, and retro-computing enthusiasts.
Why a Cybiko Repair-A-Thon Matters
A repair-a-thon is useful because vintage electronics rarely fail in only one predictable way. One Cybiko may power on but show a blank display. Another may boot but refuse to save files. A third may have corrosion around the battery contacts. A fourth may look perfect and behave like it has been personally offended by electricity.
Working on multiple units at once gives the repairer a major advantage. A known-good screen can be used to test a questionable board. A working battery circuit can become the reference for a dead one. A healthy flash chip can confirm whether a failure is software-related or hardware-related. It is detective work, but instead of a magnifying glass, you use a multimeter, a logic probe, flux, hot air, and patience measured in coffee cups.
The repair-a-thon format also helps document repeated problems. If four units show corrosion in similar locations, that becomes a pattern. If multiple devices fail because of the same flash memory issue, that points toward a known weak spot. For rare hardware like Cybiko, this shared knowledge is extremely valuable because replacement parts are not sitting politely on a shelf at the local electronics store.
Common Cybiko Problems Found During Repair
1. Battery Corrosion
Battery corrosion is one of the most common enemies of vintage handhelds. Even units that look clean from the outside may hide damage near the contacts or on the circuit board. Corrosion can break traces, eat through pads, create resistance, and stop power from reaching the system properly.
The first step is visual inspection. Remove the battery pack, open the case carefully, and check for white, green, or crusty deposits. Cleaning typically involves careful neutralization, isopropyl alcohol, cotton swabs, and gentle mechanical cleaning. The key word is “gentle.” Scrubbing a 20-plus-year-old board like a frying pan is a wonderful way to turn a repair into an archaeological tragedy.
2. Black Screen or No Display
A Cybiko that powers up but shows nothing on the screen may have a display issue, contrast problem, ribbon connection fault, bad power rail, corrupted firmware, or failing memory. The display itself is simple by modern standards, but simple does not mean indestructible.
During repair, it helps to test the board with a known-good LCD or test the display on a known-good board. This is where a repair-a-thon shines. Multiple devices become a tiny laboratory, and every working part helps identify a non-working one.
3. Flash Memory Failure
Flash memory is one of the most interesting issues in Cybiko restoration. The device relies on flash storage for its operating environment, files, and installed software. When the flash chip fails, the handheld may behave unpredictably, fail to boot, lose data, or resist software loading.
Some restorers have replaced older Atmel DataFlash chips with larger compatible chips, such as moving from a 4 Mbit part to a 16 Mbit part. This is not a plug-and-pray situation. The system expects specific behavior, including ready/busy signaling and page organization. Choosing the wrong chip can create a very clean-looking repair that does absolutely nothing useful, which is the electronics equivalent of buying fancy running shoes for a goldfish.
4. Rumble Motor Failure
Some Cybiko units include small vibration motors used for feedback. These motors can seize, weaken, or disconnect over time. Replacing them is usually easier than flash memory work, but space is tight, wire routing matters, and the replacement part must match the voltage and physical constraints of the original design.
5. Connector and Cable Issues
The Cybiko Classic depends on a serial connection for loading software and communicating with a PC, while later models improved connectivity. Old cables, drivers, operating systems, and software utilities can create a second repair project before the actual repair even begins.
The Memory Upgrade: What Actually Changes?
In a Cybiko repair context, “memory upgrade” often refers to increasing usable flash storage rather than magically turning the device into a modern multitasking machine. The original hardware was built around tight limits. Programs, files, and system data had to live within a very small storage space by today’s standards.
Replacing a smaller flash chip with a larger compatible one can increase available storage and improve the usefulness of a restored device. For example, a 4 Mbit flash chip provides about 512 KB of storage, while a 16 Mbit chip provides about 2 MB. That still sounds tiny in the age of 4K video and apps larger than entire operating systems from the 1990s, but on a Cybiko, it can feel roomy.
Why Compatibility Is Everything
The challenge is that vintage devices were not designed with unlimited upgrade paths. The firmware may expect a certain type of flash chip, a certain command set, and a certain ready/busy behavior. If the replacement chip does not act the way the Cybiko expects, the device may fail to initialize it properly.
This makes the memory upgrade both exciting and delicate. It is not enough to say, “This chip has more capacity, therefore it is better.” The correct question is, “Will this chip speak the same electrical and command language that the Cybiko understands?” Retro hardware is picky. It is less like installing a bigger closet and more like convincing a tiny, elderly librarian to accept a new filing system.
Tools Commonly Used
- Temperature-controlled soldering iron
- Hot-air rework station
- Flux and solder wick
- Multimeter for continuity and voltage checks
- Magnification for inspecting pads and traces
- ESD-safe work surface
- Serial or USB connection tools for software testing
Good lighting matters too. Many repair failures begin with the sentence, “I can probably see that well enough.” Spoiler: you probably cannot.
A Practical Cybiko Repair-A-Thon Workflow
Step 1: Sort and Label Every Unit
Before opening anything, label each Cybiko. Note the color, model, serial number if visible, battery condition, display condition, and whether it powers on. This prevents confusion when parts start moving around the bench.
Step 2: Inspect Power First
Check the battery compartment, contacts, charging path, and power rails. A dead handheld may not be dead at all; it may simply be starved for clean voltage. Many vintage repairs are solved by fixing power delivery before touching more complicated components.
Step 3: Clean Corrosion Carefully
Remove corrosion before applying extended power. Corrosion can create shorts or resistance that damages other components. Clean the board gradually, inspect traces, and repair broken connections with fine wire if necessary.
Step 4: Test Display and Input
Once power is stable, test the LCD, keyboard, speaker, and rumble motor. A working screen tells you far more about the system state than a silent board. If the keyboard has dead keys, clean the contacts and inspect the rubber membrane.
Step 5: Connect to a Computer
Software loading and debugging are central to Cybiko restoration. Tools such as older loader programs may require legacy Windows environments, virtual machines, or carefully configured adapters. Getting the computer connection working can confirm whether the device is alive even when the display is not cooperating.
Step 6: Diagnose Flash Storage
If the system boots inconsistently or fails to retain files, flash memory becomes a suspect. At this stage, compare behavior with known-good units, inspect chip markings, and research compatible replacements before desoldering anything.
Step 7: Perform the Memory Upgrade
When replacing flash memory, protect nearby plastic, apply flux, remove the original chip cleanly, inspect the pads, align the new chip perfectly, and verify every pin after soldering. Even one bridged pin can make the device act possessed, and unfortunately “haunted Cybiko” is not a supported operating mode.
Step 8: Reassemble and Stress Test
After a successful boot, load apps, save files, restart the device, test wireless functions if another Cybiko is available, and confirm that the memory upgrade remains stable. A repair is not truly finished until the device survives more than one triumphant power-on moment.
Why the Cybiko Still Fascinates Collectors
The Cybiko is fascinating because it arrived with ideas that later became normal. Messaging? Yes. Downloadable apps? Yes. Wireless local interaction? Yes. A pocket device that mixed games, communication, and identity? Absolutely.
Its limitations make it even more interesting. The screen is tiny. The memory is tiny. The processor is tiny. Yet the ambition was huge. The Cybiko tried to create a mobile social experience before smartphones, app stores, and always-on data plans were everywhere. It was not just a gadget; it was a prediction wrapped in translucent plastic.
Repairing and upgrading one today is a form of technology preservation. Every revived unit keeps a small chapter of computing history alive. It also teaches skills that modern sealed devices often hide from users: soldering, debugging, reading datasheets, understanding memory architecture, and respecting the magic of a clean power rail.
Specific Example: From Dead Board to Upgraded Survivor
Imagine a repair-a-thon with four Cybiko units on the bench. Unit A has severe battery corrosion and no power. Unit B powers on but shows a black screen. Unit C boots but cannot save apps reliably. Unit D works well enough to become the reference device.
The process begins by cleaning Unit A and repairing a broken trace near the battery contacts. Unit B gets a display swap test, revealing that the board is alive but the LCD connection is unreliable. Unit C becomes the memory-upgrade candidate because its flash behavior is unstable. The old flash chip is removed, a larger compatible DataFlash chip is installed, and the board is tested through the software loader.
After reassembly, Unit C now boots consistently, stores more software, and becomes the star of the session. Unit A may need more trace work, Unit B may need display connector repair, and Unit D remains the trusted benchmark. This is the beauty of a repair-a-thon: not every unit needs to be fixed in the same way, and every device teaches you something useful about the next one.
Mistakes to Avoid During a Cybiko Repair
- Rushing disassembly: Old plastic clips can snap easily.
- Using too much heat: Excessive heat can lift pads or warp nearby plastic.
- Skipping documentation: Photos help you remember screw placement, wire routing, and connector orientation.
- Assuming all flash chips are compatible: Capacity alone does not guarantee success.
- Ignoring corrosion under components: Damage can hide beneath shields, connectors, and battery terminals.
- Testing with unstable power: Bad voltage can create confusing symptoms and additional damage.
The best repairers move slowly, test often, and keep notes. Vintage electronics reward patience. They punish confidence when confidence is just guessing wearing a nice hat.
Experience Notes: What a Cybiko Repair-A-Thon Feels Like in Real Life
A Cybiko repair-a-thon is equal parts workshop, puzzle room, and group therapy for people who collect obsolete electronics. At first, everything looks manageable. The devices are small, the screws are friendly enough, and the boards seem simple compared with modern smartphones. Then you notice the corrosion. Then the display does not respond. Then the computer refuses to talk to the loader software. Suddenly, this cheerful plastic handheld has become a tiny professor teaching an advanced class called “Humility 401.”
The first experience that stands out is how important comparison becomes. When working on only one broken device, every symptom feels mysterious. With several Cybikos on the bench, patterns appear. If one board has a clean startup sound and another stays silent, you have a clue. If one LCD works across multiple boards, you can stop blaming the screen. If one unit accepts files while another refuses, the storage system moves up the suspect list. Multiple devices turn confusion into evidence.
The second lesson is that old hardware has personality. A modern phone either works or disappears behind a glued screen and proprietary parts. A Cybiko invites conversation. You can see the traces. You can follow the battery path. You can identify the memory chip, inspect the solder joints, and understand why a failed connection causes a specific problem. It feels less like fighting a sealed appliance and more like negotiating with a stubborn but honest machine.
The memory upgrade adds another layer of satisfaction. Installing a larger flash chip is not visually dramatic. There is no fireworks display, no cinematic boot animation, and sadly no tiny voice saying, “Upgrade complete, captain.” But when the device recognizes the storage and starts behaving reliably, the reward is enormous. You have not just repaired a toy; you have extended the practical life of a pocket computer from a very specific moment in tech history.
There is also a social pleasure in the repair-a-thon format. People bring different strengths. One person is great at soldering. Another is patient with software setup. Someone else remembers obscure loader tools or has a cable that looks homemade because it probably is. The table fills with screw trays, antistatic mats, printouts, parts bags, and the occasional snack placed dangerously close to isopropyl alcohol. It is messy, but it is productive.
Most importantly, repairing a Cybiko changes how you see forgotten technology. These devices were not failures in the simple sense. They were early, strange, limited, clever, and brave. They tried to make handheld communication playful before the world was ready to carry a glowing rectangle everywhere. Bringing one back to life feels like restoring a small message from the past. The message says: “We almost had the future figured out. Also, please check the battery compartment.”
Conclusion: A Tiny Handheld Worth Saving
Cybiko Repair-A-Thon With Memory Upgrade is more than a repair story. It is a reminder that old gadgets can still teach modern lessons. The Cybiko combined messaging, apps, games, wireless communication, and personal computing long before those ideas became ordinary. Its hardware may be modest, but its ambition was enormous.
Repairing one requires care, research, and a willingness to troubleshoot both hardware and software. Upgrading memory requires even more precision because flash compatibility matters as much as capacity. Yet the payoff is worth it. A revived Cybiko is not just a collectible; it is a working piece of mobile computing history.
For retro enthusiasts, hardware hackers, and collectors, the Cybiko remains a delightful project. It is weird in the best way, repairable in the satisfying way, and historically important in a way that becomes clearer every year. Plus, any device that can make a grown adult excited about a few extra megabytes deserves respect.
Note
This article is for educational and informational purposes. Vintage electronics repair involves risk of damage, electric shock, burns, and data loss. Always verify component compatibility, use proper safety equipment, and practice soldering skills before attempting a Cybiko memory upgrade or board-level repair.