Table of Contents >> Show >> Hide
- Why Rainbow Book Ledges Are Perfect for Children's Books
- Planning Your DIY Rainbow Book Ledges
- Materials and Tools You’ll Need
- How to Build DIY Rainbow Book Ledges
- How to Install Book Ledges Safely
- Rainbow Color Ideas for Different Room Styles
- How to Organize Books on Rainbow Ledges
- Budget Tips for DIY Rainbow Book Ledges
- Common Mistakes to Avoid
- Creative Ways to Personalize the Ledges
- Maintenance and Cleaning
- of Real-Life Experience: What It’s Like to Make and Use DIY Rainbow Book Ledges
- Conclusion
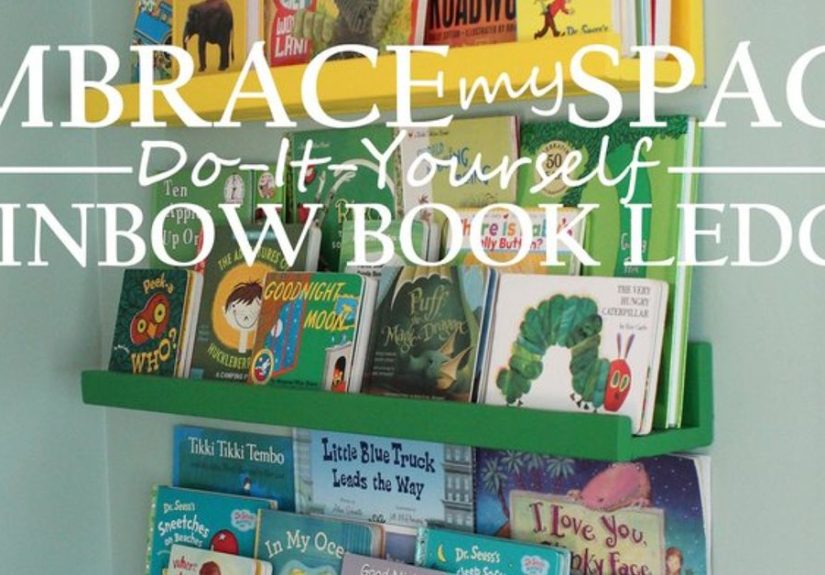
Children’s books have a magical talent for multiplying. One day you have three bedtime favorites and one suspiciously sticky board book; the next day, the floor looks like a tiny library lost a wrestling match. That is exactly where DIY rainbow book ledges for children’s books come in. They are colorful, practical, wall-mounted shelves that display book covers facing outward, making it easier for children to see, choose, and actually use their books.
Unlike a deep bookcase where picture books disappear spine-first into the shadows, rainbow book ledges turn favorite stories into cheerful wall art. They brighten a nursery, playroom, reading nook, homeschool corner, or shared bedroom while keeping books off the floor and within reach. Best of all, this project is beginner-friendly, budget-conscious, and customizable. You can build a soft pastel rainbow for a calm nursery, a bold primary-color set for a playroom, or a muted modern palette that says, “Yes, a child lives here, but an adult with taste also pays the mortgage.”
This guide covers design planning, materials, sizing, building steps, painting tips, installation safety, styling ideas, and real-life experience notes to help you create sturdy, beautiful, front-facing book storage that children will love using.
Why Rainbow Book Ledges Are Perfect for Children’s Books
Book ledges are shallow shelves with a front lip that keeps books from sliding off. For children’s books, this design is especially helpful because picture books are often wide, thin, and visually driven. Children recognize covers long before they can read titles, so displaying books face-out helps them make independent choices. A toddler may not know the title of the dinosaur book, but they absolutely know “the one with the giant green stompy guy.”
Rainbow book ledges add another layer of appeal. Color naturally draws attention, and a rainbow arrangement can make the reading area feel playful rather than like another storage solution designed by someone who has stepped on one too many board books. The color-coded look also makes cleanup easier. You can assign each shelf a color family, organize by mood, or simply use the rainbow as a fun visual structure.
Benefits of Front-Facing Book Storage
Front-facing book ledges support children’s reading habits in several simple ways. They make books visible, reduce clutter, and allow kids to choose stories without pulling out an entire stack. They also encourage book rotation. Since ledges hold fewer books than a traditional shelf, parents can display a curated selection and swap titles weekly or seasonally.
This style works especially well for bedtime stories, early readers, seasonal books, library books, and current favorites. Instead of stuffing every book into one crowded bookcase, you create a “featured collection” that feels fresh and inviting.
Planning Your DIY Rainbow Book Ledges
Before buying wood or paint, choose the wall, measure the space, and decide how many ledges you want. A small nursery may only need three short shelves. A larger playroom might look fantastic with six ledges stacked vertically in full rainbow order: red, orange, yellow, green, blue, and purple.
For children’s spaces, height matters. Install lower ledges where kids can safely reach books without climbing. Higher ledges can hold decorative items, keepsake books, or titles you rotate in later. Avoid placing shelves above a crib, bed, or changing table where items could fall onto a child.
Recommended Sizes
A practical ledge length is usually between 24 and 48 inches. Shorter ledges are easier to install and may fit between windows, closet doors, or furniture. Longer ledges create a dramatic library wall but require more careful installation into studs or appropriate anchors.
A common DIY build uses a back board, a bottom board, and a narrow front rail. For example, you can use a 1×4 board for the back, a 1×3 or 1×4 board for the base, and a 1×2 board for the front lip. This creates enough depth for picture books while keeping the ledge slim and tidy.
Materials and Tools You’ll Need
You do not need a professional workshop to build rainbow book ledges. Basic tools and careful measuring will do most of the heavy lifting. The project is also flexible: you can cut your own boards or ask a home improvement store to make straight cuts for you.
Materials
- 1×4 boards for the back pieces
- 1×3 or 1×4 boards for the bottom shelves
- 1×2 boards for the front lips
- Wood glue
- Wood screws or trim screws
- Brad nails or finishing nails, optional
- Wood filler
- Sandpaper in medium and fine grit
- Primer
- Low-VOC or zero-VOC paint in rainbow colors
- Clear water-based protective topcoat, optional
- Wall screws and anchors suitable for your wall type
Tools
- Tape measure
- Pencil
- Level
- Stud finder
- Drill
- Saw, if cutting boards yourself
- Clamps, optional but helpful
- Paintbrush or small foam roller
If you are new to woodworking, choose straight boards and inspect them before buying. Place each board on the floor and check for bending, twisting, or dramatic curves. A slightly imperfect board can work for a rustic project, but a wildly warped board will make your ledge look like it is trying to escape the wall.
How to Build DIY Rainbow Book Ledges
The construction process is simple: cut, sand, assemble, fill, paint, and install. The most important steps are measuring carefully and fastening securely.
Step 1: Measure and Cut the Boards
Decide the length of each ledge. For a clean rainbow wall, make all ledges the same length. For a playful look, vary the lengths slightly, such as 36 inches, 30 inches, and 24 inches. Cut one back board, one bottom board, and one front lip for each ledge.
Label the pieces as you cut them. This prevents the classic DIY moment where every board looks identical until you realize one shelf has a front lip two inches too short. That moment has a soundtrack, and it is not cheerful.
Step 2: Sand Every Edge
Children touch everything, so smooth edges are essential. Sand cut ends, corners, and board faces with medium-grit sandpaper first, then finish with fine-grit sandpaper. Slightly round sharp edges so the shelves feel comfortable and safe to handle.
Step 3: Assemble the Ledge
Place the back board upright and attach the bottom board at a right angle using wood glue and screws. Pre-drilling pilot holes helps prevent splitting. Then attach the 1×2 front lip along the outer edge of the bottom board. Use wood glue plus brad nails, finishing nails, or trim screws.
The result should look like a shallow tray mounted against a back panel. The front lip keeps books from sliding forward, while the back board provides a strong surface for wall mounting.
Step 4: Fill Holes and Sand Again
Use wood filler to cover nail holes, screw holes, and small gaps. After it dries, sand the filled areas smooth. This step makes the final paint finish look polished rather than “I built this during snack time while someone asked for juice seventeen times.”
Step 5: Prime the Wood
Primer helps paint adhere evenly and improves color payoff, especially for bright rainbow shades. White primer works well under most colors. Let the primer dry fully according to the product label.
Step 6: Paint the Rainbow
Paint each ledge a different rainbow color. For a classic rainbow, use red, orange, yellow, green, blue, and violet. For a softer children’s room, try blush, peach, butter yellow, sage, sky blue, and lavender. For a modern look, use terracotta, mustard, olive, teal, dusty blue, and plum.
Choose low-VOC or zero-VOC paint, especially for nurseries and kids’ bedrooms. Apply thin coats rather than one thick coat. Thin coats dry smoother, resist drips, and make the shelves look more professional. Let each coat dry fully before adding the next one.
Step 7: Add a Protective Finish
A clear water-based topcoat can help protect the paint from scratches, sticky fingers, and enthusiastic book shoving. This is optional, but it is useful in high-traffic playrooms. Choose a finish appropriate for indoor children’s furniture and allow it to cure fully before placing books on the shelves.
How to Install Book Ledges Safely
Installation is where pretty meets practical. Children may pull on shelves, lean against them, or remove books with the dramatic energy of a tiny librarian during a thunderstorm. Secure installation matters.
Use a stud finder to locate wall studs whenever possible. Mark the stud locations lightly with pencil. Hold the ledge against the wall, use a level to straighten it, and drill through the back board into the studs. If you cannot hit studs, use wall anchors rated for the expected weight and your wall type. When in doubt, choose stronger hardware than you think you need.
For long ledges, use at least two secure attachment points. For very long shelves, three or more are better. Avoid overloading the ledges with heavy books, toys, or decorative objects. These shelves are meant for children’s books, not bowling balls, family heirlooms, or that one giant coffee table book nobody knows where to put.
Spacing Between Ledges
Leave enough vertical space for tall picture books. A spacing of 12 to 16 inches between shelves usually works well, depending on the size of your books. Use painter’s tape on the wall before drilling to preview the layout. This lets you adjust spacing without creating a constellation of unnecessary holes.
Rainbow Color Ideas for Different Room Styles
The rainbow theme can be bright, soft, earthy, or sophisticated. You do not have to use neon colors unless your design goal is “birthday party inside a crayon box.” Pick shades that match the room’s personality.
Classic Playroom Rainbow
Use bold red, orange, yellow, green, blue, and purple. This look works well in energetic spaces with toy storage, activity tables, and colorful rugs.
Pastel Nursery Rainbow
Choose muted pink, apricot, pale yellow, mint, powder blue, and lilac. This style feels gentle and calming while still adding charm.
Earthy Rainbow
Try clay, rust, ochre, moss, slate blue, and mauve. This palette looks beautiful with natural wood, woven baskets, linen curtains, and Montessori-inspired decor.
One-Color Ombre
If a full rainbow feels too busy, create an ombre set using different shades of the same color. A blue ombre wall, for example, can move from pale sky to deep navy. It still feels playful but more understated.
How to Organize Books on Rainbow Ledges
Once the shelves are installed, the fun begins. You can organize books by color, theme, reading level, season, or current favorites. For younger children, keep the system simple. Display fewer books at a time so the choice feels exciting rather than overwhelming.
Try placing bedtime books on the lowest shelf, library books on the middle shelf, and seasonal books on the top shelf. You can also use one ledge for “new this week” books to keep reading fresh. Rotating books every one or two weeks helps children rediscover older favorites.
Book Rotation Example
For spring, display books about gardens, bugs, rain, baby animals, and colors. In summer, swap in ocean stories, camping books, travel books, and silly adventure tales. Fall can bring pumpkins, leaves, school stories, and cozy bedtime books. Winter is perfect for snow, kindness, family traditions, and holiday stories.
Budget Tips for DIY Rainbow Book Ledges
This project can be very affordable if you plan carefully. Standard pine boards are usually budget-friendly and easy to paint. Check scrap wood bins at home improvement stores for shorter pieces. Use leftover paint samples for the rainbow colors. Paint sample jars are often enough for small ledges and cost far less than buying full quarts of every shade.
You can also build two or three ledges now and add more later. A reading wall does not have to be completed in one weekend. In fact, doing it gradually gives you time to test the height, spacing, and book capacity before committing to a full rainbow installation.
Common Mistakes to Avoid
The first mistake is making the ledges too deep. Deep shelves may look roomy, but they can become bulky and easier to bump into. A shallow ledge is usually better for picture books.
The second mistake is skipping sanding. Rough edges and children’s hands are not a charming combination. Sand thoroughly.
The third mistake is using weak installation hardware. Even lightweight shelves need secure fastening. Always consider the combined weight of wood, books, and real-life kid behavior.
The fourth mistake is overfilling the ledges. Front-facing shelves look best when books have room to breathe. If every shelf is packed tightly, children may struggle to remove books and the display loses its inviting look.
Creative Ways to Personalize the Ledges
Rainbow book ledges are already cheerful, but a few personal touches can make them special. Add small vinyl labels, painted stars, tiny clouds, or the child’s name above the reading wall. You can paint the front lip a contrasting color or use natural wood for the base with only the front rail painted.
Another idea is to create a “reading rainbow” theme. Place a small floor cushion, a soft rug, and a basket of stuffed animals nearby. Add a battery-operated wall light or a cozy lamp. The goal is to create a reading spot that feels like an invitation, not a command. Children respond better to “look at this cozy book corner” than “please improve your literacy development before dinner.”
Maintenance and Cleaning
Dust the ledges regularly with a soft cloth. For fingerprints, use a damp cloth and mild soap if the paint finish allows it. Avoid harsh cleaners that may dull the paint or leave residue. Check the screws and shelf stability every few months, especially in rooms used by toddlers or multiple children.
If the paint chips, lightly sand the area and touch it up with leftover paint. Keep small labeled jars of each rainbow color for quick repairs. Future you will be grateful, especially when someone drives a toy truck into the yellow shelf with the confidence of a stunt coordinator.
of Real-Life Experience: What It’s Like to Make and Use DIY Rainbow Book Ledges
The best part of building DIY rainbow book ledges is that the project feels rewarding almost immediately. Some DIY projects take weeks before you see progress, but book ledges transform a wall fast. Once the first shelf is painted and held against the wall, you can already imagine the finished reading nook. It is the kind of project that gives you a little burst of confidence, even if your garage is messy and your measuring tape has mysteriously vanished three times.
In real family life, these ledges work because they match how children actually use books. Kids often choose by cover, character, color, or memory. A traditional bookshelf may be efficient for adults, but young children do not always scan book spines neatly. They grab, tug, stack, and sometimes abandon books halfway between the shelf and the rug. Front-facing ledges reduce that friction. A child can see the bunny book, the truck book, the moon book, or the funny monster book without emptying an entire shelf.
Another practical experience is that rainbow ledges make cleanup easier when the system is not too strict. If you demand perfect color sorting every night, you may accidentally create a tiny library job no one applied for. But if each shelf simply has a general color or theme, children can help return books without stress. Even toddlers can learn that bedtime books go on the blue shelf or library books go on the green shelf. The rainbow becomes a visual cue.
Painting is usually the most enjoyable and most patience-testing part. Bright colors may need extra coats, especially yellow and red. Pastels are more forgiving, but they can look uneven if the primer is skipped. The smartest approach is to paint all sides in stages and let each coat dry fully. Rushing paint is like rushing bedtime: technically possible, emotionally expensive.
Installation is the moment to slow down. It is tempting to eyeball the shelves, especially after the excitement of painting, but a level is your best friend. Crooked ledges become very obvious once books are lined up. Painter’s tape helps enormously because you can test the arrangement before drilling. You may discover that the lowest shelf should be a few inches higher, or that the top shelf looks better aligned with a window frame.
After the ledges are in use, the biggest surprise is how decorative children’s books become. Beautiful covers add personality to a room without buying extra wall art. Seasonal books can change the mood instantly. A row of winter books feels cozy; a shelf of ocean stories feels summery; a rainbow of animal books can make the whole room feel alive.
The second surprise is how quickly children develop favorites. When books are visible, kids return to them more often. They point, request, rearrange, and proudly choose stories for adults to read. This small independence matters. The shelves are not just storage; they quietly say, “Books belong to you. You can reach them. You can choose them. Reading is part of your world.”
For parents, caregivers, or teachers, DIY rainbow book ledges offer a rare combination: they are useful, attractive, affordable, and emotionally satisfying. They solve clutter, encourage reading, and add color without taking up floor space. And unlike many children’s room upgrades, they can grow with the child. Today they hold board books. Later they can display early readers, chapter books, art, photos, small collections, or school projects.
Conclusion
DIY rainbow book ledges for children’s books are more than a cute weekend project. They are a smart storage solution, a cheerful design feature, and a simple way to make reading more visible and inviting. With basic boards, careful sanding, child-friendly paint, and secure wall installation, you can create a colorful book display that fits your space and your child’s personality.
Whether you choose bold rainbow shelves for a playroom or soft pastel ledges for a nursery, the result is practical magic: fewer books on the floor, more covers at eye level, and a reading corner that feels joyful. And if the shelves inspire one extra bedtime story, that is a pretty wonderful return on a few boards and a Saturday afternoon.