Table of Contents >> Show >> Hide
- Before You Start: Is the Crack Cosmetic or Serious?
- Tools and Materials You Will Need
- Step 1: Clean and Inspect the Crack
- Step 2: Choose the Right Repair Method
- Step 3: Apply Drywall Tape for a Strong Repair
- Step 4: Apply Thin Coats of Joint Compound
- Step 5: Sand Smooth Without Overdoing It
- Step 6: Prime Before Painting
- How to Fix a Crack in a Ceiling Quickly
- How to Fix a Crack in a Plaster Wall
- Fast Fix vs. Long-Lasting Fix: What Is the Difference?
- Common Mistakes to Avoid
- Quick Product Guide: Spackle, Joint Compound, Tape, and Caulk
- Real-World Experience: What Actually Helps the Repair Look Professional
- Conclusion
That tiny crack in your wall or ceiling may look innocent, but somehow it has the emotional power of a horror movie jump scare. One day your room looks freshly painted and civilrywall cracks are not a disaster. With the right tools, a little patience, and a refusal to smear random goo on the wall like a panicked raccoon, you can fix many wall and ceiling cracks quickly and easily.
This guide explains how to repair drywall cracks, hairline wall cracks, ceiling cracks, seam cracks, and minor plaster cracks using practical DIY methods. You will learn what materials to use, when to tape, when to spackle, when to call a professional, and how to make the finished repair disappear under paint. The goal is simple: a smooth wall, a clean ceiling, and no suspicious ridge that looks like a speed bump under your paint.
Before You Start: Is the Crack Cosmetic or Serious?
Most small cracks in drywall are cosmetic. They often happen because of normal house movement, seasonal humidity changes, poor drywall taping, nail pops, minor settling, or paint and joint compound shrinkage. These are common in ceilings, around doors, near windows, and along drywall seams.
However, not every crack should be treated as a quick Saturday project. Some cracks are warning signs. If the crack is wide, growing quickly, diagonal from a door or window corner, paired with sagging drywall, surrounded by water stains, or accompanied by doors and windows that suddenly stick, pause the repair. A cosmetic patch will not fix a structural or moisture problem. It will only give the crack a tiny costume.
Call a professional if you see these red flags
- Cracks wider than about 1/4 inch or cracks that keep growing
- Stair-step cracks in masonry or foundation walls
- Ceiling cracks with sagging, bulging, or soft drywall
- Brown water stains, peeling paint, moldy odors, or damp patches
- Cracks that return soon after repair
- Homes built before 1978 where sanding may disturb old lead-based paint
If the crack is small, dry, stable, and located in drywall or plaster, you can usually handle the repair yourself. Let’s get to the fun part: making the crack vanish like it owes you money.
Tools and Materials You Will Need
You do not need a contractor’s truck full of mystery buckets. For most wall crack repair and ceiling crack repair jobs, gather these basic supplies:
- Utility knife or painter’s 5-in-1 tool
- Putty knife, 6-inch taping knife, and 10- or 12-inch drywall knife
- Drywall joint compound or lightweight spackle
- Paper drywall tape or self-adhesive fiberglass mesh tape
- Fine-grit sanding sponge or 120- to 220-grit sandpaper
- Dust mask, safety glasses, and drop cloth
- Primer and matching paint
- Damp sponge or microfiber cloth
- Paintbrush, roller, or small touch-up kit
For faster repairs, use setting-type joint compound, often called “hot mud,” which hardens faster than premixed compound. It is great when you need to repair a crack in a wall quickly, but it gives you less working time. Beginners may prefer premixed joint compound because it is more forgiving. It dries slower, but it does not punish you for answering the door halfway through the job.
Step 1: Clean and Inspect the Crack
Start by clearing the area. Move furniture, lay down a drop cloth, and remove loose paint, peeling drywall paper, crumbs of old compound, or any flaky material around the crack. Use a utility knife to lightly open the crack into a shallow V-shape. Do not carve a canyon. You only want to create enough space for compound to bond properly.
Wipe away dust with a damp cloth or sponge. Drywall dust is sneaky; if you leave it behind, it can weaken the bond between the surface and the patching compound. If the wall or ceiling feels damp, stop. Find and fix the leak first. Painting or patching over moisture is like putting a tuxedo on a raccoon: technically dressed up, still a problem.
Step 2: Choose the Right Repair Method
The fastest method depends on the type of crack. Using the wrong product can make the repair fail, even if it looks good for a week.
For tiny hairline cracks
Use lightweight spackle or a thin layer of joint compound. Press it into the crack with a flexible putty knife, scrape off the excess, let it dry, sand lightly, prime, and paint. Hairline cracks are the easiest drywall crack repair jobs because they usually do not need tape.
For cracks wider than hairline
Use drywall tape and joint compound. Tape reinforces the crack so it does not simply reopen after the compound dries. If the crack follows a drywall seam, taping is especially important. Joint compound alone may shrink, crack, or crumble over time.
For ceiling cracks
Use tape and joint compound, and work in thin coats. Gravity is not your friend during ceiling repair. Thick globs of compound can sag, crack, or fall onto your forehead in a truly undignified home improvement moment. If the drywall is loose, add drywall screws into the ceiling joists before taping and finishing.
For corner cracks
If the crack is where the wall meets trim, baseboards, crown molding, or a ceiling line, a paintable flexible caulk may be better than joint compound. Caulk handles slight movement better in trim joints. But do not use caulk across flat drywall cracks in the middle of a wall; it can leave a shiny, flexible line that paint may highlight.
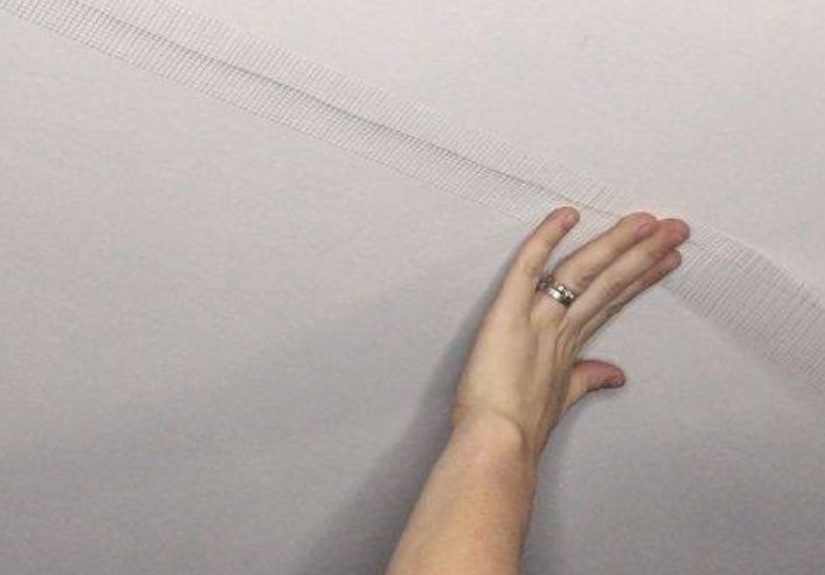
Step 3: Apply Drywall Tape for a Strong Repair
For a lasting wall or ceiling crack repair, tape is the secret ingredient. Paper tape is strong and commonly used for drywall seams. Fiberglass mesh tape is self-adhesive and faster for small crack repairs. Mesh tape is convenient, but paper tape often creates a stronger repair when embedded properly in joint compound.
If using paper tape, spread a thin bed of joint compound over the crack with a 6-inch taping knife. Press the paper tape into the wet compound, center it over the crack, and smooth it firmly to remove air bubbles. Keep the tape flat. Bubbles under tape are like bad plot twists: they always show up later.
If using self-adhesive mesh tape, stick it directly over the crack, then cover it with joint compound. Press compound through the mesh so it bonds to the drywall beneath. Feather the edges outward so the patch blends into the surrounding surface.
Step 4: Apply Thin Coats of Joint Compound
The biggest beginner mistake is applying one thick coat and hoping for the best. Drywall repair rewards patience. Use thin coats. Thin coats dry better, sand easier, and blend more naturally. Thick coats shrink, crack, and create lumpy repairs that look like the wall has a secret under its shirt.
For the first coat, cover the tape completely and feather the compound a few inches beyond each side of the crack. Let it dry according to the product instructions. For faster work, setting-type compound can harden in 20, 45, or 90 minutes depending on the formula. Premixed joint compound usually needs longer, often overnight for best results.
For the second coat, use a wider knife and spread the compound farther out. This hides the raised edge of the tape. For a wall crack, feather the repair 6 to 8 inches wide. For ceiling cracks, you may need to feather even wider because ceiling light makes imperfections easier to see. The ceiling is basically a giant overhead spotlight judging your work.
If needed, apply a third skim coat with a 10- or 12-inch drywall knife. The final coat should be very thin. Your goal is not to build a mountain; it is to create a gentle slope so the repair disappears.
Step 5: Sand Smooth Without Overdoing It
Once the compound is fully dry, sand lightly with a fine-grit sanding sponge. Use gentle circular motions or long strokes along the patch. Do not sand so aggressively that you expose the tape. If tape appears, you have gone too far and need another thin coat of compound.
For a cleaner job, hold a work light at an angle across the wall or ceiling. This reveals ridges, bumps, and low spots. A patch can look smooth straight on and then suddenly reveal itself when light hits it from the side. Side lighting is brutally honest, like a friend who tells you there is spinach in your teeth.
After sanding, wipe the area with a barely damp cloth to remove dust. Let it dry before priming.
Step 6: Prime Before Painting
Never skip primer. Fresh joint compound absorbs paint differently than the surrounding wall, which can cause flashing, dull spots, or visible patch outlines. Use a quality drywall primer or stain-blocking primer if there was old water staining. Primer seals the repair and gives paint a uniform surface.
After priming, paint the patched area with matching paint. For small repairs, you can sometimes touch up only the repaired area. For older paint, glossy finishes, or large ceiling repairs, you may need to repaint the entire wall or ceiling section for a seamless result. Paint fades over time, and even a perfect patch can stand out if the color match is slightly off.
How to Fix a Crack in a Ceiling Quickly
Ceiling cracks need the same basic repair method as wall cracks, but the technique matters more because gravity is constantly trying to ruin your afternoon.
- Protect the floor and furniture with drop cloths.
- Scrape away loose paint, texture, and damaged drywall paper.
- Check for moisture, sagging, or loose drywall.
- If needed, add drywall screws into framing near the crack.
- Apply mesh or paper tape over the crack.
- Cover with a thin layer of joint compound.
- Let it dry, then add one or two wider coats.
- Sand lightly, prime, repaint, and match texture if necessary.
If your ceiling has popcorn, orange peel, knockdown, or skip-trowel texture, the repair is not finished after sanding. You must recreate the texture before painting. Practice on cardboard or scrap drywall first. Texture products can be sprayed, rolled, or applied with a knife depending on the style. Matching ceiling texture is part technique, part patience, and part accepting that ceilings were invented to humble us.
How to Fix a Crack in a Plaster Wall
Older homes often have plaster walls instead of drywall. Plaster cracks can be repaired with joint compound for minor cosmetic cracks, but deeper cracks may need plaster repair compound, mesh tape, or special plaster washers if the plaster is loose from the lath behind it.
For a small plaster crack, gently widen and clean the crack, press compound into the opening, apply tape if the crack is larger or recurring, then feather with additional coats. If the plaster moves when pressed, or if you hear hollow areas around the crack, the repair may require more than a quick patch. Loose plaster needs to be secured before finishing, or the crack will return like an unwanted sequel.
Fast Fix vs. Long-Lasting Fix: What Is the Difference?
A fast fix hides the crack. A long-lasting fix reinforces it. If you simply smear spackle over a moving crack, the repair may look fine for a short time but fail when the house expands, contracts, or settles. For hairline cracks, spackle may be enough. For seam cracks, ceiling cracks, and recurring cracks, tape and joint compound are the smarter choice.
If speed matters, use fast-setting compound and thin coats. A same-day repair is possible for small cracks if you work carefully, use quick-setting materials, and have good airflow. But do not force drying with extreme heat. A fan, normal room temperature, and low humidity are safer than blasting the patch with heat until it resembles desert pottery.
Common Mistakes to Avoid
Using too much compound
More compound does not mean a stronger repair. It means more sanding, more dust, and more opportunities to create a bump. Use thin coats and feather them wide.
Skipping tape on larger cracks
Compound alone cannot bridge a moving crack well. Tape reinforces the repair and helps prevent the crack from reopening.
Painting before the compound is dry
If joint compound is still damp, paint can blister, peel, or dry unevenly. Wait until the patch is fully dry and light in color before sanding and priming.
Forgetting primer
Primer prevents patch flashing and helps paint blend. It is a small step that saves you from staring at a ghost-shaped repair every time the sunlight hits the wall.
Ignoring the cause
If the crack is caused by moisture, loose drywall, structural movement, or poor framing, patching the surface will not solve the problem. Repair the cause first, then repair the finish.
Quick Product Guide: Spackle, Joint Compound, Tape, and Caulk
Spackle is best for small nail holes, tiny dents, and very fine hairline cracks. It dries quickly and sands easily.
Joint compound is best for drywall cracks, seams, and repairs that need feathering over a wider area. It is smoother and better for blending larger patches.
Setting-type joint compound is best for faster repairs and stronger first coats. It comes as a powder and hardens chemically after mixing with water.
Paper tape is strong and reliable for seams and cracks when embedded properly.
Fiberglass mesh tape is fast and convenient, especially for small crack repairs, because it sticks to the surface before mudding.
Paintable caulk is best for small gaps where trim meets walls or ceilings, not for flat drywall cracks across open surfaces.
Real-World Experience: What Actually Helps the Repair Look Professional
The biggest lesson from real wall and ceiling crack repair is that the visible part of the job is rarely the most important part. Anyone can slap compound over a crack. The difference between a patch that looks professional and one that looks like a frosting accident is preparation. Cleaning the crack, removing loose material, and using tape when needed matter more than buying the fanciest bucket in the aisle.
One common homeowner experience goes like this: a hairline crack appears above a door frame. The homeowner fills it with spackle, sands it, paints it, and celebrates. Two months later, the crack returns in the exact same place, wearing the same little smirk. Why? Door and window openings are stress points. If the crack has movement behind it, spackle alone may not hold. A better repair is to open the crack slightly, embed paper or mesh tape in joint compound, feather the patch wider than feels necessary, then prime and paint. The repair takes longer, but it is far less likely to return.
Ceiling repairs teach another lesson: wide feathering is everything. On a wall, a small ridge may hide behind furniture or shadows. On a ceiling, every ridge gets a spotlight. A narrow patch over a ceiling crack often creates a visible stripe. A wider patch, feathered gradually with a 10- or 12-inch knife, blends much better. The trick is to stop thinking of the repair as “filling a line” and start thinking of it as “creating a smooth transition.” That mindset changes the whole result.
Another experience worth remembering is the paint match problem. Many homeowners do a beautiful patch, sand it perfectly, prime it correctly, and then touch it up with leftover paint from the garage. Unfortunately, wall paint ages. It collects dust, absorbs light, and changes slightly over time. Even paint from the original can may not match perfectly years later. If the touch-up flashes or looks blotchy, repainting the whole wall from corner to corner usually gives a better finish. It sounds like extra work, but it often saves time compared with endless touch-up attempts.
Dust control is another real-life difference maker. Sanding drywall compound creates fine dust that travels like it has vacation plans. Use a drop cloth, close nearby doors, cover vents if appropriate, and sand gently. A damp sanding sponge can reduce dust for small repairs. After sanding, wipe the surface before priming. Paint does not like dust. It may stick at first, but the finish can look rough or weak.
Finally, do not underestimate patience. Fast-setting compound can speed up the project, but rushing still causes problems. Let coats dry or harden fully, sand lightly, prime properly, and use thin layers. The best crack repair is not the one that happens in five frantic minutes. It is the one you do once and then forget about because the wall looks normal again. That is the dream: a boring wall. In home repair, boring is beautiful.
Conclusion
Learning how to fix a crack in a wall or ceiling quickly and easily is mostly about matching the repair to the crack. Tiny hairline cracks may only need spackle, sanding, primer, and paint. Larger or recurring drywall cracks need tape and joint compound. Ceiling cracks require careful thin coats, wide feathering, and sometimes texture matching. Most importantly, cracks caused by leaks, sagging drywall, structural movement, or old lead-based paint need extra caution before you start sanding and patching.
With the right tools and a calm approach, you can make many wall and ceiling cracks disappear without calling in a full construction crew. Clean the crack, reinforce it when needed, apply thin coats, sand gently, prime, and paint. Your reward is a smooth surface and the quiet satisfaction of knowing you defeated a crack with a putty knife and common sense.
Note: This article is written for general DIY guidance. For cracks linked to water damage, sagging ceilings, structural movement, mold, or possible lead-based paint in older homes, consult a qualified professional before beginning repairs.