Table of Contents >> Show >> Hide
- What Makes Tungsten Carbide So Difficult to Grind?
- Tools and Equipment Needed to Grind Tungsten Carbide
- Step-by-Step: How to Grind Tungsten Carbide
- Wet Grinding vs. Dry Grinding Tungsten Carbide
- Common Mistakes When Grinding Tungsten Carbide
- Best Practices for Precision Carbide Grinding
- Specific Examples of Tungsten Carbide Grinding
- Safety Notes for Grinding Tungsten Carbide
- Experience-Based Tips: Lessons from the Carbide Grinding Bench
- Conclusion
Grinding tungsten carbide is a little like trying to shave a diamond with a butter knife: possible only if you bring the right tool, the right technique, and a healthy respect for the material. Tungsten carbide is famous for being extremely hard, wear resistant, and stubborn in the way a locked garage door is stubborn when you are already late for work. That toughness is exactly why it is used in cutting tools, dies, punches, wear parts, nozzles, bushings, mining tools, and precision industrial components.
But the same qualities that make tungsten carbide valuable also make it difficult to grind. Regular aluminum oxide wheels that work nicely on steel often rub, glaze, overheat, or barely make progress on carbide. The correct answer is usually a diamond grinding wheel, controlled coolant, rigid workholding, light passes, and careful dust or mist control. In this guide, you will learn how to grind tungsten carbide safely, accurately, and efficiently without turning an expensive carbide part into a tiny, glittering paperweight.
What Makes Tungsten Carbide So Difficult to Grind?
Tungsten carbide is not ordinary metal. Most cemented tungsten carbide is a composite material made of hard tungsten carbide grains held together by a metallic binder, commonly cobalt, and sometimes nickel or other additives. That structure gives it high hardness, compressive strength, and wear resistance. It also means the material behaves differently from steel during grinding.
Instead of peeling away in long chips like a ductile metal, tungsten carbide is removed through micro-fracturing, abrasion, and erosion of the binder. If the grinding wheel is too soft, too dull, or made with the wrong abrasive, it will load up or skate across the surface. If the wheel is too aggressive or the operator pushes too hard, the part can chip, crack, burn, or lose dimensional accuracy.
The Golden Rule: Use Diamond Abrasives
The most important rule in carbide grinding is simple: use a diamond abrasive whenever precision and efficiency matter. Diamond is the preferred abrasive for tungsten carbide because it is harder than carbide and can cut it cleanly. Cubic boron nitride, or CBN, is excellent for hardened steels and ferrous alloys, but diamond is generally the better choice for carbide, ceramics, glass, and other very hard non-ferrous materials.
That does not mean every diamond wheel is automatically perfect. The wheel bond, grit size, concentration, shape, speed, coolant, and machine condition all matter. Choosing a diamond wheel without matching it to the job is like buying hiking boots without checking the size. Technically, you own boots. Practically, you may suffer.
Tools and Equipment Needed to Grind Tungsten Carbide
Before grinding tungsten carbide, prepare the right equipment. The goal is not brute force. The goal is controlled material removal with minimal heat, minimal vibration, and maximum repeatability.
1. A Rigid Grinding Machine
Use a surface grinder, tool and cutter grinder, cylindrical grinder, centerless grinder, or precision bench grinder designed for fine grinding work. Rigidity matters because tungsten carbide punishes chatter. A loose spindle, worn bearings, flimsy fixture, or shaky table can leave a poor surface finish and may chip edges.
For small tool sharpening jobs, a dedicated carbide grinder with diamond wheels can work well. For precision parts, use a machine with accurate feed control, coolant delivery, and proper guarding. If you are grinding a carbide insert, die, punch, or wear component with tight tolerance requirements, avoid handheld shortcuts unless the job is only rough shaping or deburring.
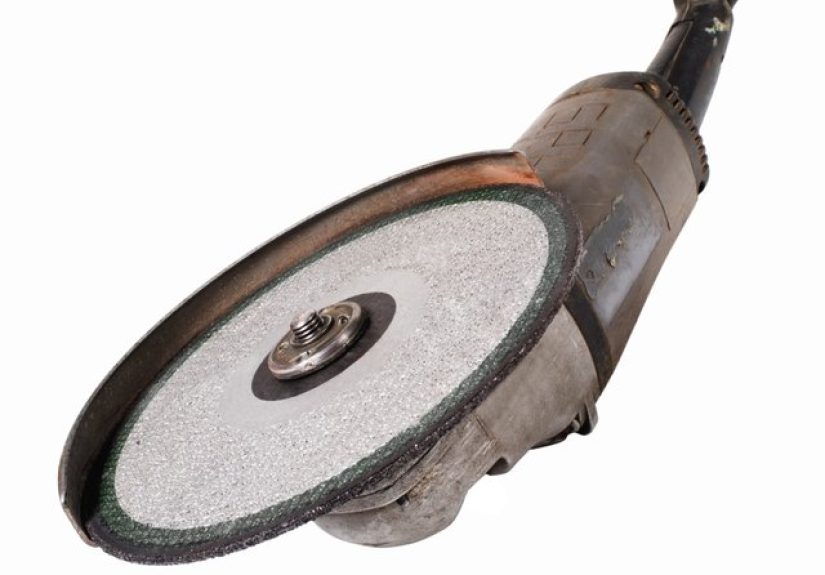
2. Diamond Grinding Wheel
A diamond grinding wheel is the standard choice for tungsten carbide grinding. Common bond types include resin bond, metal bond, vitrified bond, and electroplated bond. Resin bond wheels are popular because they cut relatively cool and provide good finish quality. Metal bond wheels are durable and hold form well but may need more careful dressing. Vitrified diamond wheels can offer high precision and strong coolant access. Electroplated wheels cut aggressively but have only one abrasive layer, so once that layer is worn, the wheel is finished.
For general carbide grinding, a medium grit diamond wheel is often a good starting point. Coarser grits remove stock faster but leave a rougher finish. Finer grits create smoother surfaces but remove material more slowly and can load more easily. A common practical approach is to rough with a coarser diamond wheel and finish with a finer wheel.
3. Coolant or Grinding Fluid
Coolant is not just there to make the machine look fancy. It reduces heat, flushes swarf, improves surface finish, and helps extend wheel life. When grinding tungsten carbide, heat control is critical because excessive heat can cause microcracking, edge breakdown, cobalt leaching concerns, and dimensional problems.
Use a coolant compatible with carbide grinding. Many shops prefer synthetic or semi-synthetic grinding fluids designed for carbide because they help control heat and reduce problems related to cobalt binder. The coolant stream should be aimed directly into the grinding zone, not vaguely in the same postal district. A weak trickle of coolant that misses the wheel-work contact area is mostly decorative.
4. Dust, Mist, and Safety Controls
Grinding tungsten carbide can generate fine dust, coolant mist, and particles containing carbide, cobalt, nickel, or other binder materials. Use machine guards, splash shields, local exhaust ventilation, mist collectors, proper coolant filtration, safety glasses, gloves where appropriate, and respiratory protection when required by the workplace risk assessment. Dry grinding carbide without dust collection is not a clever time-saver; it is a bad idea wearing safety glasses.
Step-by-Step: How to Grind Tungsten Carbide
The exact process depends on the part shape and required tolerance, but the core method is similar for most tungsten carbide grinding operations.
Step 1: Inspect the Carbide Part
Start by inspecting the part. Look for cracks, chips, brazed joints, coatings, sharp corners, and existing wear patterns. If the carbide is brazed to a steel body, be especially careful with heat because the braze joint can be affected. If the carbide has a coating, decide whether the coating must be preserved, removed, or reground completely.
Measure the part before grinding. Record the starting dimensions and the final target dimensions. Tungsten carbide is expensive, and it does not grow back. A measurement plan saves money, embarrassment, and the awkward silence that happens when someone asks, “Where did the other three thousandths go?”
Step 2: Select the Right Diamond Wheel
Choose the wheel based on the operation. For rough grinding, use a coarser diamond grit. For finishing, use a finer grit. For flat surfaces, a surface grinding wheel shape such as 1A1 may be appropriate. For tool relief, fluting, gashing, or form grinding, select the wheel shape that matches the geometry.
As a general guide, use a resin bond diamond wheel for cool cutting and good finish, a metal bond wheel for form holding and durability, and an electroplated wheel for aggressive shaping or specialty profiles. Always follow the wheel manufacturer’s recommended speed, direction, coolant, and dressing instructions.
Step 3: Mount and True the Wheel
Mount the diamond wheel carefully. Check that the flanges are clean, the wheel is seated properly, and the machine guard is in place. Do not force a wheel onto a spindle. Do not run a damaged wheel. Do not exceed the rated speed. These are not suggestions from the Department of Boring Rules; they are how you keep the wheel from becoming airborne confetti.
If needed, true and dress the wheel according to the manufacturer’s instructions. A wheel that is out of round will create vibration, poor finish, and inconsistent material removal. Dressing also exposes sharp diamond grains and helps the wheel cut instead of rub.
Step 4: Secure the Workpiece
Clamp the carbide part securely. Use a magnetic chuck only if the part or fixture allows reliable holding; carbide itself is not strongly magnetic in the way steel is. For small carbide tools or inserts, use a proper fixture, vise, collet, or tool holder. The part should not shift under grinding force.
Support thin sections and avoid overhanging setups. Tungsten carbide is hard, but it can be brittle. A poorly supported carbide edge may chip faster than a coffee mug dropped on concrete.
Step 5: Set Coolant Flow
Turn on coolant before the wheel contacts the workpiece. Aim the stream directly at the grinding zone. The coolant should flush the contact area, not bounce off the guard or splash the operator. For production work, clean and filtered coolant is important because dirty coolant carries abrasive particles that can scratch the part, load the wheel, and damage machine components.
Coolant maintenance matters. Check concentration, pH, tramp oil, odor, and filtration. If the coolant looks like old soup and smells like regret, it is not helping your grinding process.
Step 6: Use Light Passes
Take light cuts. Tungsten carbide grinding rewards patience. Heavy infeed can cause heat, cracks, edge chipping, wheel wear, and poor finish. Use steady table travel and avoid dwelling in one spot. Dwelling builds heat and can create localized damage.
For precision surface grinding, spark out at the end of the process. A spark-out pass means allowing the wheel to pass over the work without additional downfeed, removing tiny remaining high spots and improving finish and accuracy.
Step 7: Control Heat and Watch the Grind
Heat is the enemy. Watch for discoloration on attached steel bodies, unusual sparks, burning smells, coolant boiling, or changes in grinding sound. Tungsten carbide itself may not show heat damage the same way steel does, so do not wait for dramatic visual clues. If the grinding zone gets too hot, reduce infeed, improve coolant delivery, dress the wheel, or change the wheel specification.
A properly cutting diamond wheel has a steady sound and predictable feel. A dull or loaded wheel may squeal, rub, push the part, or require increasing force. If you find yourself leaning harder and harder, stop. The wheel is telling you something, and it is not whispering compliments.
Step 8: Finish, Deburr, and Inspect
After grinding, inspect the part under magnification if the edge or surface is critical. Look for chips, cracks, burrs, uneven finish, and dimensional error. Use a micrometer, height gauge, optical comparator, surface plate, or other measuring equipment suited to the part.
For cutting tools, check relief angles, rake surfaces, edge radius, and symmetry. For dies and wear parts, check flatness, parallelism, roundness, surface finish, and corner integrity. A smooth-looking surface is not always a correct surface, so measure instead of guessing.
Wet Grinding vs. Dry Grinding Tungsten Carbide
Wet grinding is generally preferred for tungsten carbide because it controls heat, reduces airborne dust, improves finish, and helps wheel life. It is especially important for precision parts, carbide tooling, and production grinding.
Dry grinding may be used in limited cases, such as small touch-ups with proper dust collection and the correct diamond wheel, but it requires caution. Dry grinding produces more heat and airborne dust. If dry grinding is unavoidable, use light pressure, frequent pauses, effective local exhaust ventilation, and proper personal protective equipment.
Common Mistakes When Grinding Tungsten Carbide
Using the Wrong Wheel
The biggest mistake is trying to grind carbide with a conventional wheel intended for steel. It may remove a small amount of material, but it will be slow, hot, and ugly. Use diamond abrasives for carbide whenever the result matters.
Grinding Too Aggressively
Heavy cuts may feel productive, but carbide does not appreciate bullying. Aggressive grinding can chip edges, crack corners, overload the wheel, and ruin the finish. Light passes are usually faster in the long run because they reduce rework.
Poor Coolant Direction
Coolant must reach the grinding zone. A generous flow that misses the contact point is like watering the driveway while the garden dies. Adjust nozzles carefully and keep them clear.
Ignoring Wheel Dressing
A glazed or loaded diamond wheel does not cut properly. Dress or clean the wheel as recommended. Proper dressing exposes fresh diamond and helps maintain geometry.
Skipping Safety Controls
Carbide grinding dust and mist deserve respect. Use ventilation, filtration, guards, eye protection, and suitable respiratory controls. Clean the work area with methods that avoid stirring dust into the air. Compressed air may be convenient, but blasting fine carbide particles around the shop is not a winning strategy.
Best Practices for Precision Carbide Grinding
For high-quality tungsten carbide grinding, combine the right abrasive with disciplined process control. Keep the machine rigid and clean. Balance and true the wheel. Use the correct wheel speed. Maintain coolant concentration and filtration. Grind with light infeed. Measure often. Protect sharp edges. Avoid thermal shock. Document wheel specifications and successful settings so the next job starts from knowledge instead of folklore.
When working with expensive carbide parts, test on scrap material if possible. A few minutes of testing can prevent a costly mistake. In production environments, track wheel life, part finish, cycle time, coolant condition, and reject causes. The best grinding shops do not rely on luck; they build repeatable systems.
Specific Examples of Tungsten Carbide Grinding
Sharpening a Carbide-Tipped Tool
For a carbide-tipped saw blade, router bit, or cutting tool, use a fine diamond wheel and light pressure. Maintain the original cutting geometry. Avoid overheating the brazed joint. Use coolant where the machine design allows it, and inspect the edge for chips after sharpening.
Surface Grinding a Carbide Wear Plate
For a flat carbide wear plate, use a surface grinder with a diamond wheel. Take light passes and use plenty of coolant. Check flatness and parallelism frequently. Finish with a finer wheel or spark-out passes if the part requires a smoother surface.
Grinding a Carbide Punch or Die
For a punch, die, or precision form, workholding and wheel form are critical. Use a properly dressed diamond wheel and avoid sharp internal stress risers when possible. Inspect corners carefully because small chips can grow into major failures during service.
Safety Notes for Grinding Tungsten Carbide
Grinding tungsten carbide is not just a machining challenge; it is a safety challenge. Cemented carbide may contain cobalt or nickel binders. Grinding can create dust, fine particles, and coolant mist that may irritate the eyes, skin, and respiratory system. In professional shops, exposure should be controlled through engineering controls first, including enclosed machines, ventilation, mist collection, coolant filtration, and housekeeping procedures.
Wear safety glasses or a face shield, use machine guards, and follow the safety data sheet for the specific carbide grade and grinding wheel. Do not eat, drink, or smoke in grinding areas. Wash hands after handling carbide dust or grinding residue. If you are in a workplace, follow OSHA requirements and your company’s industrial hygiene program. If you are a hobbyist, do not assume “small job” means “small risk.” Tiny dust is still dust, and lungs are not replaceable consumables.
Experience-Based Tips: Lessons from the Carbide Grinding Bench
The first practical lesson about grinding tungsten carbide is that the wheel usually tells the truth before the part does. When a diamond wheel is cutting well, the machine feels calm. The sound is steady, the coolant clears the swarf, and the part comes into size without drama. When the wheel starts rubbing, everything changes. The sound rises, the part heats faster, and the operator feels tempted to push harder. That temptation is where many carbide grinding problems begin.
One useful habit is to treat every carbide job like a precision job, even if it looks simple. A small carbide scraper, punch, insert, or wear pad can be ruined by one careless pass. Before touching the wheel to the part, take a moment to ask: Where is the material coming off? How will I hold the part? Where will heat go? What surface must remain untouched? That short pause often saves more time than the fastest grinding pass.
Another experience-based tip is to keep separate wheels for roughing and finishing. A wheel used for aggressive stock removal may not produce the best final surface. Likewise, using a fine finishing wheel to hog off material is slow and frustrating. In a small shop, it may feel economical to use one wheel for everything, but carbide has a way of charging hidden fees through extra time, poor finish, and worn abrasives.
Coolant condition is also more important than many beginners expect. Clean coolant makes grinding feel smoother. Dirty coolant can carry tiny abrasive particles back into the contact zone, where they scratch the work and wear the wheel. If surface finish suddenly gets worse even though the wheel and setup seem unchanged, check the coolant, nozzle direction, and filtration before blaming the machine.
Patience is the quiet superpower in tungsten carbide grinding. Carbide does not respond well to panic, heavy hands, or “just one more big pass.” The best results often come from sneaking up on the final dimension. Measure, grind lightly, measure again, and finish with spark-out passes. This is not glamorous, but neither is explaining why a part that took two weeks to procure is now undersized.
For edge work, magnification is your friend. A carbide cutting edge can look fine to the naked eye and still have microchips. A small loupe or microscope reveals whether the edge is clean, ragged, rounded, or cracked. Once you start inspecting carbide edges under magnification, you quickly learn how much pressure, vibration, and wheel condition affect the final result.
Finally, good carbide grinding is a combination of science and touch. The science is wheel specification, speed, coolant, feed, and measurement. The touch is listening to the machine, feeling vibration, noticing coolant behavior, and knowing when to stop. Beginners often want a single magic setting. Experienced grinders know the real magic is consistency: the right diamond wheel, a rigid setup, light passes, clean coolant, safe dust control, and careful inspection every time.
Conclusion
Learning how to grind tungsten carbide is mainly about respecting the material. Carbide is hard, wear resistant, and unforgiving, but it is not mysterious. Use a diamond grinding wheel, support the work securely, apply coolant correctly, take light passes, control dust and mist, and inspect the finished surface carefully. Whether you are sharpening a carbide tool, grinding a wear component, or finishing a precision die, the same principles apply: cut cool, cut clean, and do not rush.
The best tungsten carbide grinding results come from preparation. Choose the right wheel before the first spark, maintain the coolant before problems appear, and measure before removing too much material. Do that, and carbide becomes less like an impossible material and more like a demanding customer: picky, expensive, but manageable when treated properly.