Table of Contents >> Show >> Hide
- Why a Puzzle Board Is Worth Making
- Before You Build: Size, Materials, and a Smart Game Plan
- Option 1: The No-Saw Foam Board Puzzle Board
- Option 2: The Sturdy Felt-Covered Wood Puzzle Board
- Option 3: The Portable Lap-Style Puzzle Board
- Simple Add-Ons That Make a Big Difference
- Mistakes to Avoid When Making a Puzzle Board
- Which DIY Puzzle Board Option Should You Choose?
- Real-Life Experience: What It Is Actually Like to Use a DIY Puzzle Board
- Conclusion
If your dining table has become a part-time puzzle studio, a full-time snack zone, and an occasional hostage situation for 1,000 tiny cardboard pieces, it may be time for a proper puzzle board. The good news? You do not need a full woodshop, a dramatic renovation montage, or a lumberjack nickname to make one. A good DIY puzzle board can be simple, affordable, and surprisingly attractive. More importantly, it lets you move your puzzle without turning your masterpiece into abstract art.
Whether you want something ultra-budget-friendly, a sturdier wood version, or a portable board you can stash under the couch like a crafty little secret, there is an option here for you. In this guide, you will learn how to make a puzzle board three different ways, what materials work best, how big your board should be, and which upgrades are actually useful instead of just sounding impressive in the hardware aisle.
The goal is simple: create a flat, stable, easy-to-carry surface that keeps your puzzle pieces in place and your living room from looking like a cardboard confetti storm. Let us build one.
Why a Puzzle Board Is Worth Making
A puzzle board is one of those projects that feels almost suspiciously practical. It gives you a dedicated work surface, makes cleanup easier, and saves your progress when real life barges in with dinner, guests, or a cat that believes every flat surface is a personal invitation.
It also solves a common puzzle problem: location. Not everyone has a spare game room or a permanent table to sacrifice to a 1,500-piece landscape of suspiciously similar blue sky. A DIY puzzle board lets you work on the sofa, the coffee table, the bed, or even your lap if you build the right version. Better yet, you can customize it to your space instead of settling for a one-size-fits-all store-bought option.
And yes, making your own is often cheaper than buying a specialty puzzle table. It can also be better. You decide the size, the weight, the handle placement, the surface texture, and whether it deserves a sleek finish or a proudly homemade look that says, “I built this and also I know where every edge piece lives.”
Before You Build: Size, Materials, and a Smart Game Plan
How big should a puzzle board be?
The easiest rule is to build for your largest puzzle, not your current one. Measure the finished dimensions printed on the puzzle box, then add at least 2 to 4 inches of extra space on each side. That extra border gives you room to sort pieces, rotate sections, and avoid living dangerously at the edges.
For many adults, a board around 24 x 30 inches works well for everyday puzzling. If you regularly do larger puzzles, size up to something closer to 30 x 36 inches or even 24 x 48 inches. A bigger board is more versatile, but also heavier and harder to store, so do not go giant unless your space and patience can handle it.
Best materials for a DIY puzzle board
- Foam board: lightweight, cheap, easy to cut, and perfect for a simple version.
- Hardboard or MDF: smooth and sturdy, great for a flatter, more durable board.
- Sanded plywood: stronger than foam board and friendlier for upgrades like handles or trim.
- Felt: helps keep pieces from sliding around and gives the surface that classic puzzle-board feel.
- Cork: useful as a backing or cushioning layer if you want extra grip or a softer base.
- Grip liner: excellent on the bottom of a portable board so it does not scoot around like it is trying to escape.
Basic tools you may need
- Tape measure
- Pencil and straightedge
- Utility knife or craft knife
- Scissors
- Spray adhesive or peel-and-stick felt
- Sandpaper
- Optional: circular saw, drill, clamps, router
If power tools make you nervous, start with Option 1. If you enjoy a little sawdust and want something sturdier, move to Options 2 or 3.
Option 1: The No-Saw Foam Board Puzzle Board
This is the easiest and most affordable DIY puzzle board. It is ideal for apartment dwellers, casual puzzlers, students, and anyone who wants a functional board without entering a full woodworking relationship.
What you need
- 1 or 2 foam boards cut to your desired size
- Felt large enough to cover the top
- Spray adhesive or self-adhesive felt
- Painter’s tape or duct tape
- Utility knife
- Ruler or straightedge
How to make it
- Measure your size. Start with the puzzle size you want to accommodate, then add working room around the edges.
- Cut the foam board. Use a sharp utility knife and a straightedge. Make several light passes instead of one heroic stab. Your board will thank you.
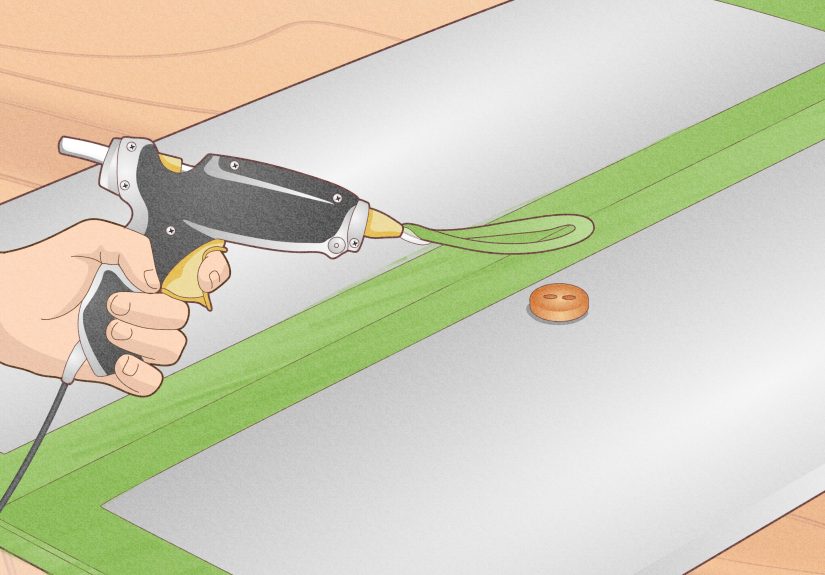
- Add the felt surface. Spray adhesive on the foam board, smooth the felt from the center outward, and trim the excess. If you use self-adhesive felt, even better. Less mess, less drama.
- Create a cover if you want one. Use a second foam board as a top cover. You can tape one side like a hinge or simply keep it separate and secure it with clips.
- Reinforce the edges. Wrap the outer edges with painter’s tape, fabric tape, or thin duct tape to reduce dents and fraying.
Why this option works
Foam board is lightweight, easy to move, and simple to store under a bed or behind a bookshelf. The felt gives puzzle pieces more traction, which matters more than you might think. Without it, one accidental nudge can send your edge pieces on a group field trip.
Best for
Small to medium puzzles, occasional use, and anyone who wants a low-cost homemade puzzle board in an afternoon.
Watch-outs
Foam board is not the champion of durability. It can dent, warp, or bend if you lean on it too hard or store it badly. If you puzzle often, you may eventually want a sturdier upgrade.
Option 2: The Sturdy Felt-Covered Wood Puzzle Board
If Option 1 is the budget hatchback of puzzle boards, this one is the dependable station wagon. It is sturdier, flatter, and much better for long-term use. A sanded plywood, hardboard, or MDF panel creates a more professional-looking board that still is not difficult to make.
What you need
- One wood panel cut to size
- Felt or peel-and-stick felt
- Spray adhesive
- Fine sandpaper
- Optional trim, edge banding, or corner guards
- Optional handles
How to make it
- Choose your board. Sanded plywood is strong and attractive. Hardboard is smooth and economical. MDF is flat and easy to work with, though heavier.
- Cut it to size. If the home center can cut it for you, great. If not, use a circular saw with a straightedge for a cleaner, easier cut.
- Sand the edges. Knock down splinters and rough spots with fine sandpaper. This step takes minutes and saves your hands from future regret.
- Attach felt to the top. Spray adhesive on the board and smooth the felt carefully, starting in the center. Trim flush with a sharp knife.
- Finish the edges. You can leave them simple, cover them with iron-on edge banding, or add thin trim for a polished look.
- Add handles if desired. Simple drawer pulls or cutout handholds make the board easier to carry.
Why this option works
A wood-based puzzle board feels solid. It stays flat better than foam board, holds up to repeated use, and can support larger puzzles more comfortably. If you enjoy puzzling every week, this is usually the sweet spot between easy DIY and long-term usefulness.
Best for
Frequent puzzlers, larger puzzles, and people who want a board that looks intentional instead of looking like it escaped from a school science fair.
Upgrade ideas
- Add a thin raised trim around the edges to keep stray pieces from making a break for freedom.
- Attach felt or cork to the bottom to protect furniture.
- Finish the wood with paint or clear coat for a cleaner look.
Option 3: The Portable Lap-Style Puzzle Board
This version is made for comfort and convenience. If you like working on the couch, carrying your puzzle from room to room, or hiding it away between sessions, a portable puzzle board is a smart move. Think of it as a cross between a lap desk and a puzzle station.
What you need
- A lightweight plywood or hardboard panel
- Felt for the top surface
- Non-slip grip liner for the bottom
- Optional pillow cushion or lap pad
- Optional handles
- Optional cover board, elastic straps, or clips
How to make it
- Cut the top panel. Keep the size manageable if you want true portability. Something in the medium range is easier to carry and store.
- Attach the felt top. Same method as before: adhesive, smooth, trim, done.
- Add grip to the underside. Attach non-slip shelf liner or grip liner so the board stays put on a table, ottoman, or lap desk cushion.
- Create a cushioned base if desired. Attach a thin pillow or sewing-project cushion underneath. If sewing is not your thing, even a removable lap pad works.
- Add carrying features. Handles, fabric loops, or elastic straps make the board easier to move. A second lightweight cover board can protect an unfinished puzzle.
Why this option works
This is the best DIY puzzle board for shared spaces. You can start a puzzle in the living room, move it to a shelf at night, and bring it back the next day without needing a dedicated table. It also works well for people who like to sort pieces while sitting comfortably instead of hovering over a dining chair like a detective in a cardboard crime scene.
Best for
Small homes, multipurpose rooms, couch puzzlers, and people who value portability over maximum size.
Simple Add-Ons That Make a Big Difference
You do not need every upgrade, but a few thoughtful extras can make your homemade puzzle board much more enjoyable to use.
1. A protective cover
A cover board, fitted fabric cover, or clip-on top layer keeps dust, pets, and accidental elbow attacks from ruining your progress. If you have children or cats, this moves from “nice idea” to “extremely wise decision.”
2. Sorting trays
Loose trays, shallow boxes, or even repurposed food containers help organize pieces by color, edge, or that one weird little pattern you swear is part of a lighthouse.
3. Raised edges
Thin trim strips around the board add a subtle barrier that prevents pieces from sliding off. Keep them low enough that you can still reach pieces easily.
4. Tilt support
If you prefer a slight angle, add a fold-out support or use a removable wedge underneath. Just make sure your surface has enough grip so pieces stay put.
5. Furniture-friendly backing
Cork, felt, or grip liner on the underside helps protect tables and keeps the board from shifting. It is a small detail that pays off fast.
Mistakes to Avoid When Making a Puzzle Board
- Choosing the exact puzzle size with no border: You need working room. Give yourself breathing space.
- Using a slippery top surface: Puzzle pieces glide too easily on bare wood or glossy panels.
- Skipping edge sanding: Splinters are not a charming homemade touch.
- Making it too heavy: A giant board sounds great until you try to move it alone.
- Forgetting storage: Before building, decide where the board will live when not in use.
Which DIY Puzzle Board Option Should You Choose?
If you want the fastest and cheapest route, go with the foam board version. If you want the best all-around balance of durability and ease, build the felt-covered wood board. If portability matters most, make the lap-style version with grip backing and a protective cover.
There is no single “best” puzzle board for everyone. The right one depends on how often you puzzle, how large your puzzles are, and whether your home has a dedicated puzzle spot or a constant battle for table space. Pick the option that fits your routine, not just the prettiest idea on paper.
Real-Life Experience: What It Is Actually Like to Use a DIY Puzzle Board
Here is the part no one tells you when you first decide to make a puzzle board: once you have one, puzzling becomes weirdly easier and dangerously more appealing. Before I started using a dedicated board, every puzzle session felt like setting up a temporary event. Clear the table. Guard the table. Apologize for the table. Promise everyone dinner will happen eventually. With a board, the whole experience becomes less of a household negotiation and more of a hobby.
The biggest change is psychological. A puzzle board gives the project a home, even if that home is technically under your sofa. You can leave a puzzle half-finished without feeling like your entire room has been taken over by a cardboard weather system. That makes it much easier to work in short sessions. Ten minutes before bed? Great. Twenty minutes with coffee on a Sunday morning? Perfect. You stop thinking, “Do I have enough time to start?” and start thinking, “I can fit in a few edge pieces before my laundry judges me again.”
The portability also matters more than expected. The first time you slide a board off a table, move it safely to another room, and continue exactly where you left off, it feels absurdly luxurious. It is not glamorous, but it is deeply satisfying. A DIY puzzle board turns a puzzle from a fixed-location activity into something flexible. You can chase better light, move away from noisy TVs, or reclaim the dining table for actual dining without sacrificing progress.
Then there is the surface itself. Felt is not just a nice touch. It changes the feel of puzzling in a good way. Pieces stay where you put them. Small sections are easier to nudge together. You spend less time rescuing runaway pieces and more time doing the fun part, which is pretending you are incredibly clever for identifying one more leaf in a forest scene. A board with even a slight bit of grip feels calmer, more controlled, and less chaotic.
Of course, a homemade board also teaches you things quickly. You learn whether you prefer extra border space. You learn that lightweight is wonderful until the board bends too much. You learn that handles are not decorative nonsense after all. You learn that a cover is essential if your household includes pets, children, or adults who place mail on any available flat surface. You also learn that “I will definitely remember where I put the sky pieces” is a lie.
What I like most about the DIY route is that it improves over time. Your first board might be very basic. Then you use it for a month and realize you want raised edges, a better backing, a second cover panel, or small sorting trays. Because you made it yourself, those improvements feel approachable instead of intimidating. It becomes a useful little system rather than a one-time project.
In the end, a DIY puzzle board is not just about holding pieces. It makes the hobby more flexible, more comfortable, and far less disruptive to daily life. And honestly, that is a pretty impressive return for a project built from felt, a board, and a little determination. Not bad for something designed to support a picture of 700 tiny pumpkins and one suspiciously difficult barn.
Conclusion
If you have been wondering how to make a puzzle board, the answer is refreshingly simple: start with the version that matches your space, budget, and puzzling habits. A foam board build is quick and beginner-friendly. A felt-covered wood board is sturdy and reliable. A portable lap-style board is ideal when your home needs flexibility. No matter which one you choose, the result is the same: a more comfortable place to puzzle, a cleaner space, and a much lower chance of losing that one important corner piece to the void.
Build it once, use it often, and enjoy the oddly powerful feeling of being the kind of person who has a dedicated puzzle board. That is not just organization. That is character development.