
Table of Contents >> Show >> Hide
- What “Lattice Shibori” Means (And Why It’s Not Just Tie-Dye With a Fancy Name)
- Why Lattice Shibori Looks Especially Good on Pillows
- Materials & Tools for Lattice Shibori Pillows
- DIY Lattice Shibori Pillow Covers: A Practical, Not-Too-Precious Method
- Step 1: Pick a pillow size that fits real life
- Step 2: Prep your fabric (the unglamorous hero step)
- Step 3: Create the lattice resist (choose your adventure)
- Option A: The “Clean Grid” Itajime-Inspired Fold + Clamp
- Option B: The “Handmade Grid” Stitched Lattice (Nui-Style)
- Option C: The “Easy Check” Pleat + Bind (No Clamps, No Sewing)
- Step 4: Dye day basics (keep it calm and controlled)
- Step 5: Sew the pillow cover (two beginner-friendly closures)
- Closure 1: Envelope Back (Fast + Forgiving)
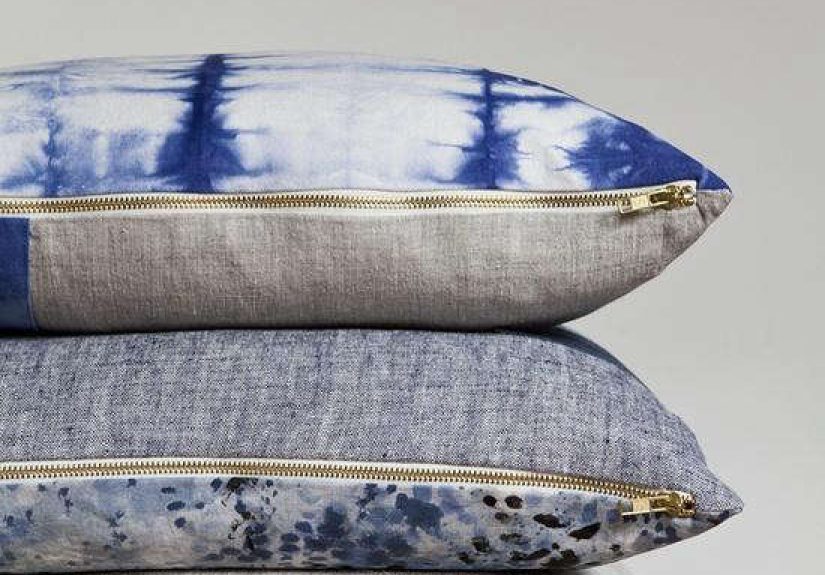
- Closure 2: Zipper (Sleek + Secure)
- Design Variations: Make the Lattice Look Like Yours
- How to Style Lattice Shibori Pillows So Your Sofa Looks “Done”
- Care Tips: Keep the Blues Beautiful
- Troubleshooting: When Your Lattice Isn’t Latticing
- Buying Lattice Shibori Pillows Instead of DIY
- Experiences: What I Learned Making Lattice Shibori Pillows (So You Don’t Have To Learn the Hard Way)
- Conclusion
Lattice shibori pillows are what happen when an ancient Japanese resist-dye tradition meets modern “I want my couch to look expensive” energy. You get that crisp, geometric grid (the “lattice”), plus the dreamy, imperfect edges that prove a human made itnot a printer. The result is equal parts cozy and cool: pillows that feel like art, but still tolerate being sat on during movie night.
In this guide, we’ll break down what lattice shibori actually is, why it looks so good on pillows, and how to DIY your own covers without turning your laundry room into a science experiment gone rogue. (Spoiler: gloves help. So does not panic-rinsing.)
What “Lattice Shibori” Means (And Why It’s Not Just Tie-Dye With a Fancy Name)
Shibori is a Japanese resist-dyeing approach where you fold, bind, clamp, stitch, or otherwise convince fabric to not accept dye in certain areas. The resisted areas stay light while the exposed areas take on coloroften indigocreating patterns with depth and texture.
“Lattice” simply points to the pattern: a grid, checkerboard, or interlocking lines that read as structured and architectural. The fun part is that shibori rarely looks perfectly mechanicalso the lattice feels warm and organic instead of rigid.
Three Common Ways to Get a Lattice Look
- Itajime (clamp resist): Fabric is folded into a compact shape and clamped between flat shapes (wood, acrylic, or similar). The pressure blocks dye, creating crisp geometrygreat for grid-like results.
- Accordion folds in two directions: Think “paper fan” folding one way, then the other, to create a stacked bundle that naturally forms a grid when bound and dyed.
- Nui (stitched resist): You stitch a pattern (like a grid), pull the thread tight, and dye. The stitched channels resist dye and can create beautifully irregular lattice lineslike hand-drawn graph paper, but chic.
Why Lattice Shibori Looks Especially Good on Pillows
Pillows are the perfect canvas for lattice shibori because they’re big enough for the pattern to read clearly, but small enough that you don’t need a whole-dining-table-sized dye setup. A grid pattern also plays nicely with interiors: it adds structure without screaming for attention, and it pairs well with stripes, solids, and textured fabrics.
Design perks you’ll actually notice
- It makes neutrals look intentional: Ivory + indigo suddenly becomes “curated” instead of “I ran out of ideas.”
- It hides daily life: Minor wrinkles? Pet hair? A lattice pattern is basically camouflage for reality.
- It scales well: One pillow can be bold; a set can be coordinated without matching like a furniture showroom.
Materials & Tools for Lattice Shibori Pillows
You can buy lattice shibori pillows ready-made, but DIY is where you get to control the scale of the grid, the shade of blue, and the exact vibe (minimal, boho, coastal, modern farmhouse, “I thrifted this in a perfect little shop,” etc.).
Fabric choices that behave well
- Cotton canvas or duck: Holds shape, shows crisp contrast, durable for couch life.
- Linen or linen blends: Gorgeous texture, slightly softer edges in the pattern, relaxed and elevated.
- Medium-weight cotton (like quilting cotton): Easy to dye and sew, but can feel lighter and less structured.
Dye options
- Indigo kits (often “pre-reduced”): Classic shibori look, deep blues, and that signature color change as it oxidizes.
- Fiber reactive dyes: Great for bold, wash-fast color on plant fibers (cotton/linen). You can still do shibori-style resists with these dyes.
Safety note: Dyeing involves chemicals and very alkaline solutions depending on the method. If you’re a teen or you’re new to dyeing, do this with an adult, follow the manufacturer’s instructions, wear gloves, and work in a well-ventilated area.
Sewing supplies (keep it simple)
- Sewing machine (or a very determined needle and thread)
- Matching thread
- Scissors or rotary cutter
- Measuring tape + pins/clips
- Zipper or envelope back fabric overlap (no zipper needed)
DIY Lattice Shibori Pillow Covers: A Practical, Not-Too-Precious Method
There are two ways to DIY these: dye yardage first and then sew, or sew a cover first and dye the finished piece. For crisp results and fewer “why is my zipper blue now?” moments, dye the fabric firstthen sew.
Step 1: Pick a pillow size that fits real life
The most common living-room sizes are 18×18 and 20×20. If you want a fuller, high-end look, size your insert slightly larger than your cover. For example, an 18×18 cover often looks best with a 20×20 insert.
Pro styling tip: if you’re doing a set, mix shapestwo squares plus a lumbar pillow can look more designed than four identical squares lined up like they’re waiting for roll call.
Step 2: Prep your fabric (the unglamorous hero step)
Wash and dry your fabric before dyeing. This removes finishes and helps dye absorb more evenly. Press it, toofolds behave better when your fabric isn’t fighting you with random creases from being crammed in a closet since 2019.
Step 3: Create the lattice resist (choose your adventure)
Option A: The “Clean Grid” Itajime-Inspired Fold + Clamp
- Start with a square or rectangle larger than your final pillow front (you’ll trim later).
- Accordion fold the fabric in one direction like a paper fan.
- Fold again in the opposite direction to form a compact square/rectangle bundle. This double-fold is what pushes the grid vibe.
- Clamp the bundle between flat squares/rectangles (wood or acrylic). Align carefully if you want symmetry.
- Bind tightly with rubber bands or strong string so dye can’t sneak into the resisted areas.
This method tends to give you bold geometryperfect if you want your lattice to read from across the room.
Option B: The “Handmade Grid” Stitched Lattice (Nui-Style)
- Mark a grid lightly on the fabric using a washable marker or chalk (start with 1–2 inch spacing for pillows).
- Stitch along the lines with a simple running stitch. You don’t need fancy embroideryjust consistent stitches.
- Pull threads tight to gather the fabric. The tighter it is, the more resist you get.
- Knot securely so it stays gathered during dyeing.
This version looks artisan and organic. The lattice lines can wobble slightly, which is exactly the charmlike a grid drawn by a person who drinks coffee (not a robot with a ruler).
Option C: The “Easy Check” Pleat + Bind (No Clamps, No Sewing)
- Accordion fold one direction.
- Bind at regular intervals with rubber bands (like little stripes along the bundle).
- Rotate the bundle and bind again in the other direction.
This tends to produce a looser, more playful latticegreat if you want “grid-ish” rather than “graph-paper precise.”
Step 4: Dye day basics (keep it calm and controlled)
Exact instructions vary by dye type and brand, so always follow your kit or dye supplier directions. That said, the workflow usually looks like this:
- Pre-wet the fabric so dye absorbs evenly.
- Submerge or apply dye according to the method (dip vat, immersion, or low-water techniques).
- Let the color develop (with indigo, the magic is oxidationfabric can shift from yellow-green to blue as it meets air).
- Repeat dips if you want a deeper shade rather than one long soak (often better for rich color and contrast).
- Rinse thoroughly until water runs clearer, then wash gently and dry.
If your goal is crisp lattice lines, keep your resist tight and avoid over-handling the bundle in the dye bath. Movement can let dye creep into places you wanted to stay light.
Step 5: Sew the pillow cover (two beginner-friendly closures)
Closure 1: Envelope Back (Fast + Forgiving)
An envelope back uses overlapping fabric on the back so you can insert the pillow form without a zipper. It’s friendly for beginners and still looks polished.
- Cut one front panel and two back panels (the back panels overlap in the center).
- Hem the inner edges of the two back panels.
- Layer: front panel right-side up, back panels right-side down, edges aligned, overlap centered.
- Sew around the perimeter, reinforce corners, trim, turn, press.
Closure 2: Zipper (Sleek + Secure)
If you want a more tailored finish, add a zipper. It’s slightly more work, but it helps the cover sit neatlyespecially with thicker canvas and crisp shibori patterns.
Design Variations: Make the Lattice Look Like Yours
Lattice shibori doesn’t have to be navy on white, perfectly centered, and symmetrical. You can tweak just one variable and get a totally different mood.
Ideas that look intentional (not accidental)
- Oversized grid: Use wider spacing or fewer folds so the lattice feels modern and bold.
- Micro lattice: Tighter folds or closer stitch lines for a subtle texture that reads “designer basic.”
- Ombre dip: Dip only part of the bundle so the lattice fades from light to dark.
- Two-tone blues: Layer dye applications for depth (keep it harmonious to avoid muddiness).
- Off-center pattern: Place the lattice heavy on one side for an editorial look.
How to Style Lattice Shibori Pillows So Your Sofa Looks “Done”
The easiest way to style lattice shibori is to treat it as your “structured pattern” and build around it with solids and texture. Designers often recommend mixing sizes, shapes, and materials for a layered lookyour lattice pillow is the anchor.
Three styling formulas that work
- Modern minimal: 1–2 lattice pillows + 1 solid (linen, boucle, or wool) in cream, camel, or charcoal.
- Coastal calm: Lattice in indigo + stripes (thin, not circus) + a sandy neutral. Add a textured throw and pretend you hear waves.
- Boho elevated: Lattice + mudcloth-inspired dots + a warm rust or olive velvet. Keep the palette limited so it reads curated.
Want that “plump, expensive” look? Use a slightly larger insert than the cover so the corners fill out and the pillow doesn’t look like it’s having a sad day.
Care Tips: Keep the Blues Beautiful
Shibori-dyed textiles can last a long time with gentle care. The key ideas: wash less, wash cooler, and skip harsh detergents and aggressive wringing. If you used indigo, you may notice slight crocking (color transfer) early onespecially if the fabric wasn’t rinsed and washed thoroughly after dyeing.
Simple care rules
- Spot clean when possible to avoid frequent full washes.
- Cold or cool water and mild detergent are your friends.
- Air dry when you can; high heat can fade color faster over time.
- Avoid prolonged direct sun if you want the deepest indigo to stick around.
Troubleshooting: When Your Lattice Isn’t Latticing
Problem: The pattern looks muddy
Usually this means the resist wasn’t tight enough, or the bundle got jostled. Next time: bind tighter, clamp firmly, and keep handling gentle.
Problem: The white lines aren’t crisp
Try thicker clamps/boards, tighter binding, or fewer layers in the fold. With stitched resist, pull threads tighter and keep stitch spacing consistent.
Problem: Fabric feels stiff after dyeing
Residual chemicals or dye can make fabric crunchy. Rinse longer, then wash thoroughly (and consider an extra rinse cycle). Once fully clean and dry, many fabrics soften back up.
Problem: Uneven color
Pre-wet the fabric, dye consistently, and avoid trapped air bubbles in folds. Also make sure the fabric was washed/scoured before dyeing.
Buying Lattice Shibori Pillows Instead of DIY
If you’re shopping rather than dyeing, you can still make smart choices that look better and last longer.
What to look for
- Fabric: cotton canvas, linen, or a sturdy cotton weave tends to wear well.
- Closure: hidden zipper is sleek; envelope back is easy and casual.
- Pattern scale: bigger rooms can handle bigger lattices; small spaces often look best with medium scale.
- Insert quality: a great insert can make a basic cover look premium.
Experiences: What I Learned Making Lattice Shibori Pillows (So You Don’t Have To Learn the Hard Way)
The first time I tried a lattice shibori pillow, I assumed “grid pattern” meant “this will be straightforward.” That was my first mistake. Lattice is straightforward in theoryuntil you realize fabric has opinions. It slides, it puffs, it sneaks out from clamps like it’s late for an appointment. My best early win was switching from a flimsy quilting cotton to a sturdier cotton canvas. The canvas held folds better, took dye more evenly, andmost importantlylooked expensive even before it became a pillow.
My second lesson was about scale. I drew a stitched grid that was way too small, like 1/2-inch spacing, because I wanted it to look detailed. On a pillow, that tiny pattern read as “vaguely textured” instead of “wow, that’s a lattice.” When I bumped the spacing up to around 1.5–2 inches, the design finally showed up from across the room. It looked intentional, graphic, and modernexactly what I wanted in the first place.
The third lesson was the one everyone learns: binding pressure is everything. With clamp-style folding, the difference between “crisp geometry” and “blue blob with good intentions” is how tightly everything is compressed. I started using wider rubber bands (or multiple bands layered together) and tightened them until the bundle felt like a little brick. That’s when the lattice lines suddenly appeared with that satisfying contrastlight where the clamp resisted, rich blue where dye reached.
Then came the “fabric handling” reality check. When you’re excited, you want to poke the bundle, flip it, squeeze it, and basically micromanage it in the dye bath. That’s a fast track to dye creeping into your resisted areas. My best results happened when I treated the bundle like a delicate pastry: lower it in calmly, let it do its thing, bring it out, and let the color develop without fussing.
Sewing was the most relaxing partmostly because it happens after the dye drama is over. I tested both envelope backs and zippers, and I’ll say this: envelope backs are the MVP if you want fast gratification. Zippers look tailored, but envelope backs make you feel like a wizard who finished a project before getting distracted by three other projects. Also, the insert matters more than I expected. The first cover I made looked slightly limp with a same-size insert. When I sized up the insert a bit, the pillow instantly looked fuller and more “designer,” even though the cover hadn’t changed at all.
Finally, I learned that lattice shibori pillows are forgiving in the best way. If your grid isn’t perfectly aligned, it still looks handcrafted. If your blues vary slightly across the fabric, it adds depth. Even the “imperfect” ones tend to become favorites because they don’t look mass-made. And once you toss a finished pillow on your couch, you’ll understand the real magic: it quietly upgrades the whole room without asking you to repaint, buy a new sofa, or pretend you’re suddenly the kind of person who alphabetizes spices.
Conclusion
Lattice shibori pillows bring together structure and softness: a grid pattern that feels architectural, paired with the organic nuance that makes shibori so timeless. Whether you DIY a set of covers or shop for artisan-made pieces, focus on good fabric, a flattering insert, and a pattern scale that fits your space. The best part? Even one lattice shibori pillow can make your seating look more layered, more intentional, andlet’s be honest more like you know what you’re doing (even if you made it in sweatpants).


