Table of Contents >> Show >> Hide
- Why Clean Makeup Brushes with Vinegar?
- How Often Should You Clean Makeup Brushes?
- What You Need Before You Start
- How to Clean Makeup Brushes with Vinegar: 7 Steps
- Common Mistakes to Avoid
- Can You Use Apple Cider Vinegar Instead?
- Is Vinegar Safe for All Makeup Brushes?
- How to Keep Makeup Brushes Cleaner Between Washes
- When to Replace Makeup Brushes
- Extra Experience: Real-Life Lessons from Cleaning Makeup Brushes with Vinegar
- Conclusion
Makeup brushes are tiny beauty wands. They blend foundation, soften blush, smoke out eyeliner, and somehow convince us that “five-minute makeup” is a real thing. But after a few uses, those same brushes can collect foundation residue, facial oils, dead skin cells, dust, and bacteria. In other words, your favorite fluffy brush may be doing a side hustle as a miniature carpet.
The good news? You do not need a luxury brush spa, a professional makeup artist, or a sink full of mysterious potions to refresh your tools. A simple diluted vinegar solution, paired with a gentle cleanser when needed, can help remove buildup, reduce odor, and leave your brushes feeling clean again. The key word is diluted. Vinegar is useful, affordable, and easy to find, but it should be handled gently because makeup brushes have delicate bristles, glue, metal ferrules, and handles that do not appreciate being soaked like soup noodles.
This guide explains how to clean makeup brushes with vinegar in 7 practical steps, plus what to avoid, how often to clean each brush, and what real-life brush-cleaning habits actually work when your schedule is busier than your concealer on a Monday morning.
Why Clean Makeup Brushes with Vinegar?
Distilled white vinegar is popular in DIY cleaning because it contains acetic acid, which helps cut through some residue and freshen surfaces. For makeup brushes, vinegar can be helpful as part of a cleaning routine, especially when brushes smell stale or have light product buildup. However, vinegar alone is not a magic eraser for every cosmetic crime scene. Foundation, concealer, sunscreen, cream blush, and long-wear products often contain oils, waxes, and pigments that need a mild soap or brush cleanser to break them down properly.
Think of vinegar as the tidy assistant, not the entire cleaning crew. A gentle shampoo, baby shampoo, mild facial cleanser, or dedicated brush cleanser does the heavy lifting. The vinegar rinse helps freshen and support hygiene. Together, they make a practical at-home method that is inexpensive, simple, and less dramatic than discovering your foundation brush has been untouched since last season.
How Often Should You Clean Makeup Brushes?
Most everyday makeup users should deep-clean frequently used brushes about once a week, especially brushes used with liquid or cream products. Foundation, concealer, cream contour, and liquid blush brushes collect more moisture and product residue, so they need regular washing. Eye brushes should also be cleaned often because the eye area is sensitive and more vulnerable to irritation.
Brushes used only for dry powder, bronzer, or blush may sometimes go a little longer, but waiting a month or two is not ideal if you use them daily. If your brush feels stiff, smells odd, changes color, applies makeup unevenly, or makes your skin look patchy, it is waving a tiny white flag. Wash it.
What You Need Before You Start
Before cleaning your makeup brushes with vinegar, gather everything in one place. This keeps the process quick and prevents you from dripping brush water across the bathroom like a very glamorous leaky faucet.
Supplies
- Distilled white vinegar
- Lukewarm water
- A gentle shampoo, baby shampoo, mild facial cleanser, or brush cleanser
- A small bowl or cup
- A clean towel or paper towel
- A silicone brush-cleaning mat or clean palm, optional
- A clean counter edge or drying rack
Use lukewarm water, not boiling water. Hot water can weaken glue and damage bristles. Cold water is safer than hot water, but it may not loosen makeup as effectively. Lukewarm is the sweet spot: useful, gentle, and not trying to turn your brush set into an expensive craft project.
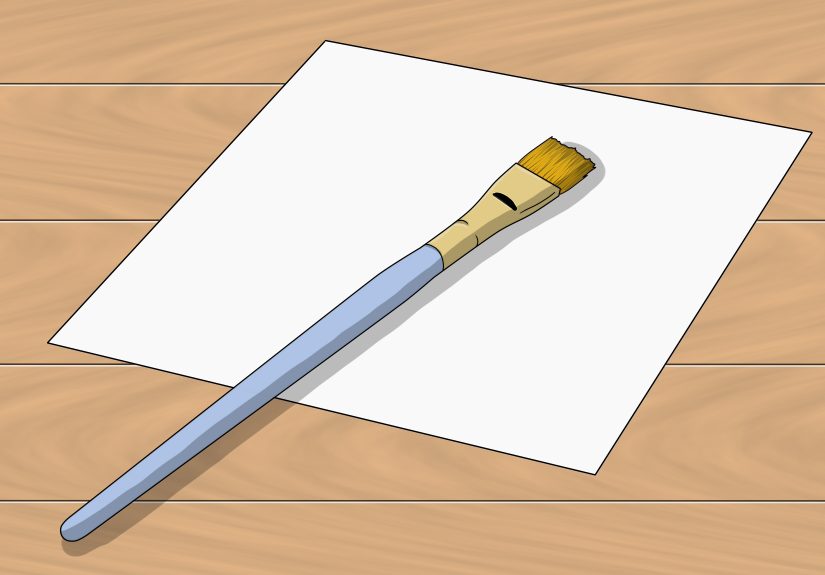
How to Clean Makeup Brushes with Vinegar: 7 Steps
Step 1: Sort Your Brushes by Type
Start by separating your brushes into groups: face brushes, eye brushes, lip brushes, and heavily used cream-product brushes. This helps you decide which brushes need the most attention. Foundation and concealer brushes usually need more washing because liquid products cling to bristles. Powder brushes may only need a lighter clean unless they are visibly dirty.
Also check the condition of each brush. If the bristles are shedding badly, the handle is cracked, the ferrule is loose, or the brush has a sour smell that will not go away, cleaning may not save it. Some brushes simply retire. Thank them for their service and let them go with dignity.
Step 2: Rinse the Bristles Under Lukewarm Water
Hold each brush with the bristles pointing downward and rinse only the brush head. Avoid letting water run into the ferrule, which is the metal band between the bristles and handle. That area contains glue. Too much water can loosen the glue, cause shedding, or make the handle swell.
Use your fingers to gently separate the bristles as water runs through them. Do not crush, bend, or scrub aggressively. Makeup brushes are not pots and pans. They need a soft touch, especially if the bristles are natural hair or very fine synthetic fibers.
Step 3: Mix a Diluted Vinegar Cleaning Solution
In a small bowl, mix 1 cup of lukewarm water with 1 to 2 tablespoons of distilled white vinegar. For brushes with oily foundation or cream makeup, add a few drops of gentle shampoo or mild cleanser. Stir lightly.
This combination is practical because vinegar helps freshen the brush while the gentle cleanser breaks down makeup residue. Avoid using undiluted vinegar directly on the bristles. It can be too harsh, especially for delicate brushes. Also avoid harsh dish detergents, bleach, abrasive cleaners, or heavily fragranced soaps, which can dry out bristles or irritate sensitive skin later.
Step 4: Swirl the Brush Tips Gently
Dip only the bristle tips into the vinegar solution. Swirl the brush in your palm, on a silicone cleaning mat, or against the bottom of the bowl with very light pressure. You should see makeup residue begin to release into the water. If the water turns beige, pink, brown, or a suspicious shade of “I should have cleaned this weeks ago,” that is normal.
Do not soak the whole brush. A quick dip and swirl is enough for most brushes. For stubborn foundation buildup, let only the bristle tips sit in the solution for one to three minutes, then swirl again. Keep the ferrule and handle as dry as possible.
Step 5: Rinse Until the Water Runs Clear
Rinse the bristles under lukewarm running water while pointing the brush downward. Gently squeeze the bristles from the base of the brush head toward the tips. Repeat the cleansing and rinsing process if the water still runs cloudy or tinted.
This step matters because leftover cleanser or vinegar can make bristles feel stiff and may transfer residue to your skin. A properly rinsed brush should feel clean, flexible, and free of slippery soap. If the brush still smells strongly like vinegar after rinsing, rinse again. Your makeup routine should not smell like salad dressing.
Step 6: Remove Excess Water and Reshape the Bristles
Place the brush on a clean towel and gently squeeze out moisture. Do not twist the bristles like a wet towel. Twisting can damage the shape and weaken the brush. Instead, press softly until the bristles are damp rather than dripping.
Next, use your fingers to reshape the brush head. Fluffy powder brushes should be gently fanned back into shape. Angled brushes should be pinched lightly along their original line. Small detail brushes should be smoothed to a neat point or flat edge. Reshaping while damp helps the brush dry correctly and perform better later.
Step 7: Dry Brushes Flat with Airflow
Lay brushes flat on a clean towel with the bristles hanging slightly over the edge of a counter. This allows air to circulate around the brush head and keeps water from draining into the ferrule. Let brushes dry completely before using them again. Most brushes need several hours or overnight to dry, depending on size and density.
Never dry makeup brushes upright while they are wet. Water can travel downward into the ferrule and handle. Also avoid using a hair dryer on high heat. It may seem efficient, but it can frizz bristles, weaken glue, and turn your soft blending brush into something that looks emotionally unwell.
Common Mistakes to Avoid
Using Too Much Vinegar
More vinegar does not mean cleaner brushes. A strong vinegar solution can leave odor behind and may be too harsh for delicate bristles. Stick with a diluted mixture and rinse thoroughly.
Soaking the Entire Brush
This is one of the fastest ways to shorten the life of a makeup brush. Keep water and vinegar away from the ferrule and handle whenever possible. Clean the bristles, not the entire brush body.
Skipping Soap for Cream Products
Vinegar alone may not remove oily or long-wear makeup well. If your foundation brush still feels coated, add a gentle cleanser. The brush should feel soft and clean, not waxy.
Storing Brushes Before They Are Dry
Putting damp brushes in a drawer, bag, cup, or closed container can trap moisture. Let them dry completely first. Once dry, store them upright in a clean holder or covered case.
Can You Use Apple Cider Vinegar Instead?
Apple cider vinegar can be used in a pinch, but distilled white vinegar is usually the better choice for cleaning makeup brushes. White vinegar is clear, simple, and less likely to leave color or scent behind. Apple cider vinegar has a stronger smell and natural color that may not be ideal for light-colored bristles.
If you only have apple cider vinegar, dilute it well and rinse carefully. Still, for regular brush cleaning, distilled white vinegar is the cleaner, more predictable option.
Is Vinegar Safe for All Makeup Brushes?
Vinegar is generally best for synthetic brushes and durable everyday tools when used properly diluted. Be more cautious with expensive natural-hair brushes, luxury brushes, or handmade brushes. Natural bristles can be more delicate and may dry out if cleaned too aggressively. For those, use a gentle brush cleanser or mild shampoo and reserve vinegar for an occasional diluted rinse only if needed.
If you are unsure, test one small brush first. Clean it, rinse it, dry it, and check how the bristles feel the next day. If they feel rough, brittle, or misshapen, use a gentler method next time.
How to Keep Makeup Brushes Cleaner Between Washes
Deep cleaning is important, but daily habits help too. Wipe excess product off brushes after use with a clean tissue or towel. Avoid leaving brushes loose in a makeup bag where they can collect powder, lint, and mystery crumbs. Keep them away from the toilet area in the bathroom because airborne particles and humidity are not exactly the skincare-supporting atmosphere we are going for.
For quick cleaning between deep washes, use a brush-cleaning spray made for makeup tools or wipe brushes gently on a clean microfiber cloth. Quick cleaning does not replace deep cleaning, but it helps prevent heavy buildup and keeps colors from mixing. Your peach blush brush should not suddenly apply yesterday’s espresso eyeshadow. That is how trust issues begin.
When to Replace Makeup Brushes
Even with careful cleaning, brushes do not last forever. Replace a brush when it sheds constantly, loses shape, smells bad after washing, feels scratchy, or no longer blends makeup smoothly. A brush that irritates your skin is not being “exfoliating.” It is being rude.
High-quality brushes can last for years with proper care, while cheaper brushes may wear out sooner. The goal is not to replace everything constantly. The goal is to keep tools clean, functional, and comfortable on your skin.
Extra Experience: Real-Life Lessons from Cleaning Makeup Brushes with Vinegar
The first thing most people learn when cleaning makeup brushes with vinegar is that the process is easier than expected, but the drying time demands patience. The actual washing may take only 15 to 25 minutes for a small brush collection. The drying, however, is where the drama lives. A dense foundation brush can look dry on the outside while still holding moisture deep in the center. That is why washing brushes at night is usually smarter than doing it ten minutes before applying makeup. Unless your beauty look includes “damp streaky foundation,” give your brushes time.
Another real-life tip: clean the dirtiest brushes first in a separate bowl. Foundation and concealer brushes can turn the water cloudy almost instantly. If you wash your fluffy powder brush in that same water afterward, you are basically giving it a beige bath. Start with cream-product brushes, dump the dirty solution, then mix a fresh batch for powder and eye brushes. It feels slightly fussy, but the results are much better.
People with sensitive skin often notice the biggest difference after building a consistent brush-cleaning routine. Dirty brushes can leave makeup looking patchy and may contribute to clogged-looking pores or irritation. Clean brushes feel softer, pick up product more evenly, and blend with less effort. In practical terms, your foundation may look smoother not because you bought a new foundation, but because your old brush stopped carrying three weeks of product history.
Vinegar is also useful when brushes smell stale. This can happen when brushes sit in a humid bathroom, stay damp too long, or collect layers of cream makeup. A diluted vinegar rinse can help freshen them, but rinsing is everything. If you rush the rinse, the bristles may dry with a faint vinegar scent. It fades, but it is not exactly the luxury beauty experience. Rinse until the brush smells neutral, then dry it with plenty of airflow.
One mistake beginners often make is pressing too hard on a silicone cleaning mat. Those textured mats are helpful, but they are not a battlefield. Gentle circles work better than aggressive scrubbing. If bristles start splaying outward, lighten your pressure. Makeup brushes are designed to touch skin softly, so treat them the same way during cleaning.
It also helps to create a routine around brush type. For example, wash foundation and concealer brushes every weekend, eye brushes every one to two weeks, and powder brushes regularly depending on use. A Sunday evening brush wash can become part of a reset routine: skincare, clean towels, fresh pillowcase, clean brushes, and a quiet little feeling that you have your life together, even if your laundry basket disagrees.
For travel brushes, vinegar cleaning is useful after a trip, but do not pack brushes while they are still damp. Travel cases can trap moisture, especially if they are zipped tightly. After washing, let brushes dry fully in open air before storing them. If you travel often, consider keeping a small set of synthetic brushes that dry faster and tolerate frequent cleaning well.
The biggest lesson is simple: clean brushes make makeup easier. Blush blends better. Eyeshadow colors stay truer. Foundation applies more evenly. You may even use less product because clean bristles distribute makeup instead of absorbing and clumping it. Vinegar is not fancy, but used correctly, it is a practical tool in a smart brush-care routine. It is affordable, accessible, and already sitting in many kitchens wondering when it will get its beauty-blog moment.
Conclusion
Learning how to clean makeup brushes with vinegar is a simple way to improve your beauty routine without spending much money. The best method is gentle: rinse bristles downward, use a diluted vinegar mixture, add mild cleanser for oily makeup, rinse thoroughly, reshape, and dry flat with good airflow. Avoid soaking the ferrule, using harsh cleaners, or storing brushes while damp.
Clean brushes are better for makeup application, better for brush longevity, and kinder to your skin. They also make your vanity feel instantly more organized, which is basically the beauty version of clearing 47 browser tabs. Once you build the habit, brush cleaning stops feeling like a chore and starts feeling like basic maintenance for tools that touch your face every day.
Note: This article is for general beauty and hygiene education. If you have persistent skin irritation, eye irritation, acne flare-ups, or signs of infection, consult a qualified healthcare professional or dermatologist.