Table of Contents >> Show >> Hide
- Why Uneven Ceilings Make Crown Molding Tricky
- Tools and Materials You Will Need
- Step 1: Inspect the Ceiling Before You Cut Anything
- Step 2: Choose a Reference Line
- Step 3: Mark Studs and Ceiling Framing
- Step 4: Cut Test Pieces First
- Step 5: Cope Inside Corners Instead of Mitering Them
- Step 6: Deal With Ceiling Gaps the Smart Way
- Step 7: Scribe the Crown Molding for Pronounced Waves
- Step 8: Use Shims When the Molding Needs Support
- Step 9: Install the Long Runs Carefully
- Step 10: Use Corner Blocks for Very Crooked Rooms
- Step 11: Caulk, Fill, Sand, and Paint
- Common Mistakes to Avoid
- Specific Example: A Ceiling With a Half-Inch Dip
- When to Repair the Ceiling First
- Personal Experience and Practical Lessons From Uneven Ceiling Crown Molding
- Conclusion
Installing crown molding is one of those home projects that looks elegant, classic, and slightly magical when finished. Then you hold the first piece up to an uneven ceiling and realize your house has been keeping secrets. The ceiling dips, the wall bows, the corner is not square, and suddenly that “simple weekend upgrade” starts acting like it has a law degree.
The good news is that you can put up crown molding on an uneven ceiling without tearing your room apart or pretending the gap is “architectural character.” The trick is to stop fighting the ceiling and start working with it. Crown molding does not need a laboratory-perfect room. It needs planning, reference lines, smart cuts, careful fastening, and the right finishing strategy.
This guide explains how to install crown molding when your ceiling is wavy, sloped, slightly sagging, or just old-house charming in the most inconvenient way possible. You will learn how to measure, mark, cut, scribe, shim, cope, caulk, and finish the molding so the final result looks intentionalnot like the trim lost an argument with gravity.
Why Uneven Ceilings Make Crown Molding Tricky
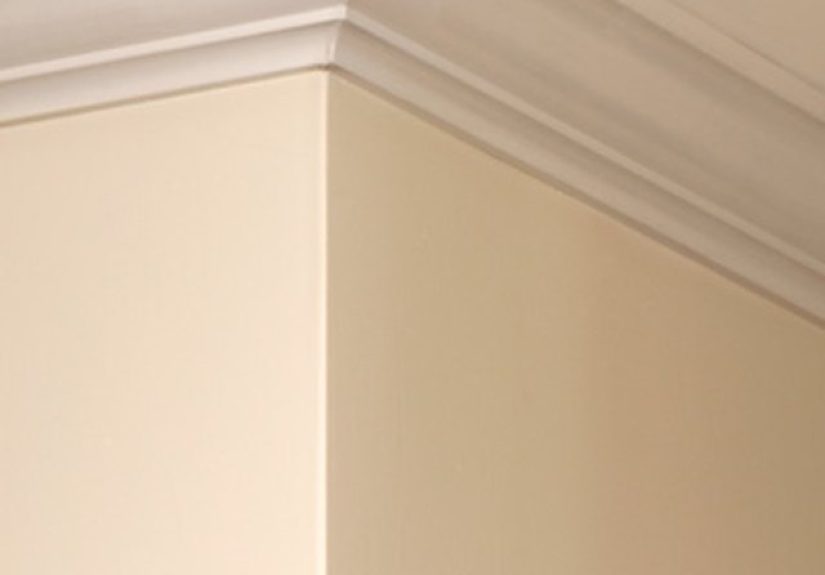
Crown molding sits at an angle between the wall and ceiling. Unlike baseboard, which lies flat against a wall, crown molding depends on two surfaces at once. If either surface waves, dips, leans, or bows, the molding can twist, open gaps, or refuse to sit at the correct spring angle.
Older homes often have plaster ceilings that have settled over time. Newer homes can also have uneven drywall seams, framing variation, or slightly out-of-square corners. Even a small ceiling dip can become obvious once a straight piece of molding highlights it. Crown molding is basically a fancy truth-teller.
The main challenges include gaps along the ceiling line, uneven reveal lines, open inside corners, crooked outside corners, warped molding, and inconsistent spring angle. The solution is not to force the molding tight everywhere. Forcing it usually creates waves in the trim. Instead, you want to create a clean visual line and hide or soften irregularities where the eye is least likely to notice them.
Tools and Materials You Will Need
Before you start, gather everything you need. Crown molding installation goes much smoother when you are not balancing on a ladder wondering where your pencil ran off to.
Essential Tools
- Tape measure
- Pencil
- Stud finder
- Chalk line
- Level or laser level
- Miter saw
- Coping saw or jigsaw with fine blade
- Brad nailer or finish nailer
- Caulk gun
- Utility knife
- Compass or scribing tool
- Wood shims
- Sandpaper
- Ladder or work platform
Materials
- Crown molding
- Paintable acrylic latex caulk
- Wood filler or spackle
- Construction adhesive, if appropriate for your molding type
- Finish nails or brad nails
- Primer and paint
- Backer blocks or triangular nailing blocks, if needed
- Backer rod for larger gaps
For uneven ceilings, paint-grade molding is usually more forgiving than stain-grade wood. Painted trim allows you to use caulk, filler, and small adjustments without the repair work shouting, “Look at me!” Stained crown molding requires much tighter carpentry because caulk and filler are harder to hide.
Step 1: Inspect the Ceiling Before You Cut Anything
Do not begin by cutting crown molding. Begin by studying the room. Walk around and look at where the ceiling meets the wall. Use a level or laser line to identify high spots, low spots, humps, dips, and corners that are not square.
Hold a straight piece of molding or a scrap board near the ceiling and check where gaps appear. Some gaps may be minor and easy to caulk. Others may require scribing, shimming, or a design adjustment. The goal is to identify the problem areas before you commit to cuts.
Pay special attention to outside corners and long walls. A small ceiling dip over a short distance can make a long straight piece of crown molding look bent. If the ceiling is extremely uneven, consider using a slightly larger crown profile, a built-up crown design, or corner blocks to make the installation more forgiving.
Step 2: Choose a Reference Line
When the ceiling is uneven, the biggest mistake is trying to keep the crown molding tight to the ceiling at every point. That approach can make the bottom edge of the crown wander up and down, which is often more noticeable than a small ceiling gap.
Instead, establish a consistent reference line on the wall. Measure the crown molding’s wall projection, then mark that distance down from the ceiling at several points. If the ceiling has dips, use the highest practical point as your guide so the molding does not crash into the low spots.
Snap a chalk line around the room to show where the bottom edge of the molding should sit. This line becomes your visual anchor. In many installations, a straight bottom line looks cleaner than a crown that follows every wave in the ceiling like a roller coaster wearing trim.
Step 3: Mark Studs and Ceiling Framing
Crown molding needs solid fastening. Use a stud finder to mark wall studs, then extend those marks slightly below your chalk line so you can still see them after the molding is in place. If you can locate ceiling joists, mark those too.
In many rooms, you can nail into the wall top plate near the ceiling. However, with uneven surfaces, it may help to install triangular backer blocks behind the crown. These blocks provide a solid nailing surface and help hold the crown at a consistent angle. This is especially useful when the wall or ceiling is too crooked to support the molding evenly.
Backer blocks do not need to be pretty. They are hidden behind the crown. Cut small triangular blocks from scrap wood, attach them to studs or the top plate, and use them to support the molding. Think of them as the backstage crew making the star look good.
Step 4: Cut Test Pieces First
Before cutting your expensive full-length molding, make test pieces. Crown molding can be confusing because it is usually cut upside down and backward on a miter saw. The ceiling edge rests on the saw base, and the wall edge rests against the fence, mimicking the angle it will have when installed.
Cut small inside and outside corner samples. Label them clearly: left inside, right inside, left outside, right outside. These samples help you confirm orientation before cutting long pieces. They also save you from the classic DIY moment where you proudly cut a perfect angle in exactly the wrong direction.
Step 5: Cope Inside Corners Instead of Mitering Them
Inside corners are rarely perfect 90-degree angles. On an uneven ceiling, they can be even more unpredictable. A mitered inside corner may look fine on the saw but open up once installed. A coped joint is usually more forgiving.
To cope an inside corner, run one piece of crown molding square into the corner. Cut the joining piece at a 45-degree angle to expose the profile. Then use a coping saw to cut along the profile line, removing the back material so the shaped edge fits over the first piece.
A coped joint can hide small irregularities better than a plain miter. It also allows one piece to overlap the other slightly, which helps when walls are not square. For best results, back-cut the cope slightly so only the front profile touches.
Step 6: Deal With Ceiling Gaps the Smart Way
Small gaps between crown molding and an uneven ceiling are normal. For paint-grade molding, a flexible paintable caulk can make minor gaps disappear. Apply a smooth bead after the molding is installed, then wipe it clean with a damp finger or caulk tool.
For medium gaps, do not simply pump in a mountain of caulk. Large blobs of caulk can shrink, crack, and look lumpy after painting. Use backer rod behind the gap first, then caulk over it. Backer rod gives the caulk something to bridge against and helps create a cleaner joint.
For larger or highly visible gaps, consider scribing the molding, floating the ceiling with joint compound, adding a small trim piece such as quarter round, or choosing a built-up crown design. The right fix depends on how uneven the ceiling is and how noticeable the area will be.
Step 7: Scribe the Crown Molding for Pronounced Waves
Scribing is the process of transferring the ceiling’s uneven shape onto the molding so you can trim the molding to match. This technique is helpful when one section of the ceiling dips dramatically and caulk alone would look sloppy.
To scribe crown molding, hold the piece in its installed position along your reference line. Find the widest gap between the top of the molding and the ceiling. Set a compass to that distance. Keeping the compass point against the ceiling, run the pencil along the molding. This creates a line that mirrors the ceiling’s shape.
Remove the molding and carefully trim to the scribed line with a coping saw, jigsaw, block plane, or sanding tool, depending on the profile and material. Go slowly. You can always remove more material, but putting it back requires advanced wizardry or a new board.
Scribing works best when the molding has enough flat material at the top edge. If the decorative profile would be damaged by trimming, use shims, caulk, or a different molding strategy instead.
Step 8: Use Shims When the Molding Needs Support
Sometimes the molding fits well in most of the room but loses contact in one or two spots. Small shims can help bring the molding into plane. Place shims behind the molding or above a joint where needed, then fasten the crown carefully.
After fastening, trim any exposed shim with a sharp utility knife. Do not over-shim. The goal is to support the molding, not force it into a strange new personality. If shimming creates a visible twist, back off and look for a more balanced adjustment.
Step 9: Install the Long Runs Carefully
Start with the least visible wall if you are new to crown molding. Dry-fit each piece before nailing. Check the bottom edge against your chalk line and check the top edge against the ceiling. If you must choose between a perfectly tight ceiling joint and a straight bottom reveal, favor the straight reveal in most cases.
Nail into studs, the top plate, ceiling joists, or backer blocks. Use enough fasteners to hold the molding securely, but do not overdo it. Too many nails can split wood molding or create extra filling work.
For long walls, you may need scarf joints where two pieces meet. Cut the ends at opposing 45-degree angles so one overlaps the other. Position scarf joints over studs whenever possible, glue the joint if appropriate, and nail both pieces securely.
Step 10: Use Corner Blocks for Very Crooked Rooms
If the corners are wildly out of square or the ceiling and wall both wave near the corner, decorative corner blocks can make the job much easier. Crown molding then runs straight between blocks instead of requiring perfect compound corner cuts.
Corner blocks are especially helpful in older homes where every corner seems to have been built during a different emotional season. They can look traditional, intentional, and charming while hiding irregular cuts. Install the blocks first, then measure the crown molding between them.
Step 11: Caulk, Fill, Sand, and Paint
Finishing is where crown molding goes from “installed” to “beautiful.” Fill nail holes with wood filler or spackle. Sand lightly after the filler dries. Caulk the top and bottom edges of the molding with paintable caulk, smoothing the bead as you go.
Do not rush painting. A clean paint job can hide small imperfections, but glossy paint can highlight uneven caulk lines. For most rooms, a satin or semi-gloss trim paint gives crown molding a polished look without making every ripple obvious.
If possible, prime or pre-paint the molding before installation, then apply a final coat after caulking and filling. This saves time overhead and reduces the amount of ladder painting required. Your shoulders will send a thank-you note.
Common Mistakes to Avoid
Following the Ceiling Too Closely
If the ceiling is wavy, following it exactly can make the crown molding look wavy too. Use a reference line to keep the bottom edge visually consistent.
Using Too Much Caulk
Caulk is a finishing tool, not a structural beam. Use it for small gaps. For larger gaps, use backer rod, scribing, shims, or additional trim.
Skipping Test Cuts
Crown molding angles are easy to reverse. Test pieces prevent wasted material and colorful language.
Mitering Every Inside Corner
Inside corners are often out of square. Coping usually gives a better fit, especially in uneven rooms.
Nailing Without Checking the Reveal
Always check the bottom edge against your chalk line before fastening. Once nailed, the crown should look level and consistent from across the room.
Specific Example: A Ceiling With a Half-Inch Dip
Imagine a dining room where the ceiling drops about half an inch along one 8-foot wall. If you press the crown tight to the ceiling, the bottom edge will dip too, making the whole wall look crooked. A better approach is to snap a straight chalk line, install the crown to that line, and evaluate the gap at the ceiling.
If the gap is small and gradual, use backer rod and paintable caulk. If the gap is concentrated in one area, scribe that section of molding so the top edge follows the dip while the bottom edge remains visually straight. If the dip is severe, floating the ceiling with joint compound before installation may create the cleanest result.
When to Repair the Ceiling First
Sometimes the ceiling is too uneven for trim tricks alone. If the drywall is sagging, cracked, water-damaged, or loose, repair it before installing crown molding. Crown molding can hide cosmetic irregularities, but it should not be used to cover active structural or moisture problems.
If the ceiling has a long, obvious sag, a drywall professional can float the surface with joint compound. This creates a smoother transition and reduces the amount of scribing or caulking needed. It adds time, but it may produce a much cleaner finished room.
Personal Experience and Practical Lessons From Uneven Ceiling Crown Molding
The biggest lesson from installing crown molding on uneven ceilings is simple: perfection is not the same thing as a good-looking result. Many beginners try to make every inch of crown touch the ceiling tightly. That sounds logical, but in a real room it can create a crooked bottom line, twisted corners, and joints that refuse to close. The eye usually notices a wandering shadow line more than a carefully caulked ceiling gap.
One practical experience that helps is to step back often. Do not judge the molding only from six inches away while standing on a ladder with sawdust in your hair. Step across the room and look at the overall line. Crown molding is viewed from below and at a distance. A tiny gap above the molding may vanish after caulk and paint, while a wavy bottom edge will remain visible every time you walk into the room.
Another useful habit is labeling everything. Crown molding has a way of making intelligent people doubt left, right, up, down, inside, outside, and possibly the nature of reality. Label the wall edge, ceiling edge, left end, and right end on the back of each piece. Keep sample cuts nearby. This one small habit can save a surprising amount of material.
Working with a helper also makes a major difference. Long pieces of crown molding are awkward, flexible, and dramatic. One person can hold the piece on the chalk line while the other checks the corner and nails it. If you are working alone, temporary support blocks or small finish nails partially driven along the chalk line can act as a ledge while you position the molding.
It is also wise to accept that some rooms need a hybrid solution. One wall may only need caulk. Another may need scribing. A troublesome corner may need a corner block. A long dip may look best after floating the ceiling. Professional-looking trim is often the result of several small decisions, not one magic trick.
Finally, do not underestimate paint. A careful coat of trim paint can unify the molding, soften caulk lines, and make small repairs disappear. The installation may feel messy in progress, especially before nail holes are filled and seams are caulked. But after sanding, caulking, and painting, the room often transforms. Crown molding on an uneven ceiling is not about defeating the house. It is about negotiating with it politelyand occasionally bringing a coping saw to the meeting.
Conclusion
Learning how to put up crown molding on an uneven ceiling is really about learning how to control the visual line. Start by inspecting the ceiling, snap a reliable reference line, make test cuts, cope inside corners, and use smart fixes such as scribing, shims, backer blocks, backer rod, and paintable caulk. When the ceiling is only slightly uneven, finishing techniques may be enough. When the ceiling is seriously wavy, scribing or surface repair may be the better path.
Crown molding does not require a perfect room. It requires patience, planning, and a willingness to adjust. With the right method, even an uneven ceiling can wear crown molding beautifullylike an old house putting on a tailored jacket.