Table of Contents >> Show >> Hide
- Why Hydrometer Calibration Matters
- What You Need Before You Start
- How to Calibrate a Hydrometer: 10 Steps
- Step 1: Find the Hydrometer’s Calibration Temperature
- Step 2: Verify Your Thermometer First
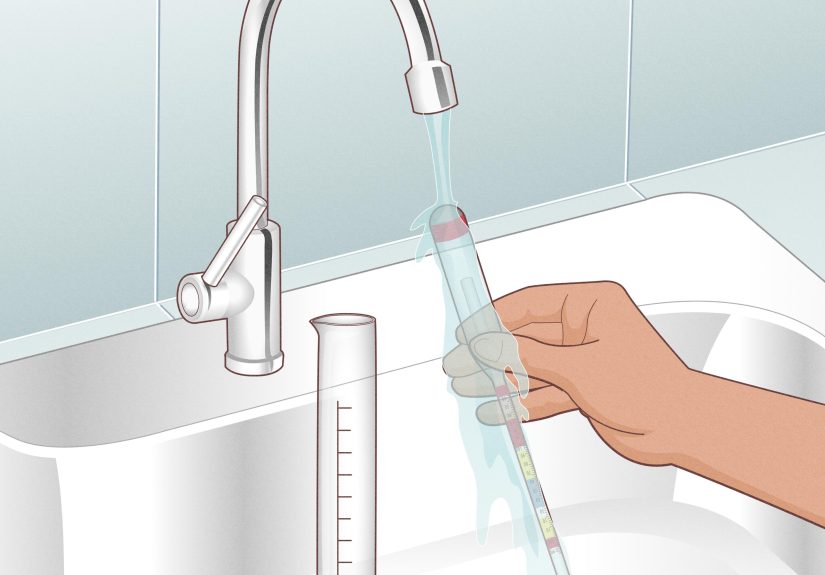
- Step 3: Clean and Dry Everything
- Step 4: Bring Distilled Water to the Reference Temperature
- Step 5: Fill the Test Cylinder Properly
- Step 6: Lower the Hydrometer Gently and Give It a Spin
- Step 7: Let It Settle and Read at Eye Level
- Step 8: Compare the Reading to 1.000
- Step 9: Perform an Optional Second-Point Check
- Step 10: Record the Offset and Build It Into Your Routine
- Common Calibration Mistakes to Avoid
- When to Correct the Reading and When to Replace the Hydrometer
- Final Thoughts
- Experience: What People Learn the Hard Way About Hydrometer Calibration
- SEO Tags
If you have ever stared at a hydrometer and thought, “You are a tiny glass submarine with opinions,” welcome to the club. A hydrometer looks simple, but when it reads even a couple of points off, it can throw your numbers, your recipe decisions, and your confidence into the same bucket. That is why calibrating a hydrometer matters. Whether you are brewing beer, making wine, fermenting cider, or just trying to stop second-guessing every specific gravity reading, a quick calibration routine helps you trust your data instead of arguing with it.
The good news is that hydrometer calibration is not complicated. It is mostly a matter of using clean equipment, checking the reference temperature, testing the instrument in distilled water, and recording the offset. The even better news? You do not need a lab coat, a dramatic soundtrack, or a PhD in liquid floating. You just need patience, decent technique, and a willingness to read a curved liquid line without blinking.
Why Hydrometer Calibration Matters
A hydrometer measures the density of a liquid compared with water. In brewing and winemaking, that reading helps you estimate sugar concentration, track fermentation progress, and calculate alcohol by volume. If the instrument is off, your original gravity, final gravity, and ABV math can all drift off course. That does not just affect bragging rights. It can change how you interpret yeast performance, fermentation completion, dilution decisions, and recipe consistency.
The sneaky part is that many hydrometers are close to accurate, but not perfect. Some read a point or two high. Others drift low. A cheap one may be fine in plain water but become less trustworthy farther up the scale. Calibration tells you whether your hydrometer is reliable, whether you need a simple correction factor, or whether it is time to retire it with honors and move on.
What You Need Before You Start
- A hydrometer
- A tall test jar or hydrometer cylinder
- Distilled water
- A trustworthy thermometer
- A clean cloth or paper towel
- A notebook or brewing log
- Optional: a known sugar solution for a second-point check
That last item is optional but useful. A water test tells you whether the hydrometer reads 1.000 at its reference temperature. A second known solution helps you see whether the instrument stays accurate farther up the scale. Think of it as checking whether your hydrometer behaves well only at home or also in public.
How to Calibrate a Hydrometer: 10 Steps
Step 1: Find the Hydrometer’s Calibration Temperature
Before you float anything, check the hydrometer itself or its packaging for the calibration temperature. Many brewing hydrometers are calibrated around 60°F, while others are calibrated at 68°F or 70°F. This detail matters more than people expect. If you test water at the wrong temperature, you may think your hydrometer is wrong when the real problem is that your sample is too warm or too cool.
Do not guess. Check the printed scale, instructions, or product information. This one small detail can save you from inventing fake problems and then heroically solving them.
Step 2: Verify Your Thermometer First
A hydrometer calibration test is only as good as the temperature reading behind it. If your thermometer is inaccurate, your hydrometer check can be off from the start. That is why it is smart to verify the thermometer before you use it. A simple ice-water test or boiling-water check can reveal whether your thermometer is reading honestly or telling little floating lies.
This step is especially important if you are serious about precise gravity readings. Calibrating a hydrometer with a bad thermometer is like proofreading with your glasses upside down. Technically possible, but deeply unwise.
Step 3: Clean and Dry Everything
Wash and rinse the hydrometer, test jar, and any tools you will use. If the hydrometer is being used in brewing or winemaking, sanitize it as appropriate before it touches a sample. For calibration, cleanliness matters because residue, dried sugar, oils, or leftover sanitizer foam can affect the way the instrument floats.
A clean, dry test jar also helps you see the meniscus clearly and keeps random droplets from adding confusion. Calibration is not the time for mystery smudges or suspicious sticky spots. Save those for the outside of the mash tun.
Step 4: Bring Distilled Water to the Reference Temperature
Pour distilled water into a clean container and let it come to the exact calibration temperature listed on the hydrometer. Distilled water is the standard because it is predictable and free from dissolved solids that can alter density. Tap water may be fine for many household chores, but this is not one of them.
If your hydrometer is calibrated at 60°F, aim for 60°F water. If it is calibrated at 68°F, use 68°F water. Close is good, exact is better. The more accurate the temperature, the more meaningful your calibration result will be.
Step 5: Fill the Test Cylinder Properly
Transfer the distilled water to your hydrometer jar or test cylinder. Fill it deep enough that the hydrometer can float freely without touching the bottom. Just as important, make sure the vessel is wide enough that the hydrometer does not lean on the sides. If it touches the wall, your reading can be skewed by friction and surface tension.
This is one of those little technique issues that seems boring until it ruins your number. The hydrometer should float like it paid full rent, not like it is leaning on the neighbor’s fence.
Step 6: Lower the Hydrometer Gently and Give It a Spin
Place the hydrometer into the water slowly. Do not drop it in like you are launching a tiny glass torpedo. Once it is floating, give it a gentle spin. That helps center the instrument and knocks off bubbles that may cling to the stem or bulb.
Bubbles are a classic source of false readings because they change buoyancy. In fermented beverages, carbon dioxide can be especially annoying. Even in plain water, a quick spin is a good habit. It is the hydrometer equivalent of straightening a picture frame before you judge whether the wall is crooked.
Step 7: Let It Settle and Read at Eye Level
Wait until the hydrometer settles completely. Then crouch or raise the jar so your eyes are level with the liquid surface. Read it straight on, not from above. This helps you avoid parallax error, which is the fancy term for “your eyeballs were in the wrong place.”
Now for the part that confuses almost everyone at least once: the meniscus. Different hydrometers may be read slightly differently depending on the manufacturer’s instructions. Many guides teach reading at the bottom of the meniscus, while some hydrometers are intended to be read where the liquid cuts the scale. The smartest approach is to follow the reading method specified for your instrument and use that same method every single time. Calibration is not just about accuracy. It is also about consistency.
Step 8: Compare the Reading to 1.000
At the correct reference temperature, distilled water should read 1.000 on a specific gravity hydrometer. If it does, congratulations: your hydrometer is behaving itself. If it reads 0.998, 1.001, 1.002, or something nearby, write down the difference. That difference is your offset.
For example, if your hydrometer reads 1.002 in distilled water at its calibration temperature, it is reading two points high. That means future readings should be corrected downward by 0.002, assuming the error is consistent across the range. If it reads 0.999, you would add 0.001 to future readings.
Step 9: Perform an Optional Second-Point Check
A zero-point check in water is great, but a second-point check tells you more. If you want to be extra thorough, make or buy a known sucrose solution and test it at the same temperature. This lets you see whether the hydrometer’s spacing stays accurate as gravity rises.
Why does this matter? Because some hydrometers are not simply shifted up or down by a constant amount. They may be accurate near 1.000 but get sloppy at higher gravities. If the offset in a sugar solution does not match the offset you found in water, you probably do not have a simple correction issue. You have a linearity problem, and that usually means the hydrometer should be replaced rather than “mentally adjusted forever.”
Step 10: Record the Offset and Build It Into Your Routine
Once you know the offset, write it down where you actually keep your brewing or winemaking notes. Not in your head. Not on a mystery scrap of paper that will vanish into a drawer. Put it in your brew log, your phone, a label on the storage tube, or anywhere future-you will find it without becoming furious.
Then recheck calibration periodically, especially if the hydrometer is dropped, transported often, exposed to extreme temperature swings, or just starts giving suspicious readings. A quick water check takes only a few minutes and can save an entire batch from bad data interpretation.
Common Calibration Mistakes to Avoid
Using the Wrong Water
Tap water can contain minerals that slightly change density. Use distilled water for the cleanest reference point.
Ignoring Temperature
This is the big one. Hydrometers are calibrated for a specific temperature. If your sample is warmer than that, the actual gravity is usually higher than the raw reading suggests. If it is cooler, the correction may go the other way. Use a temperature correction chart or calculator when needed, but whenever possible, test at the instrument’s calibration temperature and make your life easier.
Misreading the Meniscus
If you read from the wrong point on the liquid curve, your number may be off by a point or two. Follow the instrument’s instructions and stay consistent.
Letting Bubbles Hang Around
Bubbles change buoyancy. Spin the hydrometer gently and wait for the sample to settle.
Returning the Sample to the Fermenter
Do not do it. Even if the hydrometer and jar were sanitized, the safest habit is to discard or taste the sample instead of sending it back into the batch. Calibration is supposed to improve your process, not invite contamination or oxidation to the party.
When to Correct the Reading and When to Replace the Hydrometer
If your hydrometer is off by a small, consistent amount in both distilled water and a second known solution, you can usually apply that offset to future readings. That is practical, simple, and common.
But if the offset changes at different points on the scale, or if the stem is bent, the scale is visibly crooked, the paper has shifted, or the hydrometer wobbles strangely, replacement is the better move. A flaky hydrometer is like a GPS that sometimes sends you to the grocery store and sometimes to a swamp. Technically interesting, operationally terrible.
Final Thoughts
Calibrating a hydrometer is one of the easiest upgrades you can make to your brewing or winemaking routine. It costs almost nothing, takes very little time, and gives you cleaner, more trustworthy gravity readings. That means better process control, better fermentation tracking, and fewer moments of staring at a suspicious number while muttering, “That cannot be right.”
If you want the shortest version possible, here it is: check the reference temperature, use distilled water, read carefully, record the offset, and verify that the instrument behaves across the range you care about. Once you do that, your hydrometer stops being a vague suggestion machine and becomes what it should be: a simple, dependable tool.
Experience: What People Learn the Hard Way About Hydrometer Calibration
Ask enough brewers and winemakers about hydrometers, and you will hear the same story told in fifty different ways. It usually begins with confidence. A fresh batch is made, the sample is pulled, the hydrometer goes in, and the reading looks strange. Too high. Too low. Weirdly perfect. The first reaction is almost never, “I should calibrate my hydrometer.” It is usually, “My recipe is broken,” or “My yeast failed,” or “Apparently gravity itself has changed.”
One of the most common experiences is discovering that the hydrometer has been off for months. Someone finally floats it in distilled water at the right temperature, and there it is, smugly reading 1.002 or 0.998. Suddenly old brew logs make more sense. That stout that seemed to finish too sweet? Maybe not. That cider that looked stronger than expected? Maybe the math was built on a crooked foundation.
Another common lesson comes from bubbles. Fermented samples love to cling to the hydrometer with tiny CO2 bubbles, especially if the sample was poured briskly or still has a lot of sparkle. New makers often read the number too quickly, then panic when it seems too high or too low. Later they spin the hydrometer, watch the bubbles break loose, and see the reading shift. It is a humbling moment. Also a very educational one.
Then there is the meniscus problem, which has probably caused more mild confusion than any other feature in home fermentation. A person reads from the top of the curve, their friend reads from the bottom, both are certain, and now the hydrometer has somehow started a family argument. The practical experience most people come away with is that consistency matters just as much as theory. Once you know how your instrument should be read, use the same method every time.
Temperature also teaches hard lessons. Many people take a warm sample, forget correction, and wonder why the gravity does not line up with expectation. The experienced makers eventually become boringly disciplined in the best way. They cool the sample, check the thermometer, read at eye level, and write the number down carefully. Exciting? No. Effective? Absolutely.
The deepest experience, though, is simple: calibration builds trust. Once your hydrometer has been checked properly, every future reading feels less like a guess and more like useful information. That confidence changes the whole process. You stop chasing phantom problems. You make calmer decisions. And when a number looks odd, you investigate the batch instead of blaming the glass floaty thing immediately. That is progress, and in fermentation, progress tastes pretty good.