Table of Contents >> Show >> Hide
- What Rooting a Samsung Galaxy S5 Really Means
- Before You Root: Important Warnings
- What You Need Before Starting
- Step 1: Identify Your Exact Samsung Galaxy S5 Model
- Step 2: Back Up Everything
- Step 3: Enable Developer Options and USB Debugging
- Step 4: Install Samsung USB Drivers
- Step 5: Choose a Root Method
- Step 6: Boot the Galaxy S5 Into Download Mode
- Step 7: Flash the Correct File With Odin
- Step 8: Install Root From Custom Recovery
- Step 9: Verify Root Safely
- Common Problems and Fixes
- Should You Root a Samsung Galaxy S5 in 2026?
- Practical Experience: Lessons From Rooting a Galaxy S5
- Conclusion
Note: This article is for educational use and for people rooting a Samsung Galaxy S5 they personally own. Rooting can void warranty protections, trip Samsung Knox security flags, erase data, or make a phone temporarily unusable if the wrong file is flashed. Always verify your exact model number before doing anything dramatic. The Galaxy S5 is a legend, but even legends dislike being fed the wrong firmware.
What Rooting a Samsung Galaxy S5 Really Means
Rooting a Samsung Galaxy S5 means gaining administrator-level access to Android. In normal use, Android keeps system files behind a polite but firm velvet rope. Root access moves that rope aside and lets advanced users modify deeper parts of the phone: remove bloatware, use root-only backup tools, install firewall apps, tweak performance, flash custom ROMs, and revive an old device that would otherwise be living in a drawer next to mystery cables.
The Samsung Galaxy S5, released in 2014, remains popular among Android hobbyists because it has a removable battery, microSD card support, physical buttons, and a huge community history. Many variants have been rooted with tools such as Odin, custom recovery images like TWRP, older CF-Auto-Root packages, and, on compatible Android builds, Magisk. The catch is simple: “Galaxy S5” is not one single phone. It is a family of models, including SM-G900F, SM-G900H, SM-G900T, SM-G900V, SM-G900A, SM-G900P, SM-G900M, SM-G900W8, and others. That alphabet soup matters.
Rooting the wrong variant with the wrong file can cause boot loops, failed flashes, or a phone stuck in Download Mode. That is why the best root guide starts before you press any buttons. Think of it like baking: if the recipe calls for flour and you use powdered cement, the cake is not “customized.” It is a construction project.
Before You Root: Important Warnings
Rooting may trip Samsung Knox
Samsung devices with Knox security include a warranty bit that can be tripped by rooting or flashing non-Samsung-certified software. Once tripped, it may not return to its original state even after reinstalling stock firmware. On an older Galaxy S5, warranty may no longer matter to many users, but Knox-related features and some security-sensitive apps may complain.
Rooting can erase data
Some methods preserve data; others do not. Updates, recovery flashes, firmware repairs, and accidental mistakes can wipe photos, downloads, contacts, app data, and messages. Before rooting, back up anything you would be annoyed to lose. If your phone contains the only copy of your graduation photos, your dog’s best sneeze video, or a note titled “passwords maybe,” stop and back it up first.
Rooting is model-specific
The international SM-G900F and T-Mobile SM-G900T models are commonly discussed in rooting communities. Some U.S. carrier versions, especially certain AT&T and Verizon builds, have locked bootloaders that can make rooting harder or limit recovery flashing. The exact Android version, baseband, and bootloader state matter.
What You Need Before Starting
For most Samsung Galaxy S5 rooting methods, you need a Windows PC, a good USB cable, Samsung USB drivers, Odin flashing software, the correct file for your exact model, and enough battery power to survive the process. Aim for at least 60 percent battery. A nearly dead phone during flashing is like a parachute packed by a raccoon: technically possible, emotionally unacceptable.
Checklist
- Your exact Galaxy S5 model number, found in Settings > About phone or printed under the battery.
- A full backup of photos, videos, contacts, and important files.
- Samsung USB drivers installed on your computer.
- Odin for Windows, commonly used to flash Samsung firmware and recovery files.
- A model-matched root package or recovery image.
- A calm mood and no plans to rush out the door in nine minutes.
Step 1: Identify Your Exact Samsung Galaxy S5 Model
Remove the back cover and battery if needed, then check the model number printed on the label. You can also open Settings > About phone. Write the model number down exactly. Do not guess. SM-G900F and SM-G900V are not the same thing, even though both may look like a Galaxy S5 wearing the same little plastic tuxedo.
Common Galaxy S5 variants include the SM-G900F international LTE model, SM-G900H Exynos model, SM-G900T T-Mobile model, SM-G900P Sprint model, SM-G900A AT&T model, SM-G900V Verizon model, SM-G900M Latin America model, and SM-G900W8 Canadian model. Root guides, recovery images, and firmware packages are usually built for specific variants. Matching the file to the device is the single most important part of the process.
Step 2: Back Up Everything
Before rooting, copy your photos and videos to a computer or cloud storage. Sync contacts with your Google account. Export important two-factor authentication codes using the app’s official transfer method. Back up WhatsApp, Signal, Telegram, or other messages using their built-in backup features. If you already have a custom recovery, make a full NANDroid backup. If you are still on stock recovery, at least preserve personal files.
A backup is not exciting. It has no neon lights, no dramatic progress bar, and no “I am a tech wizard” energy. But when something goes sideways, a backup turns panic into mild inconvenience. That is a very good trade.
Step 3: Enable Developer Options and USB Debugging
On your Galaxy S5, go to Settings > About phone and tap Build number seven times until Developer Options appear. Then go back to Settings, open Developer options, and enable USB debugging. Some models may also show OEM unlocking, though many older Samsung builds handle bootloader access differently from modern Android phones.
USB debugging helps your computer communicate with the phone through Android Debug Bridge, commonly called ADB. You may not need ADB for every Odin-based root method, but enabling debugging is useful for troubleshooting, transferring files, and confirming that your computer can see the device.
Step 4: Install Samsung USB Drivers
Install Samsung USB drivers on your Windows PC, then restart the computer. This step sounds boring because it is boring. Do it anyway. Odin needs the drivers to recognize the Galaxy S5 in Download Mode. If Odin does not show an “Added” message when the phone is connected, a driver problem or poor USB cable is often the villain.
Use a reliable USB cable, preferably one that supports data transfer rather than charging only. Plug directly into the computer instead of a loose USB hub. The Galaxy S5 may be old enough to remember when skinny jeans were a personality, but it still deserves a stable connection.
Step 5: Choose a Root Method
There are two common approaches for rooting a Samsung Galaxy S5: a traditional Odin-based root package, such as older CF-Auto-Root methods for supported variants, or flashing a custom recovery such as TWRP and then installing a compatible root solution. The right choice depends on your model, Android version, and goal.
Option A: Odin and CF-Auto-Root
Older Galaxy S5 root tutorials often used CF-Auto-Root, which flashed a root package through Odin. This approach was popular for users who wanted to stay close to stock Samsung firmware while adding root access. It can be quick when the model is supported, but it is also older, and not every variant or firmware build remains practical with this method today.
Option B: TWRP and Magisk
Another route is to flash TWRP custom recovery with Odin, boot into recovery, make a backup, and install a compatible root package. Magisk became the modern standard for root management on many Android devices because it provides superuser access and module support. However, very old Android versions and legacy Samsung layouts may require older Magisk builds or model-specific instructions. The phrase “latest version” is not always your friend on vintage phones.
Step 6: Boot the Galaxy S5 Into Download Mode
Power off the phone completely. Press and hold Volume Down + Home + Power until the warning screen appears. Then press Volume Up to continue into Download Mode. This is also called Odin Mode. It is the special Samsung mode used for flashing firmware, recovery, and other low-level files.
If you land in the wrong screen, remove the battery, wait a few seconds, reinsert it, and try again. One advantage of the Galaxy S5 is that removable battery. Modern phones make you hold buttons like you are casting a spell. The S5 lets you simply pull the battery and reset the situation like a tiny plastic escape hatch.
Step 7: Flash the Correct File With Odin
Open Odin on your Windows PC as administrator. Connect the Galaxy S5 while it is in Download Mode. Odin should display an “Added” message or show a highlighted COM port. In Odin, load the correct file in the appropriate slot, often AP or PDA depending on the Odin version. For a TWRP recovery image, this is usually a file ending in .tar or .tar.md5. For CF-Auto-Root, it is also typically packaged for Odin.
Make sure Auto Reboot and F. Reset Time are the only common boxes checked unless your specific guide says otherwise. Do not check Re-Partition. Re-partitioning with the wrong file can cause serious trouble. When everything matches your model-specific instructions, click Start. Wait until Odin reports PASS.
If you are flashing TWRP, many Galaxy S5 users manually boot into recovery immediately after flashing so the stock system does not overwrite the custom recovery. The usual button combination is Volume Up + Home + Power. Timing can matter. If stock recovery returns, you may need to flash TWRP again and boot straight into recovery before Android starts.
Step 8: Install Root From Custom Recovery
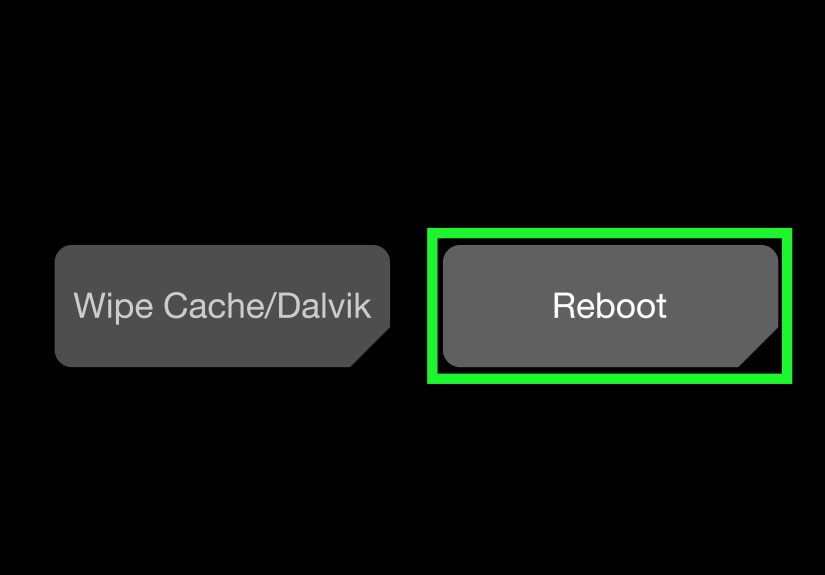
If your method uses TWRP, copy the compatible root package to your phone or microSD card before booting into recovery. In TWRP, choose Install, select the root package, and swipe to flash. Then wipe cache and Dalvik cache if prompted. Reboot the system and be patient. First boot after modifying Android can take longer than usual.
Once Android loads, install or open your root manager app and verify root status. Grant superuser access only to apps you trust. Root access is powerful. Giving it to a random flashlight app from the dusty corner of the internet is like handing your house keys to a raccoon because it looked confident.
Step 9: Verify Root Safely
After rooting, confirm that the phone boots normally, Wi-Fi works, cellular service works, and storage is visible. You can use a trusted root checker app or a terminal command to confirm superuser access. Avoid installing a dozen root modules immediately. Change one thing at a time, test, and then continue.
Rooting is not the finish line; it is the start of managing a more powerful phone. Keep notes about what you installed. Save copies of the exact files you used. If you ever need to restore stock firmware, those details can save hours of detective work.
Common Problems and Fixes
Odin does not detect the Galaxy S5
Reinstall Samsung USB drivers, restart the PC, use another USB port, and try a different cable. Avoid USB hubs. Make sure the phone is actually in Download Mode, not recovery or normal Android.
Odin fails during flashing
Check that the file matches your exact model number and bootloader. Use another Odin version if recommended by your model-specific community guide. Do not repeatedly flash random files. That is not troubleshooting; that is Android roulette.
The phone boot loops
Boot into recovery and wipe cache. If you made a full backup, restore it. If the phone still fails, you may need to flash stock firmware for your exact model and region. A boot loop is scary, but on the Galaxy S5 it is often recoverable if Download Mode still works.
TWRP disappears after reboot
Stock Samsung firmware may replace custom recovery on first boot. Flash TWRP again, then boot directly into recovery using Volume Up + Home + Power before booting Android.
Apps detect root
Some banking, payment, streaming, work, or game apps may refuse to run on rooted devices. Do not use root to bypass rules, security checks, or app protections. If an app is important for daily life, test carefully before making the Galaxy S5 your main device.
Should You Root a Samsung Galaxy S5 in 2026?
Rooting a Samsung Galaxy S5 makes the most sense if you enjoy Android tinkering, want to use root-only tools, need a test phone, or plan to install a custom ROM. It is less ideal if the phone is your only device, you rely on security-sensitive apps, or you simply want better battery life without doing research. Rooting is powerful, but it is not magic. It will not turn a 2014 phone into a modern flagship. It may, however, turn an old device into a fun weekend project, a music player, a retro gaming handheld, a smart home controller, or a backup phone with personality.
The Galaxy S5 is especially charming because it belongs to a more repairable era. The battery pops out. Storage expands. The body is not a sealed glass sandwich begging to meet a repair bill. Rooting it can feel less like risking a luxury gadget and more like restoring an old bicycle: a little grease, a little patience, and suddenly it has another life.
Practical Experience: Lessons From Rooting a Galaxy S5
The best experience with rooting a Samsung Galaxy S5 usually comes from treating the process like a careful repair, not a speedrun. The biggest mistake beginners make is downloading the first file they see and assuming “close enough” is fine. With Samsung phones, close enough is not fine. A recovery image for one model may fail on another. A root package for one firmware build may not behave the same way on a different carrier version. The Galaxy S5 has many variants, and each variant has its own personality. Some are friendly golden retrievers. Some are locked-down office printers with trust issues.
One helpful habit is creating a small project folder on your computer before starting. Name it something obvious, such as “Galaxy-S5-SM-G900F-root.” Inside, keep the Samsung drivers, Odin version, recovery file, root package, stock firmware link notes, and a text file listing what you did. That simple folder becomes your emergency kit. If the phone later boot loops or you forget which recovery version worked, you are not digging through your Downloads folder among memes, tax documents, and three files named “final-final-really-final.zip.”
Another real-world lesson is that the USB cable matters more than people expect. A cable can charge perfectly but fail during data transfer. If Odin does not detect the phone, do not immediately assume the phone is doomed. Try another cable, another port, and another computer if available. Many “serious” flashing problems are just a cheap cable doing cheap cable things.
Patience also matters during first boot. After flashing recovery, root, or a custom ROM, the Galaxy S5 may sit on the Samsung logo longer than usual. That does not always mean disaster. Give it time. However, if it stays frozen for an extremely long period or repeatedly restarts, then move into recovery and troubleshoot. The difference between waiting patiently and panicking too early can be the difference between a clean setup and unnecessary extra flashing.
For daily use, root only what you need. Many new users install root and immediately add performance tweaks, battery modules, audio mods, theme engines, ad blockers, kernel managers, and experimental scripts. Then, when the phone becomes unstable, nobody knows which change caused it. A smarter approach is boring but effective: install one change, reboot, test calls, Wi-Fi, camera, charging, and sleep behavior, then continue. Boring is underrated. Boring means your phone works.
Battery expectations should also stay realistic. Root can help remove unwanted apps, manage background processes, or install better system tools, but the Galaxy S5 is still an older phone. A fresh replacement battery often improves real-world performance more than any root tweak. If the phone shuts down at 30 percent or drains rapidly overnight, suspect the battery before blaming Android. Sometimes the “software issue” is a tired battery quietly waving a white flag.
Finally, rooting a Galaxy S5 is most enjoyable when you view it as a learning project. You learn about bootloaders, recovery partitions, firmware, Android permissions, backups, and risk management. Even if you eventually return to stock firmware, the process teaches you how Android devices are structured. That knowledge is useful far beyond one old Samsung phone. Rooting the Galaxy S5 is not just about getting superuser access; it is about understanding the little computer in your pocket and keeping useful hardware alive a bit longer.
Conclusion
Rooting a Samsung Galaxy S5 can unlock a surprising amount of control over an older but still beloved Android phone. The key is preparation: identify the exact model, back up your data, install the right drivers, use trusted tools, match every file to your variant, and move slowly. Odin, TWRP, CF-Auto-Root, and Magisk all belong to the Galaxy S5 rooting conversation, but none of them should be used casually or blindly.
If you want a clean, safe-ish rooting experience, start with research, not flashing. Confirm your model number, read recent comments from users with the same variant, keep stock firmware available, and avoid using root for anything that compromises privacy, security, or app rules. Done carefully, rooting can turn a retired Galaxy S5 into a useful experiment machine. Done carelessly, it can turn the same phone into a dramatic paperweight with a removable battery.